


18 2115WC and 2115WCOL, 2175WC and 2175WCOL
Wine Rack Removal/Installation
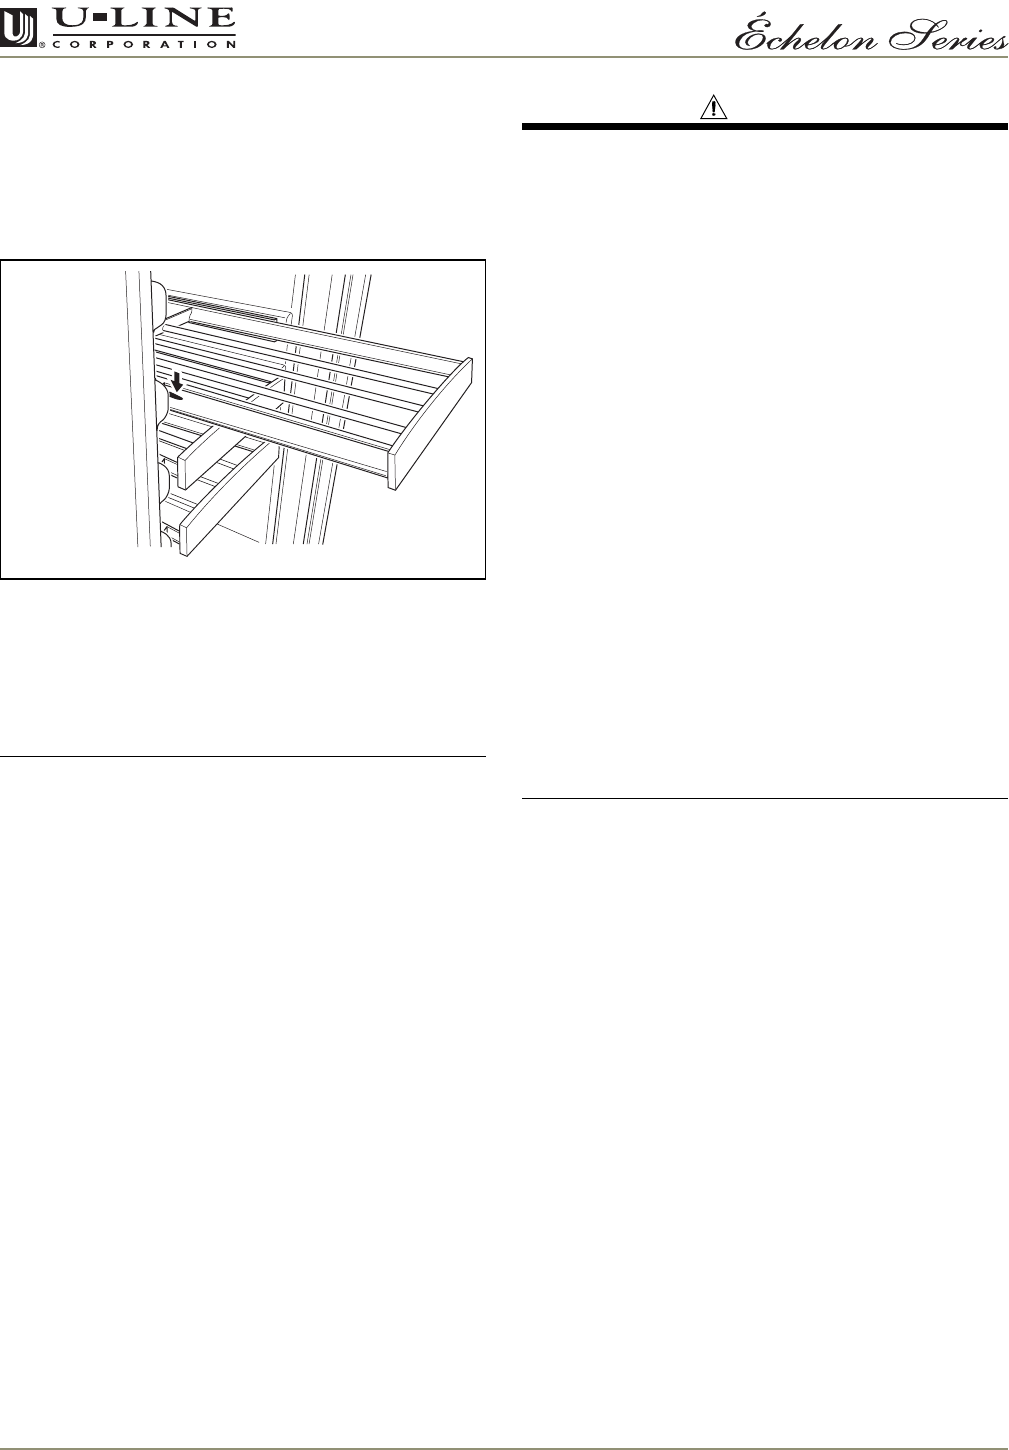
To remove a rack from the cabinet:
1. Grasp the end of the rack, and gently slide it out until
it stops.
2. Remove any bottles stored on the rack.
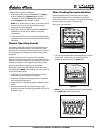
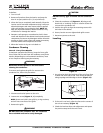
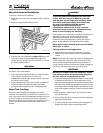
Figure 25
3. Press the left rack release lever
(Figure 25)
down, and
at the same time, lift the corresponding right rack
release lever up, and pull the rack out until it is free of
the tracks and the cabinet.
IMPORTANTIMPORTANT
Do not remove the track side rails from the cabinet.
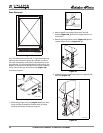
To insert a rack in the cabinet:
1. Align the left and right rack channels with the tracks
in the cabinet, and ensuring an even track
engagement on both sides, gently push the rack into
the cabinet until it stops.
2. Before reloading the rack, ensure proper operation of
the travel stops in the left and right track rails by
pulling the rack out gently until it completely stops.
Wood Trim Finishing
The U-Line Wine Captain
®
is equipped with wood-
trimmed wine racks that are coated at the factory with a
clear vinyl sealer, which will adequately protect the wood
in normal usage. A final finish coat was not applied so
that the wood trim could be stained to match décor. The
trim on the racks may be coated with a final finish or
stained.
WARNING
To prevent permanent damage to the inner liner
of your unit, the wood trim MUST be removed
from the unit for staining and/or finishing. Allow
stain/finish to dry thoroughly (at least 24 hours
per coat) in accordance with the product
manufacturer’s instructions prior to
reinstallation. Failure to do so may cause the
inner liner of the unit to have a permanent odor,
which is not covered by the warranty.
If staining the trim is desired, it must be done before the
application of any type of final finish. Review the
following staining/final finish and final finish-only
guidelines when staining/ and or sealing the wood to
ensure proper adhesion and durability of the finish.
NOTE: Glass in door is tinted. Stain may look darker
when door is closed.
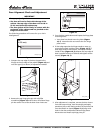
Staining and final finish application:
1. Remove all screws securing wood trim to interior
components, and remove the trim from the cabinet
interior.
NOTE: Your model will contain an electronic display panel
in the lowest level trim piece. After removing the trim
screws, and gently pulling the trim from its location, a
wiring harness connector will become visible. Unplug the
connector, and remove the trim from the interior.
IMPORTANTIMPORTANT
DO NOT use oil-based stains on wood trim. Vapors
from oil-based stains will permanently penetrate
the liner and will not dissipate over time.
2. Apply Minwax
®
Water-Based Wood Stain to wood with
a synthetic bristle brush or a foam applicator. Allow
stain to penetrate approximately three minutes. Before
the stain is dry, take a stain dampened rag and remove
any excess stain remaining. Wipe in the direction of the
grain with medium pressure to achieve the desired stain
color.
3. After two hours, repeat step 2. This will even out the
color of the wood.
4. Allow stain to dry for a minimum of three hours before
applying the final finish.
5. If desired, sand the wood with very fine sandpaper to
smooth the surface after the staining process.
ULIN_0207_A