


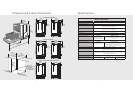
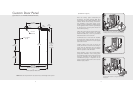

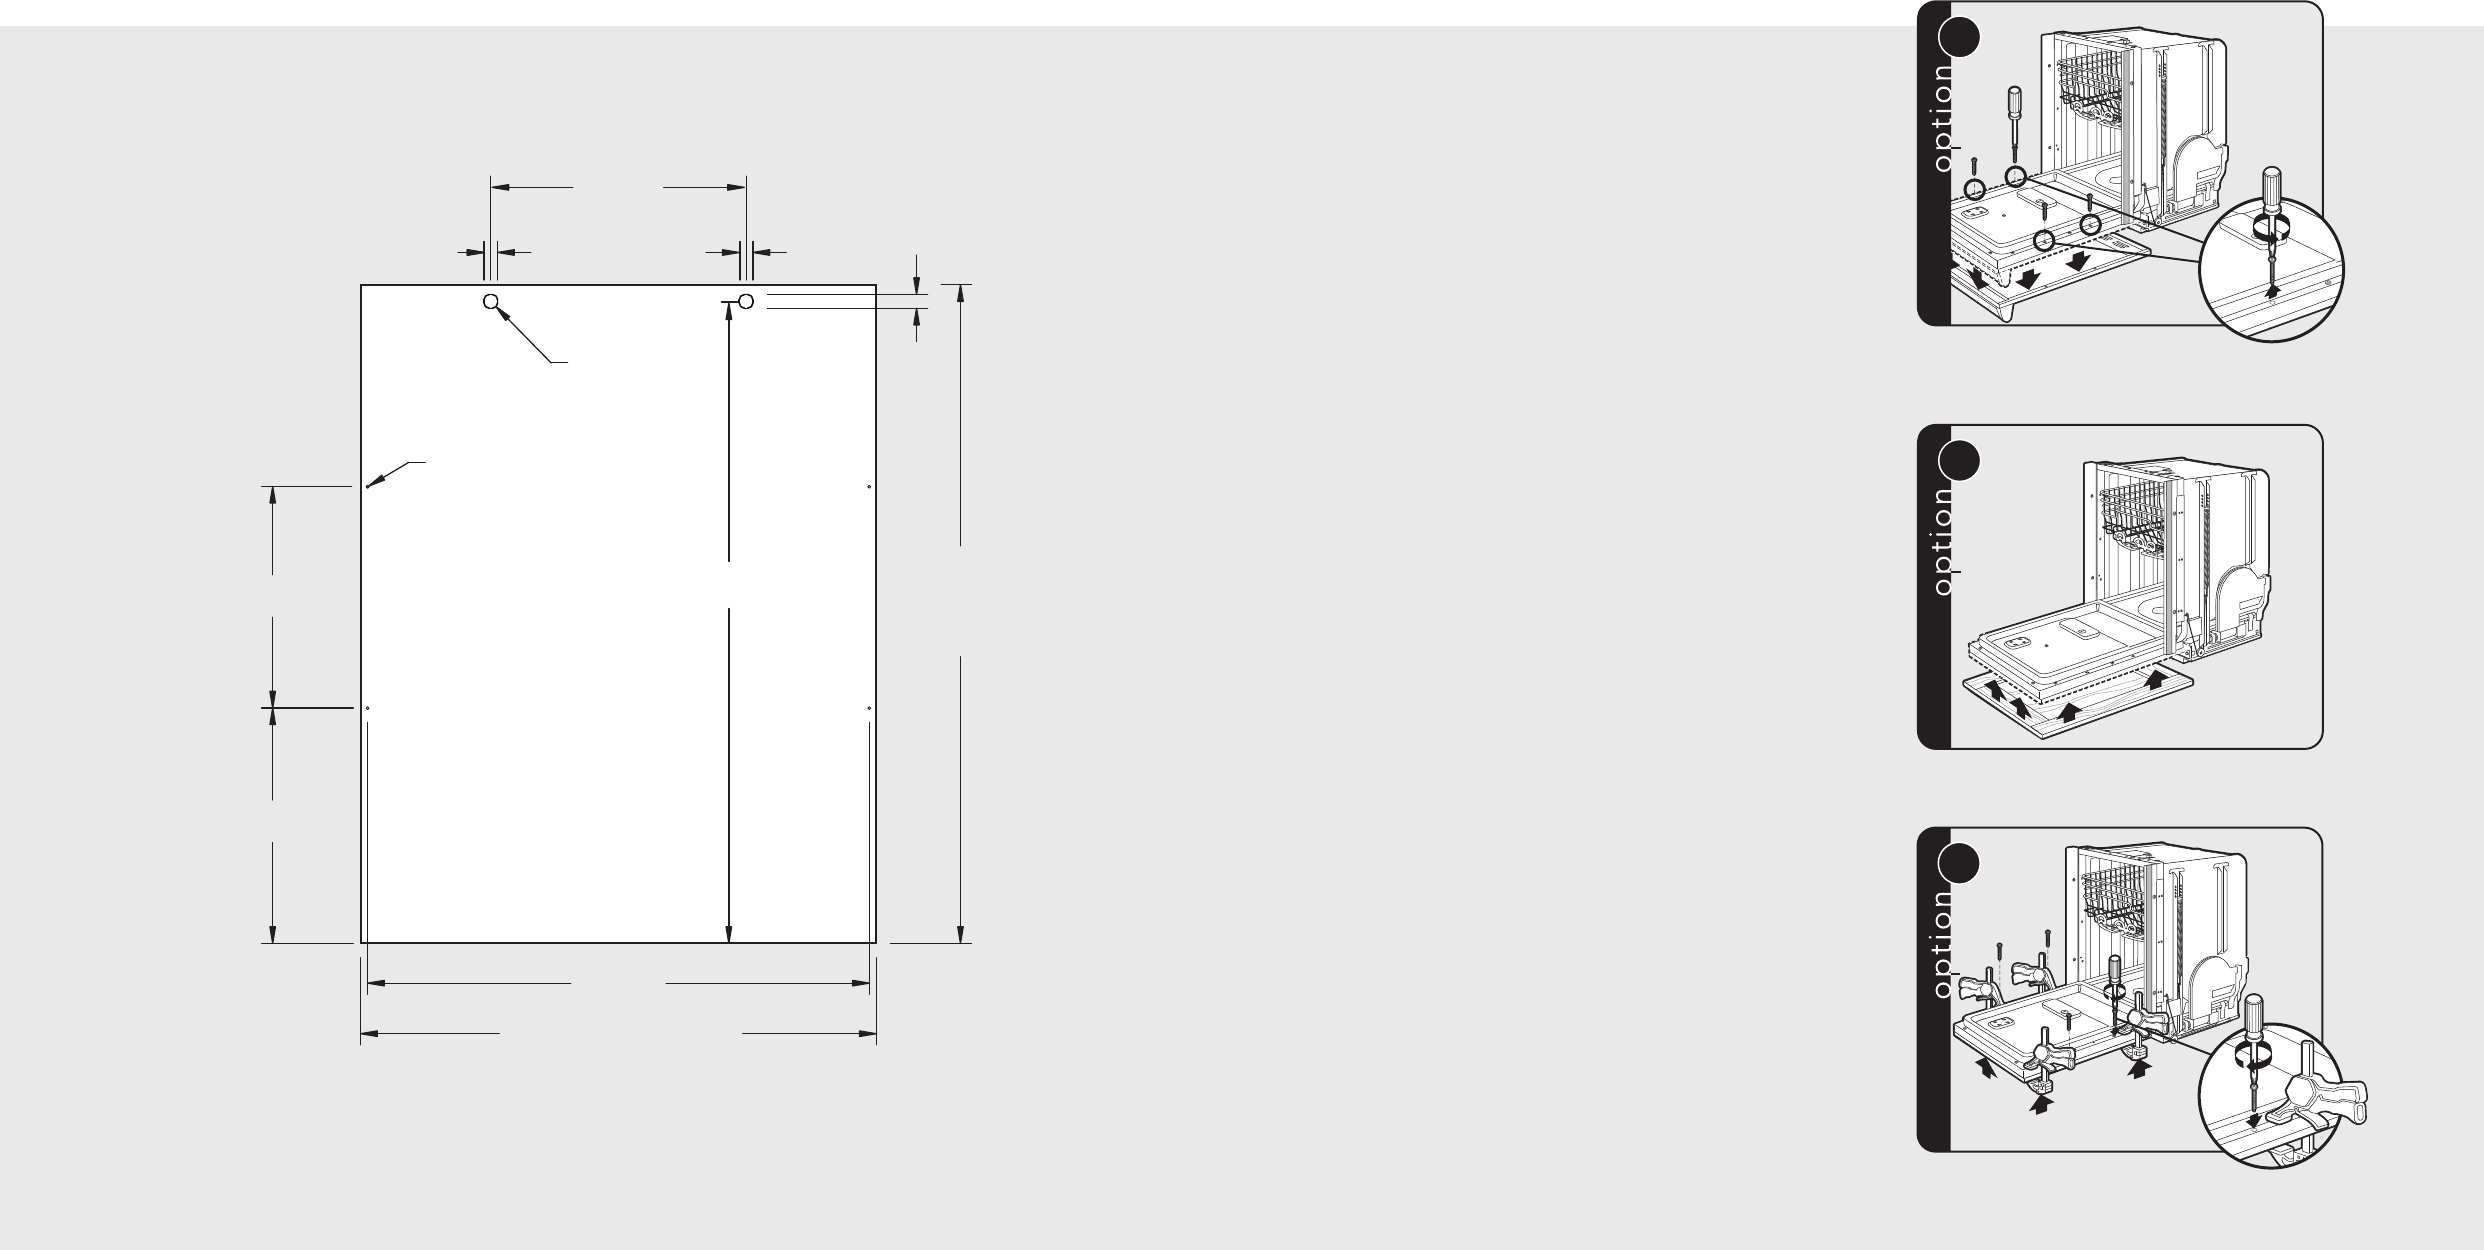
11-17/32"
(29.3 cm)
29-3/4"
(75.6 cm)
to
31-1/4”
(79.4 cm)
22-21/32"
(57.5 cm)
23-9/32" (59.1 cm) with trim
or
23-7/8” (60.6 cm) without trim
10"
(25.4 cm)
10-5/8"
(27.0 cm)
5/8"
(1.6 cm)
5/8"
(1.6 cm)
5/8"
(1.6 cm)
ø1/8" 4 places
(.3 cm)
Use 1/4"
router bit
29"
(73.7 cm)
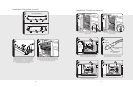
8
Custom Door Panel
(Specifications for FDB200/DFB450E Models)
9
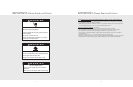
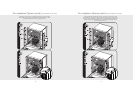
a
To remove face panel of dishwasher remove only the
4 Phillips screws - do not remove any other fasteners.
b
Position custom face panel on front of dishwasher.
Use non-marring clamps to hold custom panel in place.
Secure with #8 1-3/4”(4.5 cm) long, stainless steel flat
head screws.
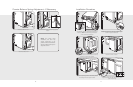
c
(Installation Option)
Have the overlay panel constructed per
dimensions. The panel thickness MAY NOT
exceed 5/8” (1.6 cm) for flush installation in most
cabinets. Ensure that the design, construction,
and installation of the panel overlay and its
handle mounting is sufficient to reliably operate
in this application with a maximum panel weight
of 18 lbs. (8.2 kg.) Custom panels should not
exceed 18 lbs. (8.2 kg.)
Obtain four screws with the proper thread type
for the overlay material chosen. The screws
MUST BE #8 flat head, 1-3/4” long and MUST
BE stainless steel to avoid corrosion.
If dishwasher has a metal door skin installed,
remove the four screws. DO NOT remove any
other fasteners and ensure that only the proper
screws are removed.
Carefully tighten each screw to secure the
overlay and check to ensure that the overlay is
square with the dishwasher door and cabinet
opening and that the panel doesn’t interfere
with the operation of the dishwasher.
Verify operation of the door counter balance
springs after installation of the overlay panel.
The additional weight of the overlay panel might
require an adjustment to the preload of the
counterbalance springs. If adjustment of the
springs is required, please refer to the “Counter
Balance Spring” section.
NOTE: Back side of panel shown. Use caution not to drill through front of panel.