


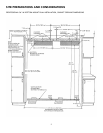
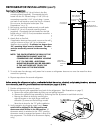
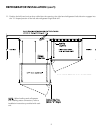


13
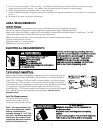
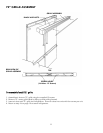
Top vented
panel
Bottom solid
panel
Item A
Item C
Item B
Chrome
screws
Item D
Black
screws
Figure 1
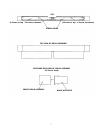
Figure 2
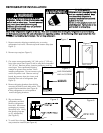
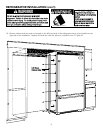
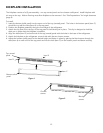
KICKPLATE INSTALLATION
The kickplate consists of a (2) part assembly: one top vented panel and one bottom solid panel. Install kickplate with
air vents to the top. Kitchen flooring must allow kickplate to be removed. See “Site Preparations” for height clearance
(page 2).
To Install:
1. Insert the bottom (solid panel) into the open end of the top (vented) panel. The holes in the bottom panel (Item C)
should line up with the slots (Item A) in the top panel.
2. Position the kickplate assembly along the front edge of the refrigerator.
3. Attach the clip (Item B) to the top of the top panel to hold drain pan in place. This clip is designed to hold the
drain pan in place after the kickplate is installed.
4. Align the holes (Item D) on both ends of the top (vented) panel with the holes in the base of the refrigerator.
5. Attach the kickplate to the refrigerator on each side with the two chrome screws.
6. Adjust the bottom (solid) panel to the desired height and fasten in place by placing the black screws through the
slots (Item A) on each end of the top panel and into the hole (Item C) on the bottom panel and fasten securely.