17
1
2
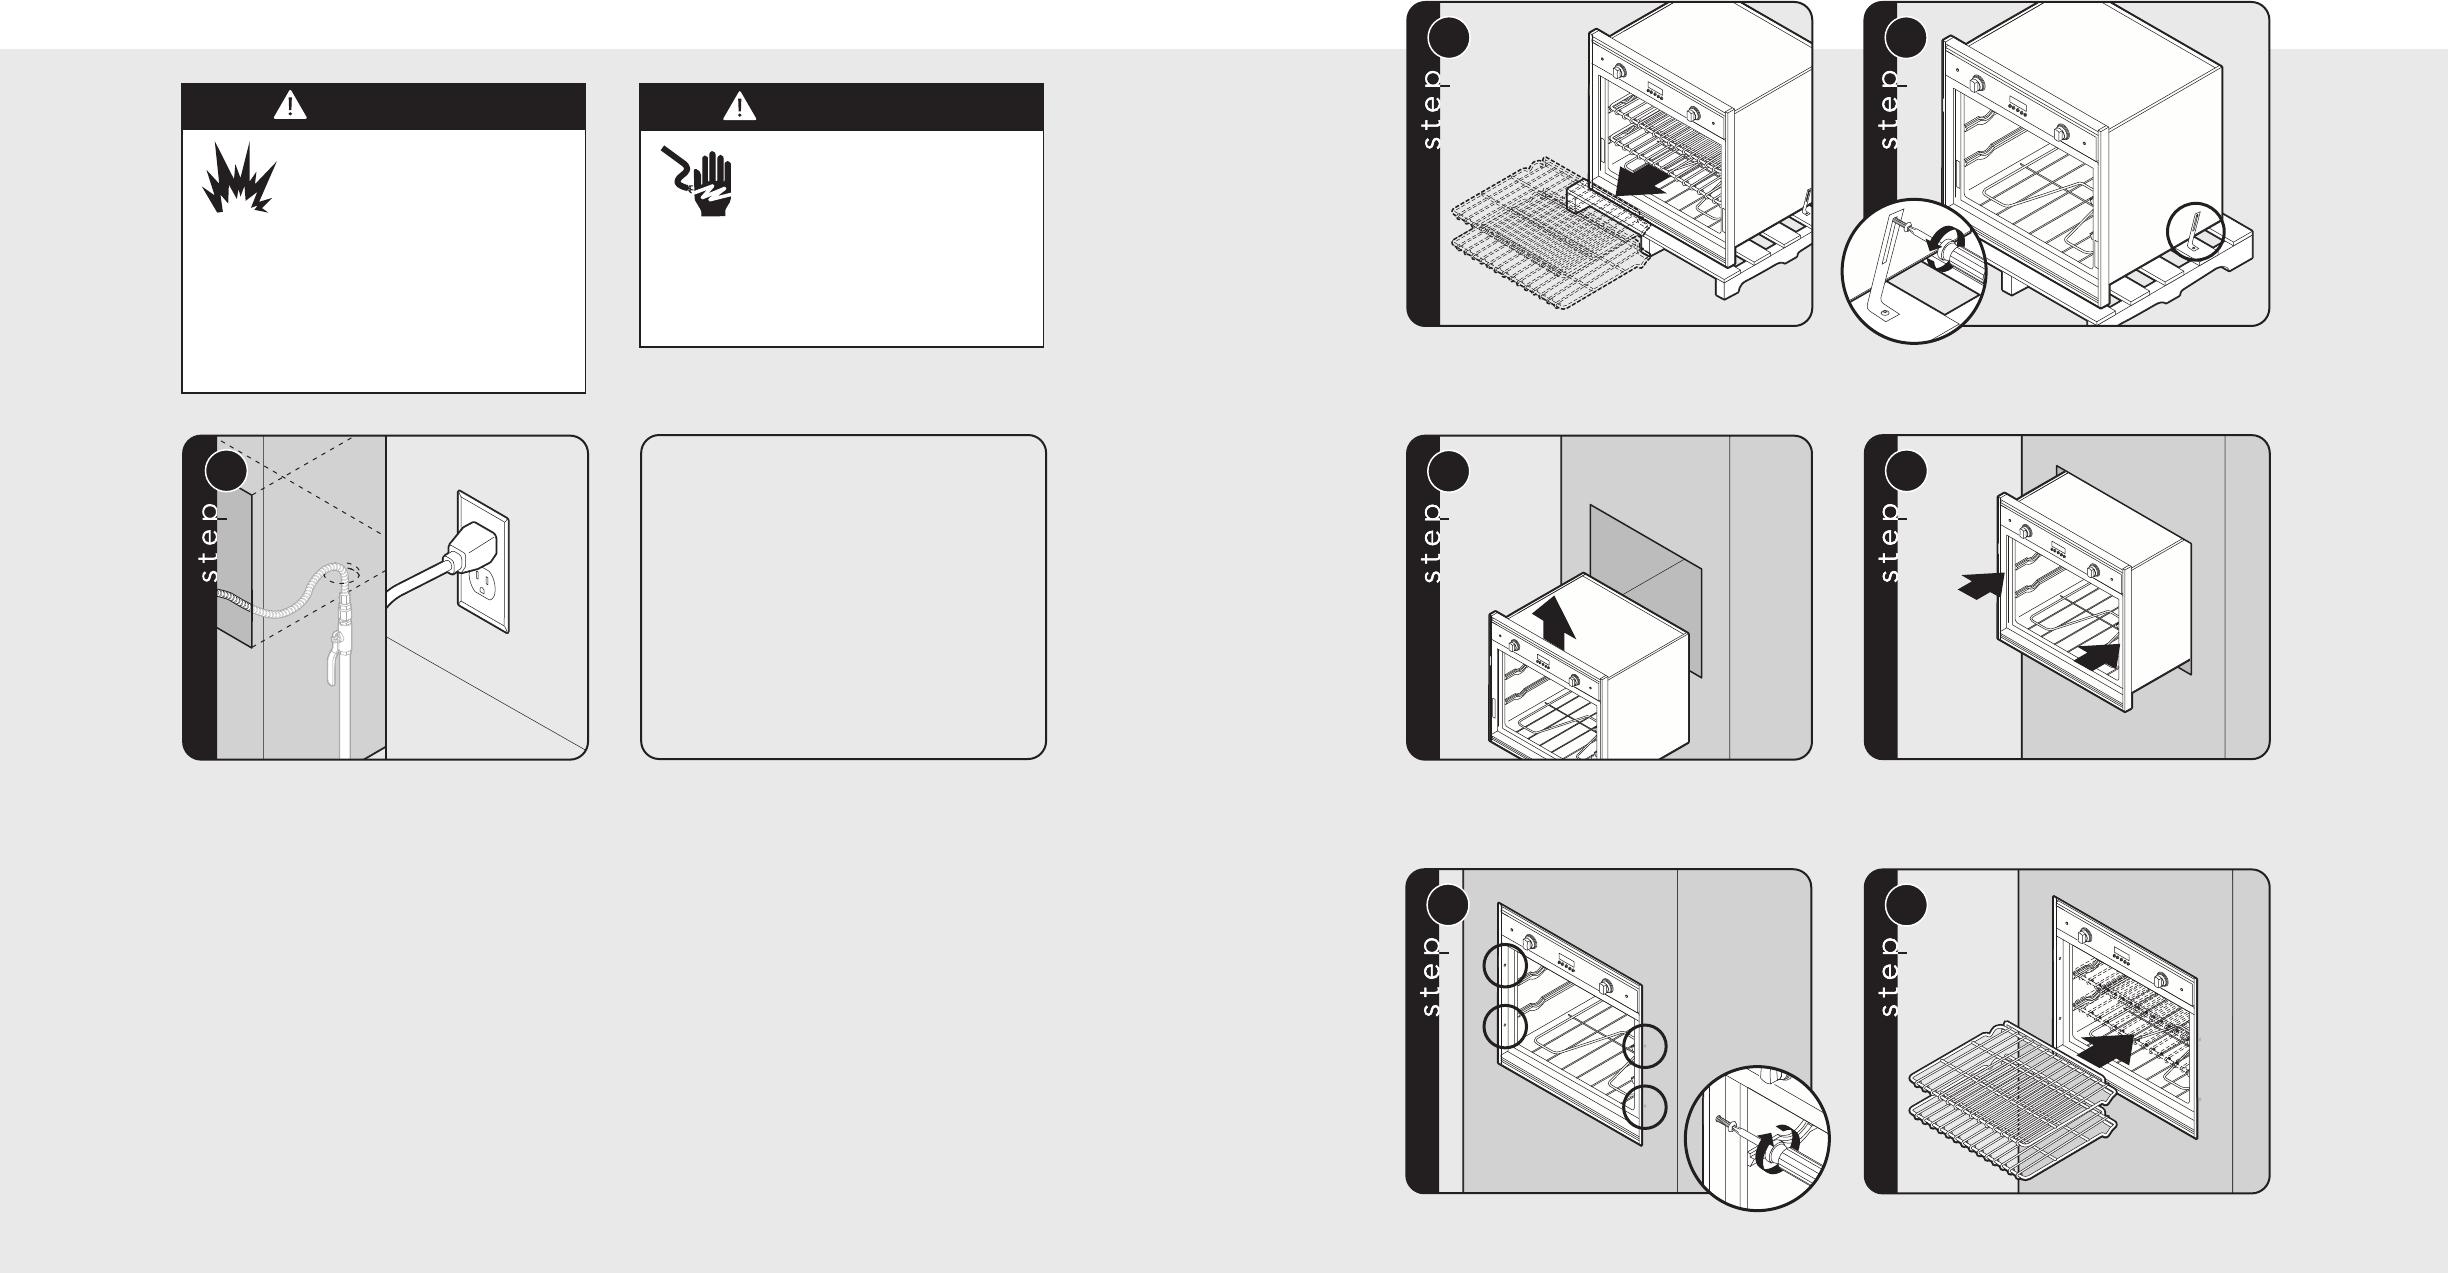
Remove racks.
Unscrew pallet screws from side of oven.
3
4
Lift oven into position.
Push oven straight into cabinet.
5
6
Attach screws to the side of the framing.
Note: Four screws (two on each side).
(Screws not included.)
Replace racks.
Final Installation (30”W.)
16
Note: Refer to “Electrical & Gas
Requirements” section for proper
installation information.
Connect gas and electrical. Before placing appliance in
operation, always check for gas leaks. This must be
performed by your dealer, a qualified licensed plumber,
or gas service company.
Connecting Gas & Electrical (30”W.)
DANGER
Gas leak hazard.
To avoid risk of personal injury
or death; leak testing of the
appliance must be conducted
according to the manufacturer’s
instructions. Before placing appliance in
operation, always check for gas leaks
with soapy water solution.
• DO NOT USE AN OPEN FLAME TO
CHECK FOR GAS LEAKS.
WARNING
Electrical shock hazard.
To avoid the risk of electrical
shock, personal injury or death;
verify your appliance has been
properly grounded in accordance with
local codes or in absence of codes, with
the National Electrical Code (NEC).
ANSI/NFPA 70-latest edition.
1


