


— 15 —
CLEAN AFTER EACH USE
Open Top, Oven and Exterior
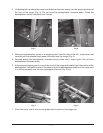
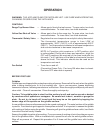
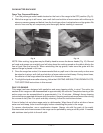
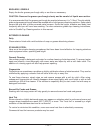
1. Turn the yellow gas valve handle located on the front of the range to the OFF position (Fig. 9).
2. While the range top is still warm, use a soft cloth and solution of warm water with mild soap to
wipe any excess grease and debris from the front top surface, backsplasher and top grates. Be
sure to rinse and dry all component parts thoroughly before cooking is resumed.
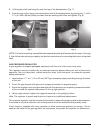
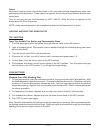
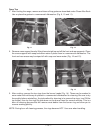
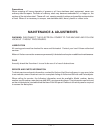
NOTE: After cooling, top grates may be lifted by hand to access the burner heads (Fig. 10). Burned
on foods and grease are unsightly and will slow down the cooking speed as the debris blocks the
flow of heat from the burner(s). When reinstalling the top grates, make sure the grate with the
upward flange is placed in the rear.
3. Once the range has cooled, it is recommended that any spill over in the oven cavity or door area
be wiped out using a soft cloth and solution of warm water and mild soap. During down times,
the exterior of the range should be wiped off in the same manner.
4. To relight the top burners after cleaning, follow the LIGHTING AND SHUTTING DOWN PILOTS,
TOP SECTIONS instructions in this manual.
DAILY CLEANING
This range has been designed with sanitation and easy cleaning ability in mind. The entire top
section of this range can be disassembled in approximately 60 seconds. Complete cleaning of the
entire range can be accomplished in approximately 5 to 10 minutes. Although these cleaning
instructions are suggested minimum daily procedure, cleaning can be performed more often during
the course of daily use. For quick and easy cleaning, follow the instructions below.
If time is limited, do not place range parts in a dishwasher. Wipe them off with a solution of warm
water and mild soap, then rinse thoroughly before reinstalling the parts to the range.
To remove discoloration, use a nonabrasive cleaner. Always rub with the grain of the metal.
Stainless steel and chrome areas of the range can be polished by using a soft dry cloth. If needed,
add stainless steel polish to the soft cloth.
Fig. 9
Fig. 10