


— 6 —
RANGE TOP SECTIONS
1. Remove top grate.
2. Remove burner/venturi/pilot assembly and discard all packing materials in the drip pan basin,
3. Make sure the burner/venturi assembly is in the proper position (Fig. 13, 14 & 15 in this manual).
4. Install all knobs.
GRIDDLE
The range is shipped with the griddle in place for cooking. No farther griddle installation is required,
except for models G260 and G260C with a broiler/griddle.
BROILER GRIDDLE BRICKS
1. Remove six 5
1
/4" x 2
1
/4" (133 x 57 mm) and six 5
1
/4" x 5
1
/16 (133 x 129 mm) bricks from the
shipping box packaged in the oven cavity.
2. Install the 5
1
/4" x 2
1
/4" (133 x 57 mm) bricks to the left and right hand sides of the broiler by
inserting the bricks individually through the front opening in the broiler. Angle the brick sideways
for easy fit between the burner edges. Set the bricks flat in place resting on the broiler side and
burner edges. Push each brick as far to the rear of the broiler as possible to ensure easy fit of
last brick.
3. Install the remaining six 5
1
/4" x 5
1
/16 (133 x 129 mm) bricks to the center section as described
in step 2. Place the bricks on the center burner edges only.
LEVELING
To level the range, place a carpenter's level on the range top and check leveling of the unit side to
side and front to rear. Achieve leveling by turning each foot section of the unit's leg as needed.
Turning the foot in a counter clockwise direction will increase height and clockwise will decrease
BACKSPLASH/ SHELF
This range is supplied with a standard 23" (584 mm) high backsplasher with a 22" (559 mm) high
mounted plate shelf. To install the backsplasher and plate shelf, follow steps 1 through 9 below.
1. Remove the crating material for the
backsplasher/plate shelf. The backsplasher/
plate shelf is crated resting against the rear
of the range.
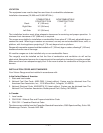
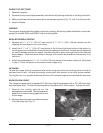
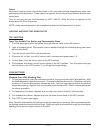
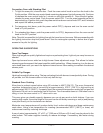
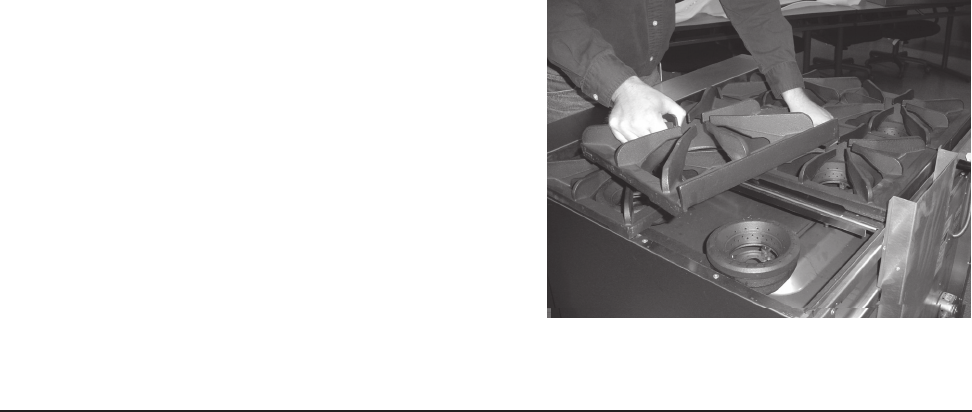
2. Remove the entire back row of burner grates
from the range top (Fig. 2).
Fig. 2