


ELECTRIC COMBI OVENS - SERVICE PROCEDURES AND ADJUSTMENTS
Page 30 of 68
HEATING ELEMENTS
WARNING:
THE FOLLOWING STEPS REQUIRE
POWER TO BE APPLIED TO THE UNIT DURING
THE TEST. USE EXTREME CAUTION AT ALL
TIMES.
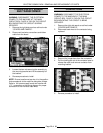
1. Measure the voltage at the heating element
terminals and verify it against the data plate
voltage.
A. If voltage is incorrect, find the source of
the problem.
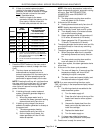
2. If voltage is correct, check current draw (amps)
through the heating element lead wires. If
current draw is correct then heating element is
ok.
See table below for proper values.
A. If current draw is not correct then, replace
heating element.
3. Check for proper operation.
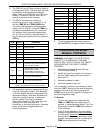
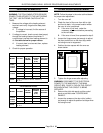
CONVECTION HEAT
MODEL VOLTAGE
KW PER
ELEMENT
AMPS PER
ELEMENT
LEAD
(3 PH)
OHMS PER
ELEMENT
VCE6H
VCE10H
VCE20F
208 9 15 14
240 9 13 19
480 9 11 26
VCE20H
208 6 10 22
240 6 8 29
480 6 7 38
NOTE
:
Values in the table are nominal. Tolerance is
+5/-10 %.
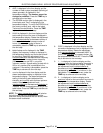
STEAM GENERATOR HEAT
MODEL VOLTAGE
KW PER
ELEMENT
AMPS PER
ELEMENT
LEAD
(3 PH)
OHMS PER
ELEMENT
VCE6H
VCE10H
VCE20F
VCE20H
208 8 13 16
240 8 11 22
480 8 10 29
NOTE
:
Values in the table are nominal. Tolerance is
+5/-10 %.
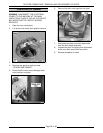
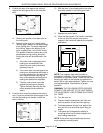
OVEN DOOR ADJUSTMENT
NOTE
: Follow the steps in the order outlined below
for proper door adjustment.
1. Turn the oven off.
2. Check the level of the oven from left to right
and front to back, in the exact location where
the oven is to be positioned.
A. If the oven is not
level, make the
necessary adjustments before proceeding
to the next step.
B. If the oven is level, then proceed to step 3.
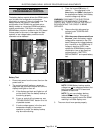
3. Loosen the hinge screws just enough to adjust
the door position but so the door stays when
not being moved or supported.
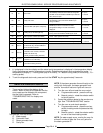
4. Position the door square with the oven as
shown below.
5. Tighten the hinge screws after adjusting.
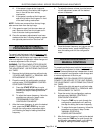
WARNING:
DISCONNECT THE ELECTRICAL
POWER TO THE MACHINE AT THE MAIN
CIRCUIT BOX. PLACE A TAG ON THE CIRCUIT
BOX INDICATING THE CIRCUIT IS BEING
SERVICED.
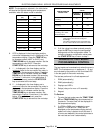
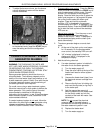
6. Remove the right side panel and the control
panel as outlined under ”COVERS AND
PANELS”.
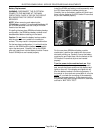
7. Loosen the screws on the door roller (striker)
just enough to adjust its position but stays when
not being moved.