FULL SIZE ELECTRIC CONVECTION OVENS - SERVICE PROCEDURES AND ADJUSTMENTS
F25105 (December 2001) Page 28 of 60
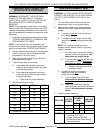
B. If the code displayed is not correct for the
key pressed, then the keyboard is
malfunctioning.
1) Turn the power switch OFF.
WARNING:
DISCONNECT THE ELECTRICAL
POWER TO THE MACHINE AT THE MAIN
CIRCUIT BOX. PLACE A TAG ON THE CIRCUIT
BOX INDICATING THE CIRCUIT IS BEING
SERVICED.
C. Replace the computer control and check
for proper operation.
5. Press the Rack 1 key to advance the display
menu to the "dISP" (display) test. A test
sequence automatically runs on the display and
control LEDs for a visual verification that all
segments in the LED display and the internal
LEDs are functioning.
6. At the end of the test, the control exits the
calibration mode and returns to the Operation
Mode.
Restore Factory Settings
NOTE:
If the computer control does not appear to
be functioning properly, do not
restore factory
settings until verifying the control is configured
properly as outlined in "SETUP MODE" under
"COMPUTER CONTROL" and performing the
"COMPUTER CONTROL OPERATIONAL TEST" as
outlined in the above section.
1. Enter the "Calibration Mode" by using the key
sequence stated in step 1 under "COMPUTER
CONTROL OPERATIONAL TEST".
A. The computer control outputs are turned
OFF.
B. The display will alternate between "CALY"
and "no".
2. Press the up or down arrow key until the "rESt"
parameter displays.
3. Press the Rack 1 key and "no" displays.
4. Press the up or down arrow key to change the
display to "YES".
5. Press the Rack 1 key to select this data option
and then advance the menu to the "LgOt" (logic
output test).
NOTE:
The "g" in LgOt displays as a "9".
6. Press the Rack 1 key twice to advance past the
"LI" (Logic Inputs test) and the "HEY"
(keyboard) test.
7. The "dISP" (display) test sequence
automatically runs.
8. At the end of the test, the control exits the
calibration mode and returns to the Operation
Mode.
9. Enter the "SETUP MODE" as outlined under
"COMPUTER CONTROL" and perform the
procedure.


