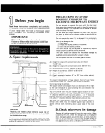
/A 1 Level and position
Gl
” the range
NOTE:
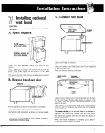
If installing the option vent hood, go to that step now.
Instructions are on page 7. Level and position the
range after the vent hood is attached.
I
‘-
SPIRIT
LEVEL -\
A. Leveling
Move range into fiGI operating position. Use caution
when moving this appliance to prevent damage to floor
coverings. The weight of the appliance may cause rip-
ping, scratching or other damage to the floor. For best
results, slide appliance onto cardboard or hardboard
before moving to prevent damage.
Place rack in oven. Put spirit level on rack. If range
needs leveling, remove oven drawer. The tops of level-
ing legs will be exposed as shown.
Use a 3/” allen wrench to raise or lower legs as needed.
IMPORTANT: Oven must be properly leveled for
satisfactory baking conditions.
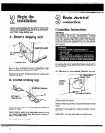
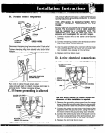
B. Remove shipping clips
Each of the 4 elements is
secured by a shipping clip.
Using screwdriver or pliers,
bend upper part of the clip
to vertical position. Slide
clip out and discard
it.
C. Complete elec
Back appliance away from
wall, leaving room to make
connection.
Plug flexible pigtail into ap-
proved receptacle (if allow-
ed by local codes). OR
Connect flexible armored or
non-metallic shielded cable
directly to fused disconnect
box.
t.rical connection
5
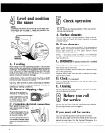
Check operation
CAUTION:
Do not touch any heating elements. They may be hot
and you may be burned.
A. Surface elements
Turn on each of the 4 surface elements. Check to be cer-
tain they heat and check for proper operation of surface
indicator light(s).
B. Oven elements
BAKE - Set selector switch on BAKE. Turn thermostat to
350° BAKE. The bottom element should glow red and in-
dicator light should be on. The upper element should
become hot but NOT glow red.
BROIL - Set selector switch on BROIL. Turn thermostat
to high. The top element should glow red and indicator
light should be on.
C. Rotisserie
(if optional rotisserie kit is installed)
Place straight oven rack on bottom ledge position
Place broiler pan on oven rack
Place special rotisserie rack on broiler pan. Position the spit
bar on this special rack.
Rotation should start when spit bar is inserted into recep-
tacle in back of oven.
D. Clock
(if so equipped)
Refer to operating instructions in the Use and Care Guide
(packed in the oven).
E. Cleaning
See the
Use
and Care Guide (packed in the oven) for proper
care and cleaning instructions.
Before you call
for service. . .
See the Use and Care Guide for trouble-shooting checklist.
Be sure pigtail power cord is plugged in.
Check for blown fuses or tripped circuit breaker.
If you must call for service. . .
You will need the appliance model and serial number.
Find the serial plate on the front frame of the main oven
behind the main door. For the Eye-level Microwave, it is
on the front frame behind the microwave oven door.
6


