Now start...
With cooktop in kitchen.
q
1
Remove shipping materials and
tape from cooktop. Remove
pressure regulator and hardware package
from side of carton.
1 2. 1 Remove cooktop and burner grates
package from shipping box.
Remove plastic parts bag from
inside cooktop. Remove parts from
bag and line up next to your tools.
Lift entire cooktop up from cutout when
repositioning cooktop in countertop
opening.
El
4
Lift up and pull out the two rear
n
burner assemblies to remove them
from the cooktop. Insert cooktop
into the countertop opening. Center cooktop
in cutout. Check that the front of the cooktop
is parallel to the front edge of the countertop.
Check that all required clearances are met.
15.1
Place a hand in each front burner
opening and lift maintop. Support
I maintop by inserting the rod
between the maintop and the burner box.
Mark location of mounting holes on
countertop. Remove cooktop from cutout.
Determine which mounting method you
will use. Refer to Steps 6 and 7.
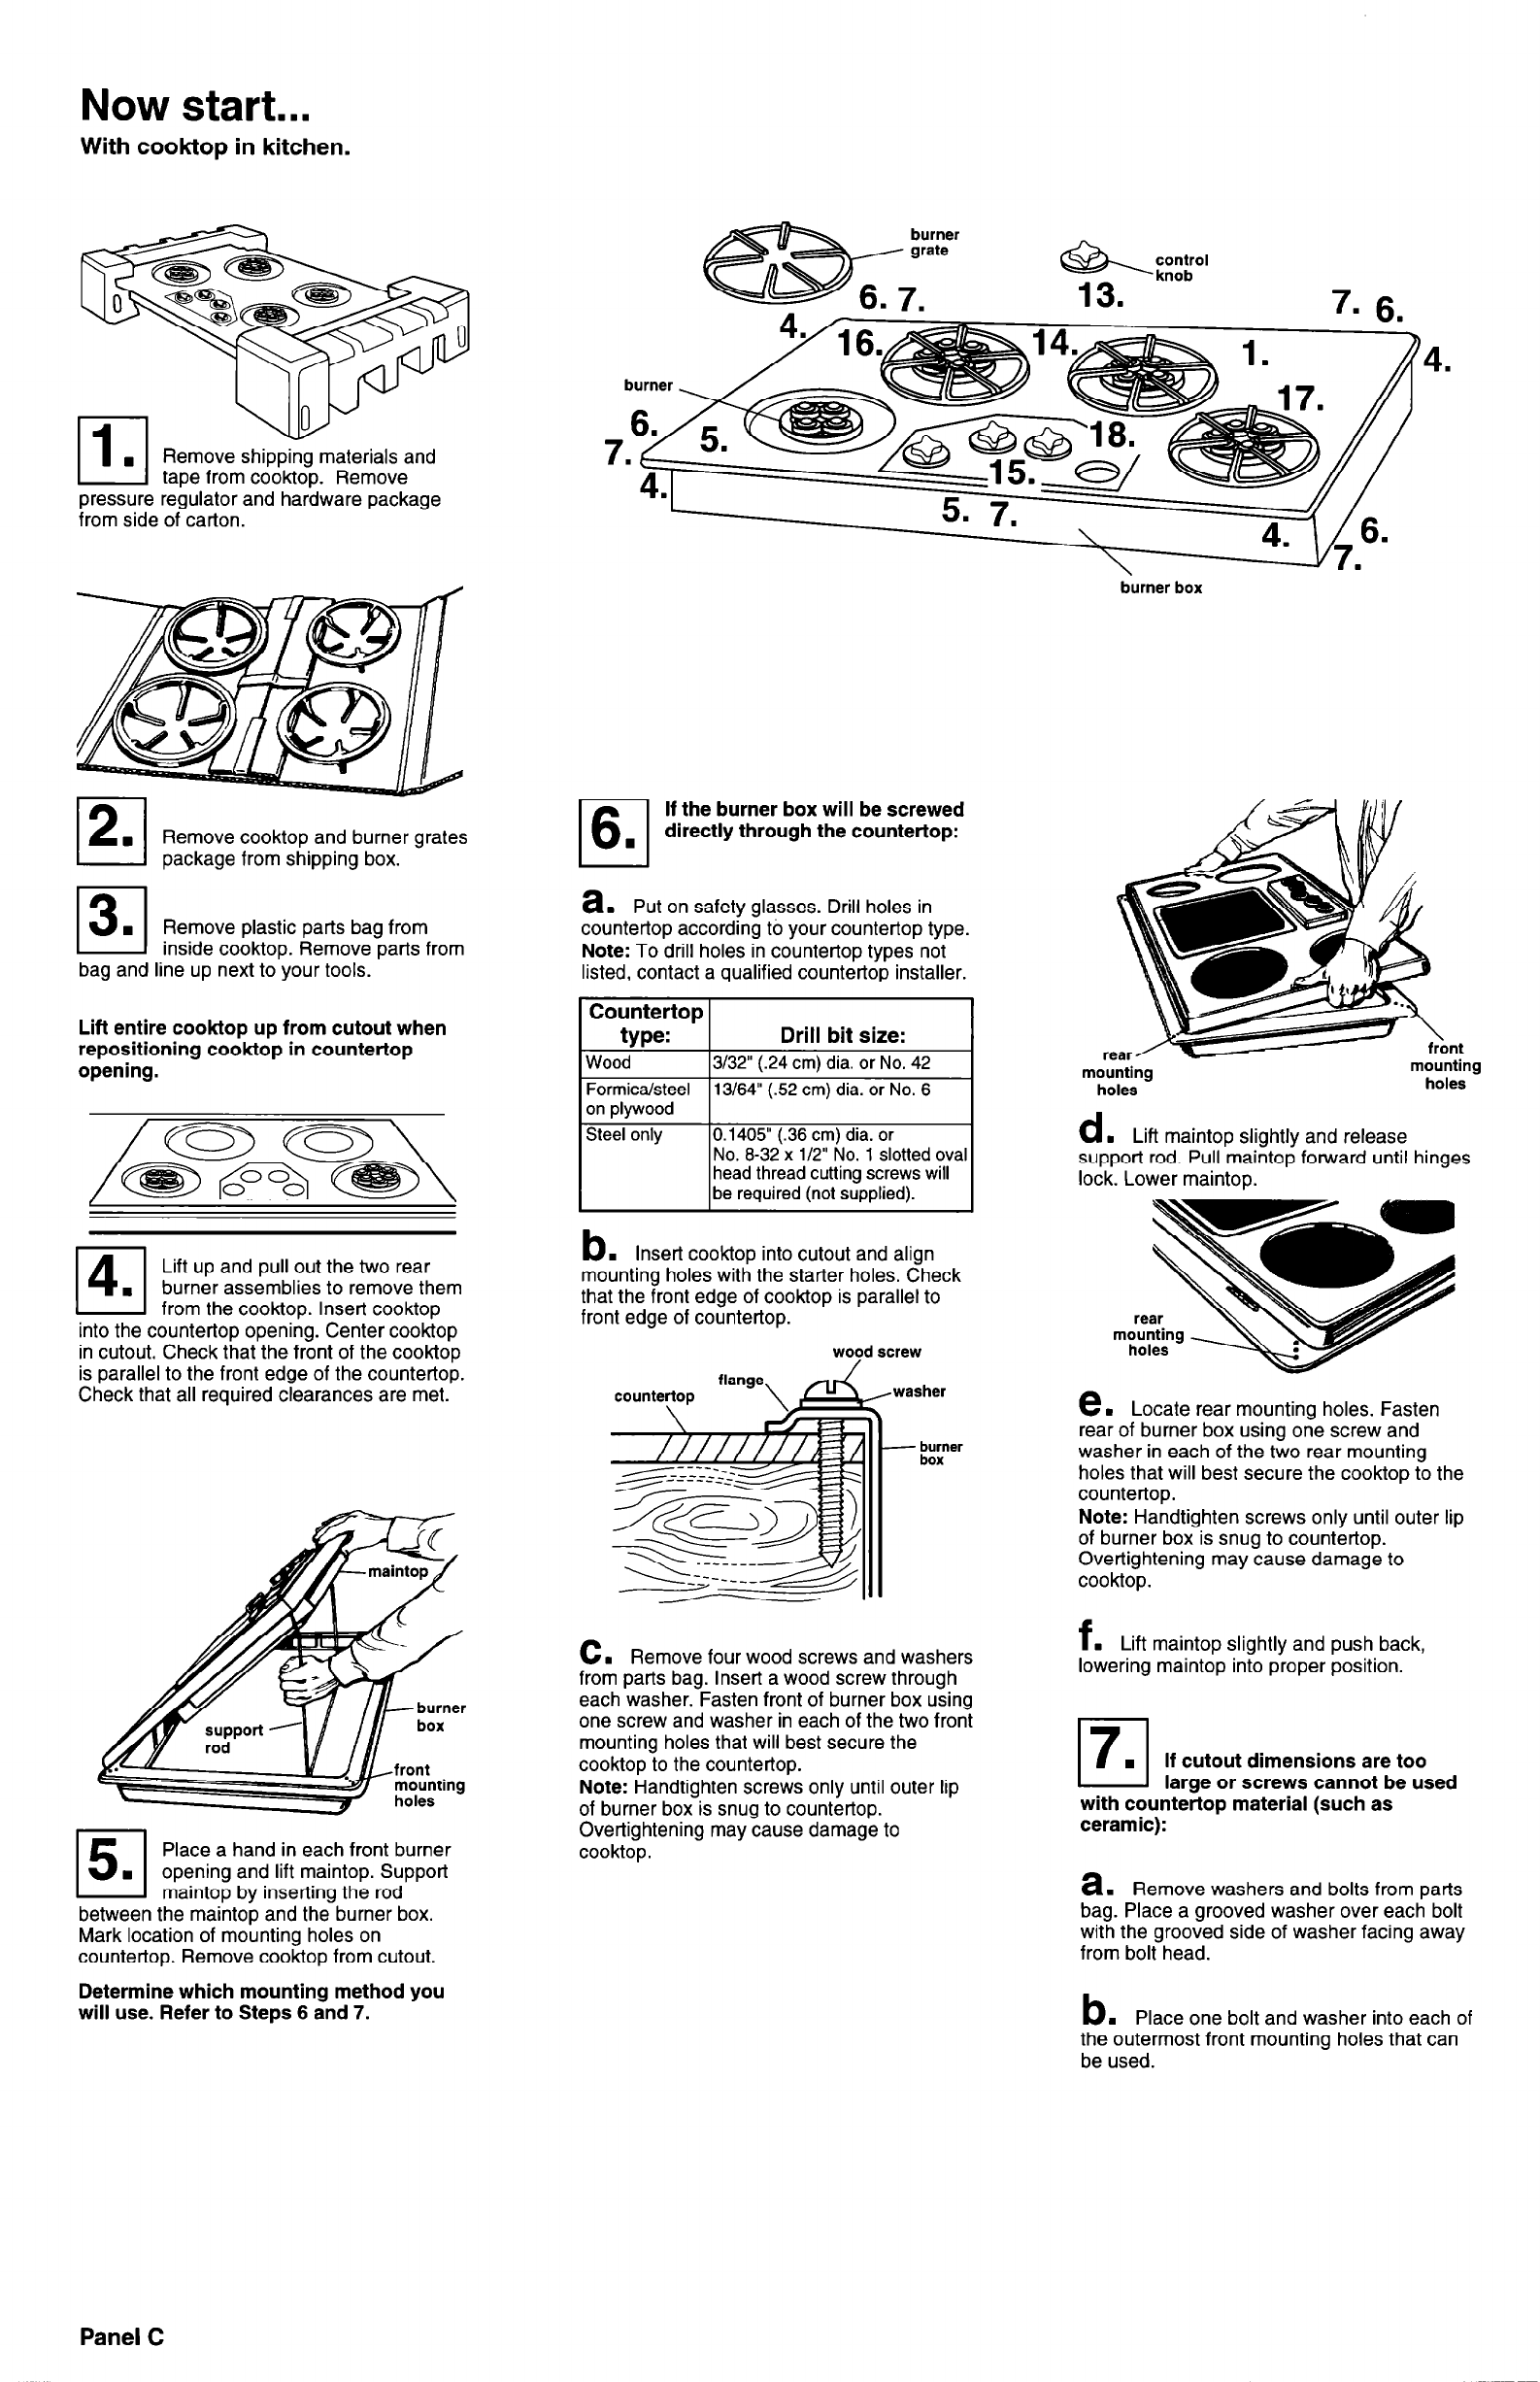
--..._
- grate
6.1
If the burner box will be screwed
directly through the countertop:
I
I
a.
Put on safety glasses. Drill holes in
countertop according to your countertop type.
Note: To drill holes in countertop types not
listed, contact a qualified countertop installer.
Countertop
type:
Drill bit size:
Wood 3/32” (.24 cm) dia. or No. 42
Formica/steel
13/64” (.52 cm) dia. or No. 6
on plywood
Steel only 0.1405” (.36 cm) dia. or
No. 8-32 x l/2” No. 1 slotted oval
head thread cutting screws will
be required (not supplied).
b
. Insert cook-top into cutout and align
mounting holes with the starter holes. Check
that the front edge of cooktop is parallel to
front edge of countertop.
wood screw
-washer
- burner
box
c.
Remove four wood screws and washers
from parts bag. Insert a wood screw through
each washer. Fasten front of burner box using
one screw and washer in each of the two front
mounting holes that will best secure the
cooktop to the countertop.
Note: Handtighten screws only until outer lip
of burner box is snug to countertop.
Over-tightening may cause damage to
cooktop.
burner box
.--.
mounting
mounting
holes
holes
d
. Lift maintop slightly and release
support rod. Pull maintop forward until hinges
lock. Lower maintop.
e.
Locate rear mounting holes. Fasten
rear of burner box using one screw and
washer in each of the two rear mounting
holes that will best secure the cooktop to the
countertop.
Note: Handtighten screws only until outer lip
of burner box is snug to countertop.
Over-tightening may cause damage to
cooktop.
f
. Lift maintop slightly and push back,
lowering maintop into proper position.
1 7. ] If cutout dimensions are too
large or screws cannot be used
with countertop material (such as
ceramic):
a.
Remove washers and bolts from parts
bag. Place a grooved washer over each bolt
with the grooved side of washer facing away
from bolt head.
b
. Place one bolt and washer into each of
the outermost front mounting holes that can
be used.
Panel C


