flexible
connector
3/W’ (0.95 cm)
nipple
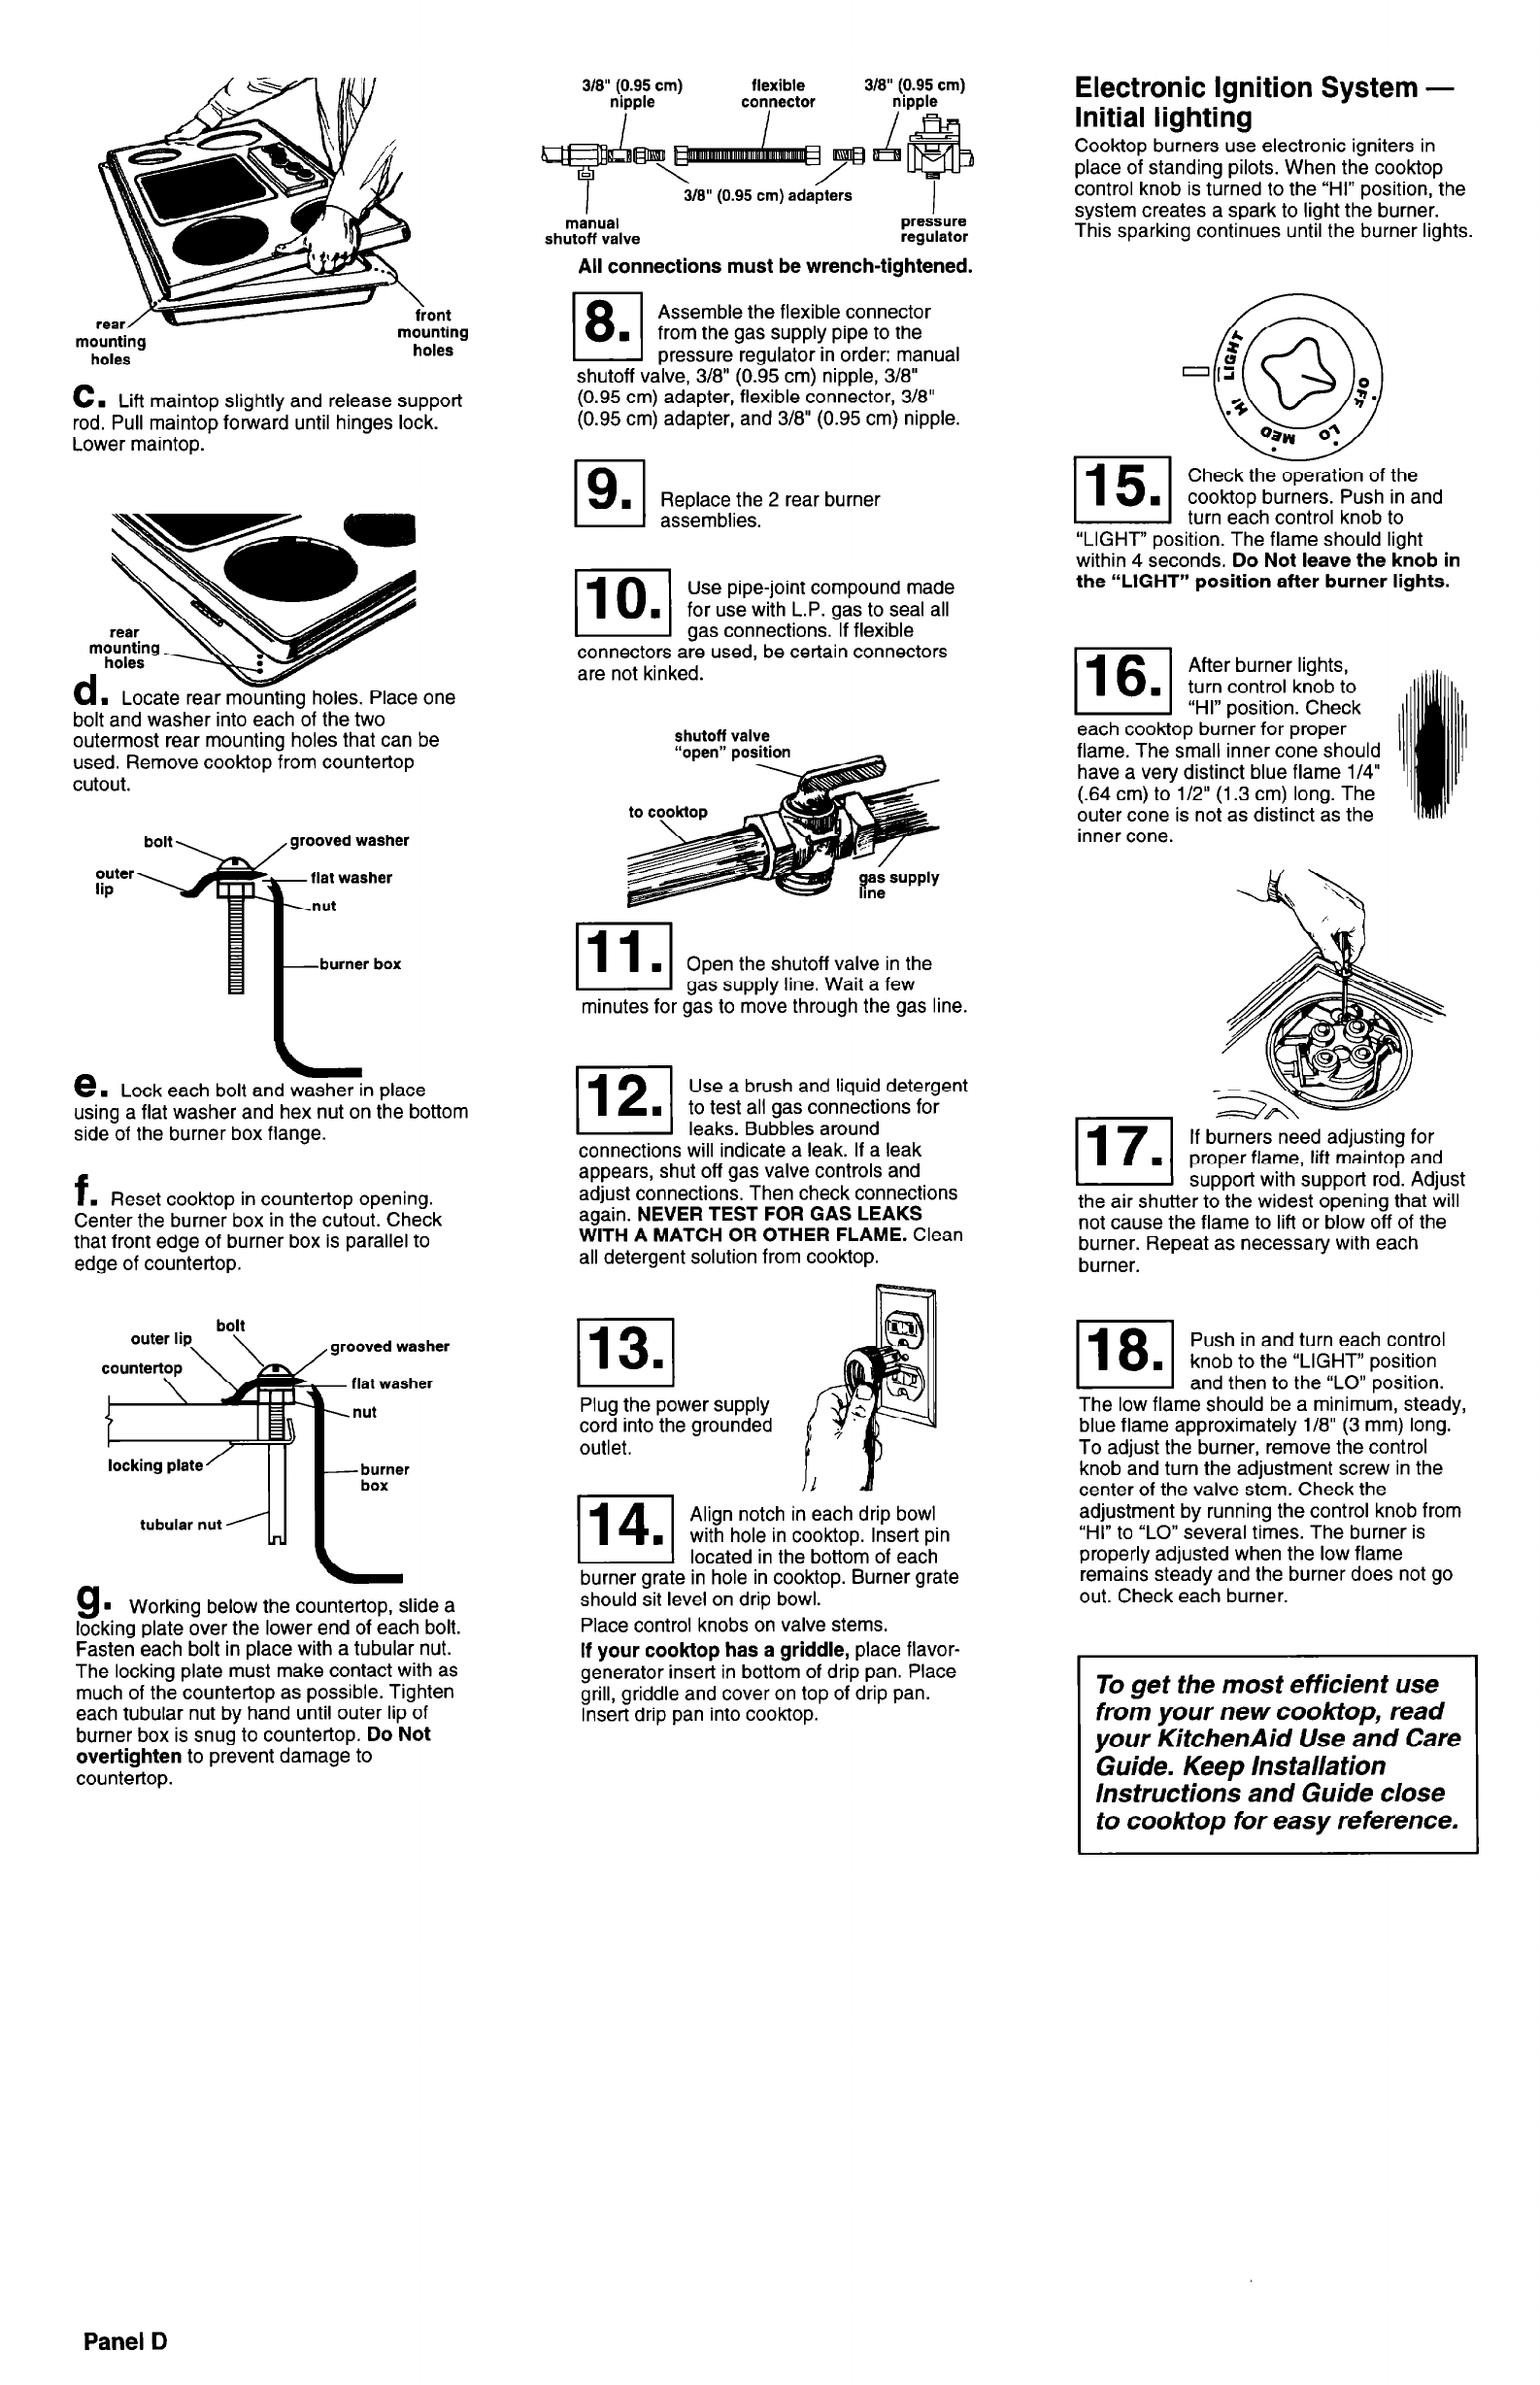
Electronic Ignition System -
Initial lighting
Cooktop burners use electronic igniters in
place of standing pilots. When the cooktop
control knob is turned to the “HI” position, the
system creates a spark to light the burner.
This sparking continues until the burner lights.
I
3/W (0.95 cm) adabters
1
manual
pressure
shutoff valve
regulator
All connections must be wrench-tightened.
Assemble the flexible connector
from the gas supply pipe to the
pressure regulator in order: manual
shutoff valve, 3/8” (0.95 cm) nipple, 3/8”
(0.95 cm) adapter, flexible connector, 318”
(0.95 cm) adapter, and 3/8” (0.95 cm) nipple.
mounting
holes
holes
C.
Lift maintop slightly and release support
rod. Pull maintop forward until hinges lock.
Lower maintop.
115.1
19. 1 Replacethe2rearburner
assemblies.
Check the operation of the
cooktop burners. Push
in and
u turn each control knob to
“LIGHT” position. The flame should light
within 4 seconds. Do Not leave the knob in
the “LIGHT” position after burner lights.
110
Use pipe-joint compound made
. for use with L.P. gas to seal all
gas connections. If flexible
connectors are used, be certain connectors
are not kinked.
116.
After burner lights,
turn control knob to
“HI” position. Check
each cooktop burner for proper
flame. The small inner cone should
have a very distinct blue flame l/4”
(.64
cm) to l/2” (1.3 cm) long. The
outer cone is not as distinct as the
inner cone.
. Locate rear mountinq holes. Place one
bolt and washer into each-bf the two
outermost rear mounting holes that can be
used. Remove cooktop from countertop
cutout.
shutoff valve
“open” position
bolt \
, grooved washer
outer
lip
III I
n
Open the
shutoff
valve in the
I gas supply line. Wait a few
minutes for gas to move through the gas line.
112.1
Use a brush and liquid detergent
to test all gas connections for
leaks. Bubbles around
connections will indicate a leak. If a leak
appears, shut off gas valve controls and
adjust connections. Then check connections
again. NEVER TEST FOR GAS LEAKS
WITH A MATCH OR OTHER FLAME. Clean
all detergent solution from cooktop.
e. Lock each bolt and washer in place
using a flat washer and hex nut on the bottom
side of the burner box flange.
P-J
If burners need adjusting for
. proper flame, lift maintop and
support with support rod. Adjust
the air shutter to the widest opening that will
not cause the flame to lift or blow off of the
burner. Repeat as necessary with each
burner.
f
. Reset cooktop in countertop opening.
Center the burner box in the cutout. Check
that front edge of burner box is parallel to
edge of countertop.
bolt
outer lip
\ \
, grooved washer
113.1
118
Push in and turn each control
. knob to the “LIGHT” position
and then to the “LO” position.
The low flame should be a minimum, steady,
blue flame approximately l/8” (3 mm) long.
To adjust the burner, remove the control
knob and turn the adjustment screw in the
center of the valve stem. Check the
adjustment by running the control knob from
“HI” to “LO” several times. The burner is
properly adjusted when the low flame
remains steady and the burner does not go
out. Check each burner.
flat washer
.nut
I
I
Plug the power supply
cord into the grounded
outlet.
-burner
box
114.1
Align notch in each drip bowl
with hole in cooktop. Insert pin
located in the bottom of each
burner grate in hole in cooktop. Burner grate
should sit level on drip bowl.
Place control knobs on valve stems.
If your cooktop has a griddle, place flavor-
generator insert in bottom of drip pan. Place
grill, griddle and cover on top of drip pan.
Insert drip pan into cooktop.
Ye
Working below the countertop, slide a
locking plate over the lower end of each bolt.
Fasten each bolt in place with a tubular nut.
The locking plate must make contact with as
much of the countertop as possible. Tighten
each tubular nut by hand until outer lip of
burner box is snug to countertop. Do Not
overtighten to prevent damage to
countertop.
To get the most efficient use
from your new cooktop, read
your KitchenAid Use and Care
Guide. Keep Ins talla tion
Instructions and Guide close
to cooktop for easy reference.
Panel D


