Using Your Range
Continued
Until you get used to the set-
tings, use the following as a guide.
For best results, start cooking at the
high settings; then turn the control knob
down to continue cooking.
Use HI
to start foods cooking; to
bring liquids to a boil.
Use MED-HI to hold a rapid boil; to
fry chicken or pancakes.
Use MED
for gravy, puddings and
icing; to cook large amounts of
vegetables.
Use MED-LO to keep food cooking
after startrng it on a higher setting.
Use LO to keep food warm until
ready to serve. Set the heat higher or
lower within the LO band to keep food
at the temperature you want.
Using the ceramic cooktop
Cooking on the ceramic cooktop is
almost the same as cooking on conven-
tional surface units. There are, however,
a few differences:
l
The ceramic cooktop will take slightly
longer to heat up than a regular
surface unit. It will also take longer to
cool down. Turn off the unit a few min-
utes before you are finished cooking.
l
The surface unit will glow red when it
is turned on. You will see the element
cycling on (glowing red) and off to
maintain the proper temperature set-
ting you have selected.
l
Do not use the ceramic cooktop for
canning.
l
Sliding metal pans on the ceramic
cooktop surface could leave marks. If
they are not heated, metal marks
can be removed using a special cook-
top polishing creme. Other marks may
be permanent. See pages 17 and 18
for cleaning and caring suggestions.
Wiping off the cooktop before and
after each use will help keep the
surface free from stains and provide
the most even heating.
l Using a pan with a nicked or
scratched bottom could damage
the ceramic cooktop.
l Heating a soiled pan can leave a
stain on the cooktop and cause
scratches.
Cookware
Pans should be the same size or
slightly larger than the surface unit to
prevent boil-overs and hot handles.
Use only flat-bottomed utensils on
the cooktop. Flat bottoms allow
maximum contact between the pans
and surface units for fast, even cooking.
Pans without flat bottoms and specialty
items with rounded or ridged bottoms
(woks, ridged bottom canners or tea
kettles) will cause uneven heating and
poor cooking results.
To check your cookware for flatness,
place a straight-edge across the bottom
of each piece. Move the straight-edge
around. If light shows anywhere
between the pan and the straight-edge,
the pan is not flat. Do not use it.
See the Cooking Guide for additional
cookware information.
The electronic oven controls
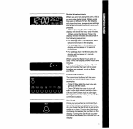
There are three parts in the oven control
section:
-The digital display.
-The command buttons.
-The Set Knob.
Instructions for each oven control are
covered on the following pages. Read
them carefully.
When you first plug in the range, the
display will show four flashing 8’s. If,
after you set the clock (page 8) the dis-
play again shows four flashing 8’s; your
electricity was off for a while. Reset
the clock.
6


