


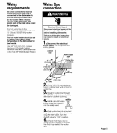

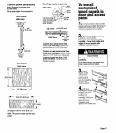
Drain
requirements
The drain hose must connect to the
house plumblng at a mlnlmum of
20 Inches (50.8 cm) above the
floor. Thls will prevent backflow or
water slphonlng out of dlshwasher
durlng operatlon.
If the draln hose Is routed to a
connectlon point less than 20
Inches (50.8 cm) above the floor,
the draln hose must form a loop
20 Inches (50.8 cm) above the
rloor. An alr gap must be used In
the hlgh draln loop.
Do Not klnk draln hose and copper
tublng.
Do Not use draln hose or flttlngs
that are less than l/2 Inches
(1.3 cm) I.D.
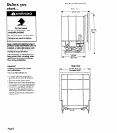
The drain hose
should be l/2”
(1.3 cm) minimum I.D.
20” (50.8 cm)
flexible hose and no
min. to floor
longer than 20 feet
(6 m). Flexible hose must be
v
resistant to heat and detergent.
Flexible hose is available through
your local plumbing, hardware
and automotive supply stores.
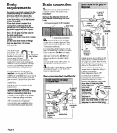
ir
connectlon to an alr gap Is
required,
an air gap kit (Part No.
300096) is available from your local
parts dealer. If another brand air
gap is used, it should be checked
to make sure it allows for the same
water flow.
Install air gap according to kit
instructions.
If connecting to a disposer,
remove disposer knockout or plug
before connecting draln Ilne.
Connect the air gap to a waste
tee or disposer using a rubber
connector. Most disposers have
7/8” connectors, or special
connectors are available from
local plumbing supply sources,
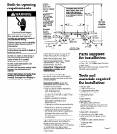
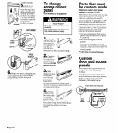
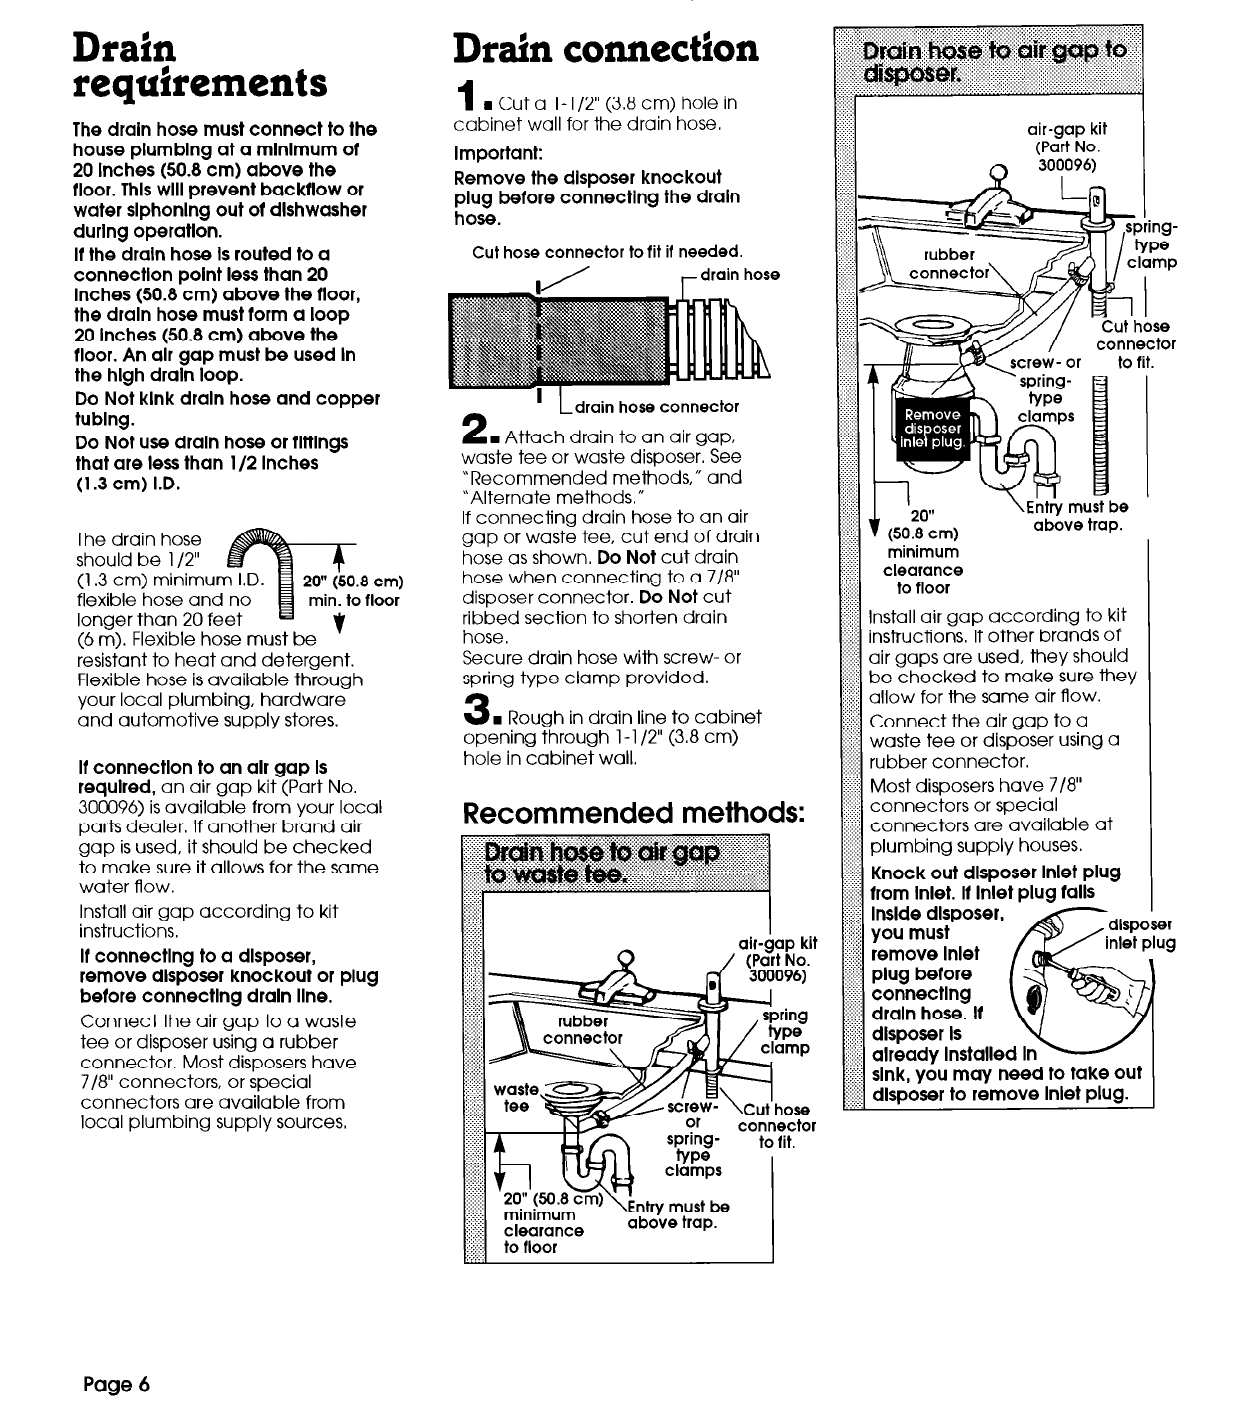
Drain connection
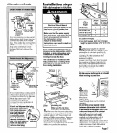
1
H Cut a l-l /2” (3.8 cm) hole in
cabinet wall for the drain hose.
Important:
Remove the disposer knockout
plug before connecting the draln
hose.
Cut hose connector to fit if needed.
2
Ldrain hose connector
n
Attach drain to an air gap,
waste tee or waste disposer. See
“Recommended methods, fl and
‘Alternate methods.”
If connecting drain hose to an air
gap or waste tee, cut end of drain
hose as shown.
Do
Not cut drain
hose when connecting to a 718”
disposer connector.
Do Not
cut
ribbed section to shorten drain
hose.
Secure drain hose with screw- or
spring-type clamp provided.
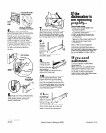
3
. Rough in drain line to cabinet
opening through l-l /2” (3.8 cm)
hole in cabinet wall.
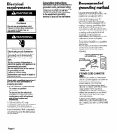
Recommended methods:
7-i-n
sorina-
kut’hose
connector
to fit.
p! mir?
::/,::::
clew wance
must be
above trap.
. . . .
:z minimum
::.::::::
i;i clearance
,.;..:
,.;::
,.,...:.
to floor
3 Install air gap according to kit
3; instructions, If other brands of
2. air gaps are used, they should
$$ be checked to make sure they
:i$: allow for the same air flow.
..,.. . . .
3 Connect the air gap
to a
$2 waste tee or disposer using a
2’; rubber connector.
$$ Most disposers have 718”
~3:; connectors or special
;:$ connectors are available at
z plumbing supply houses.
3:; Knock out disposer Inlet plug
from Inlet.
ir
Inlet plug rails
lnslde dlSpOSer,
you must
remove Inlet
plug before
connecting
draln hose. If
disposer Is
already Installed In
sink, you may need to take out
disposer to remove Inlet plug.
Fii;i;‘;l 10 floor
Page 6