


8
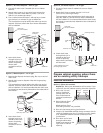
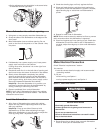
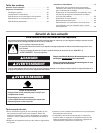
Option 2, Power supply cord method:
NOTE: A mating, three prong, ground-type wall receptacle
is required in a cabinet next to the dishwasher opening.
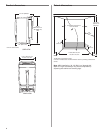
1. Drill a 1-1/2"
(3.8 cm) hole in
the cabinet rear
or side. Preferred
and optional
locations are
shown.
2. Wood cabinet:
Sand hole until
smooth.
Metal cabinet: Cover hole with grommet (Part
No. 302797) included with power supply cord kit.
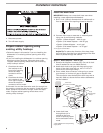
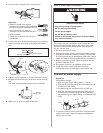
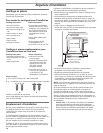
Install the water line
Helpful Tip: Routing the water line through the left side
of cabinet opening will make water connection easier.
1. Drill a minimum 1/2" (1.3 cm) hole in the cabinet side,
rear or floor. Preferred and optional locations are
shown.
2. Measure overall length of copper tubing required.
3. Attach copper tubing
to the water line with a
manual shutoff valve.
4. Slowly feed copper
tubing through hole in
cabinet. Copper tubing
will bend and kink
easily, so be gentle.
The copper tubing
should be far enough into the cabinet opening to
connect it to dishwasher inlet on the front left of the
dishwasher.
5. Turn water shutoff valve to “ON” position. Flush water
into a shallow pan to get rid of particles that may clog
the inlet valve.
6. Turn shutoff valve to “OFF” position.
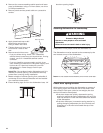
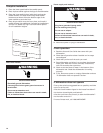
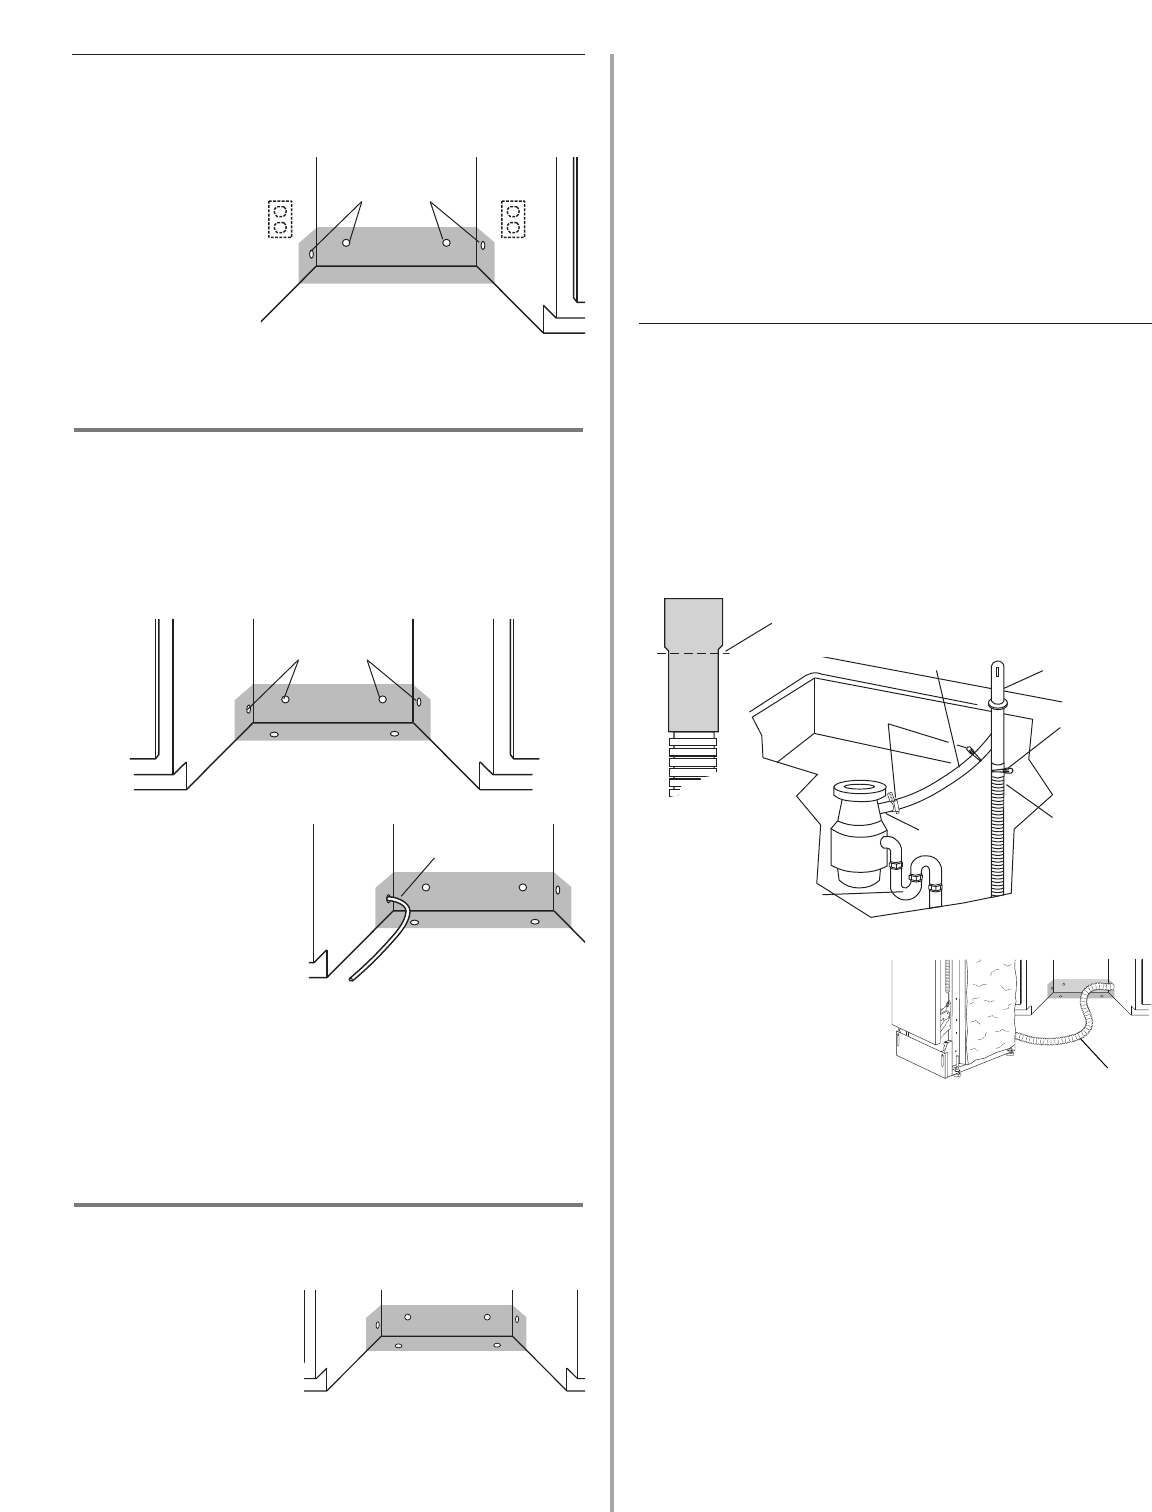
Install the drain hose
IMPORTANT: Always use a new drain hose.
1. Drill a 1-1/2" (3.8 cm)
diameter hole in
cabinet wall or floor on
the side of the opening
closest to the sink.
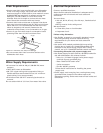
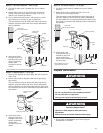
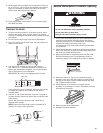
Option 1, Waste disposer – with air gap:
1. Remove the disposer knockout plug. Cut end of drain
hose if needed (do not cut ribbed section).
2. Attach drain hose to air gap with large spring-type
clamp. If the drain hose was cut, use a 1-1/2" to 2"
(3.8 to 5 cm) screw-type clamp*.
3. Use a rubber hose connector* with spring or screw-
type clamps* to connect air gap to disposer inlet.
This connection must be before the drain trap and at
least 20" (50.8 cm) above the floor where dishwasher
will be installed.
4. Insert drain hose through
hole cut in cabinet to the
front center of opening
where drain connection
will be made.
* Parts available from local plumbing
supply stores
drain
hose
large
spring-type
clamp
air gap
rubber hose
connector
disposer
inlet
drain trap
drain hose –
cut here if needed
spring or
screw-type
clamps
2. Connect drain hose to waste tee or waste disposer
using one of the following methods:
• Option 1, Waste disposer – with air gap
• Option 2, No waste disposer – with air gap
• Option 3, Waste disposer – no air gap*
• Option 4, No waste disposer – no air gap*
*an air gap is recommended
Helpful Tip:To reduce the vibration of the hose, keep
the hose away from the floor and the edge of the hole
where it passes through the cabinet.
copper
tubing
optional
locations
preferred
locations
preferred
locations
optional
locations
drain hose