


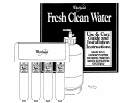
Before You Start . . .
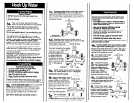
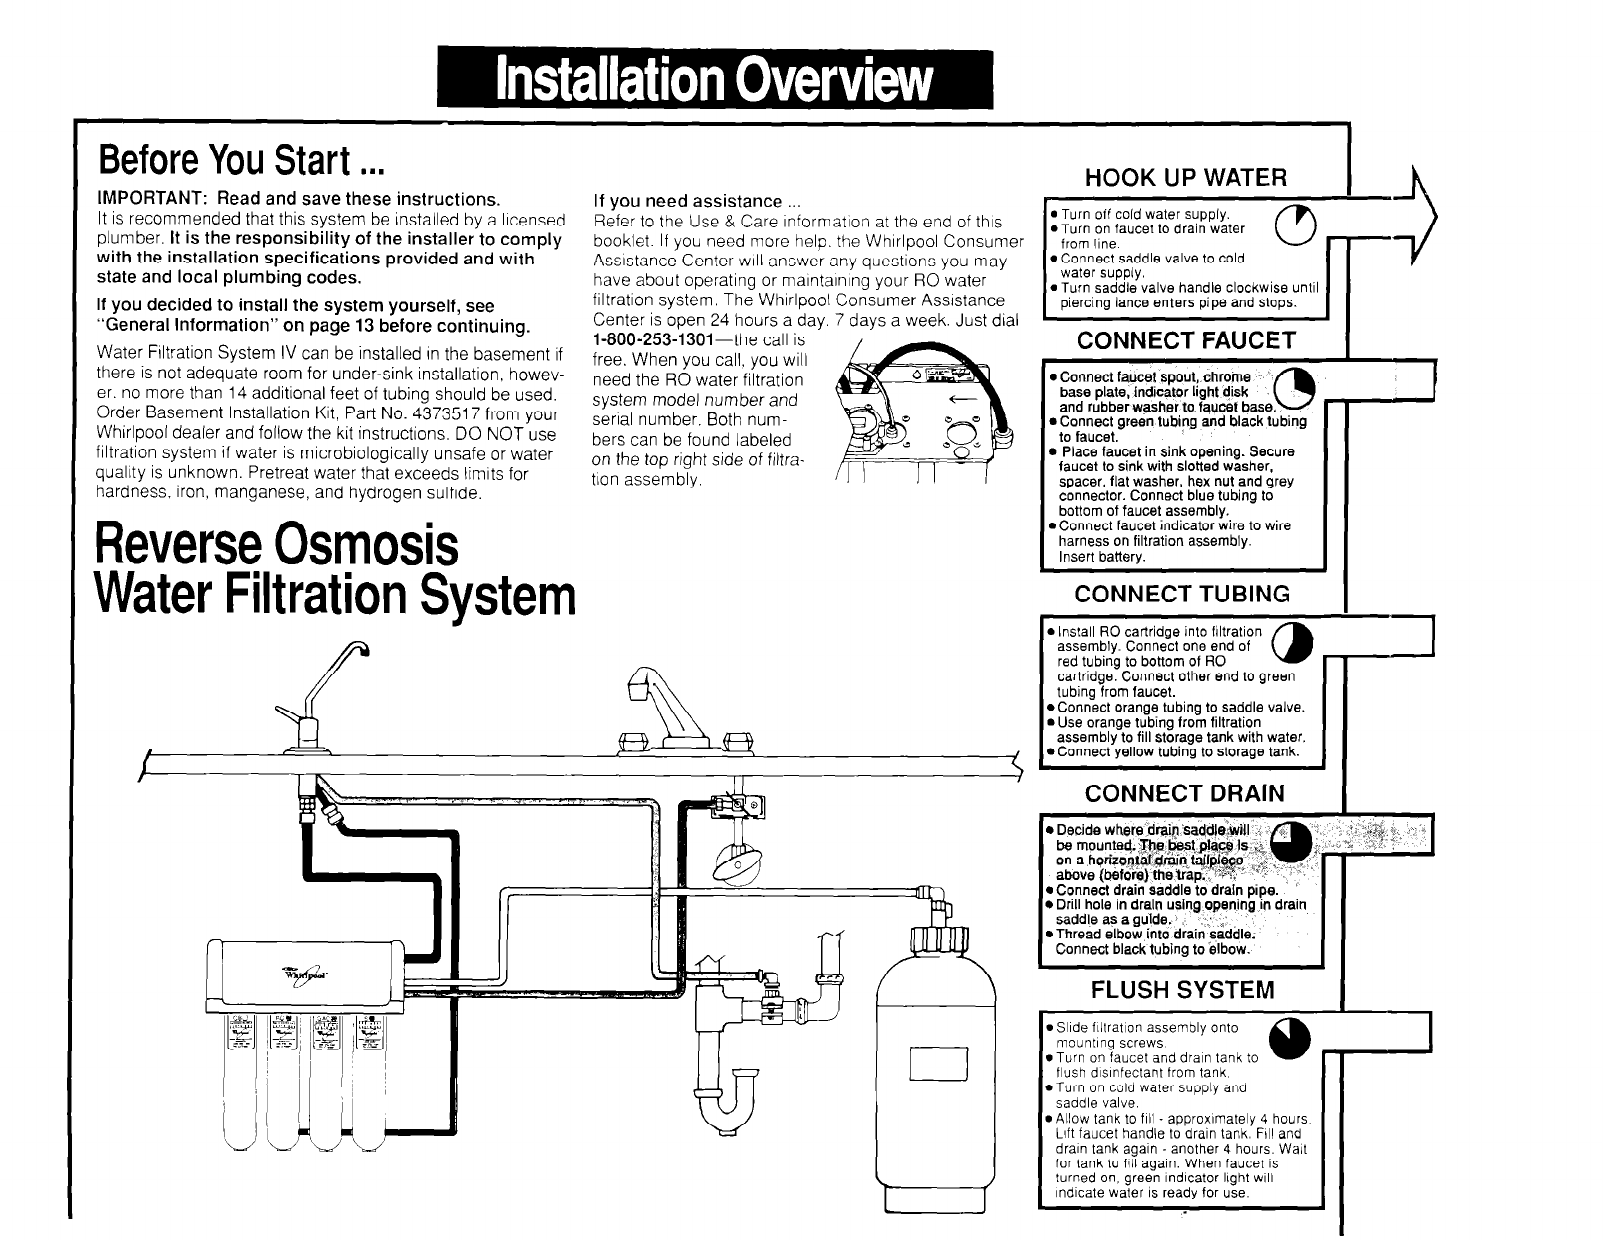
HOOK UP WATER
I L,
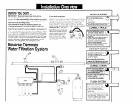
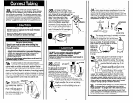
IMPORTANT: Read and save these instructions.
It is recommended that this system be installed by a licensed
plumber. It is the responsibility of the installer to comply
with the installation specifications provided and with
state and local plumbing codes.
If you decided to install the system yourself, see
“General Information” on page 13 before continuing.
Water FlItration System IV can be installed In the basement if
there is not adequate room for under-sink installation, howev-
er. no more than 14 additional feet of tubing should be used.
Order Basement Installation Kit, Part No. 4373517 from your
Whirlpool dealer and follow the kit instructions. DO NOT use
filtration system if water is microbiologically unsafe or water
quality is unknown. Pretreat water that exceeds limits for
hardness, iron, manganese, and hydrogen sulfide.
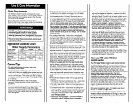
If you need assistance
Refer to the Use & Care Information at the end of this
booklet. If you need more help. the WhIrlpool Consumer
Assistance Center WIII answer any questions you may
have about operating or
malntalnlng
your RO water
filtration system. The WhIrlpool Consumer Assistance
Center is open 24 hours a dav. 7 days a week. Just dial
piercing lance enters pipe and stops.
l-800-253-1301-the call is ’
free. When you call, you will
need the RO water filtration
system model number and
senal number. Both num-
bers can be found labeled
on the top right side of filtra-
tlon assembly.
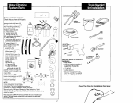
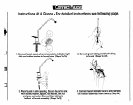
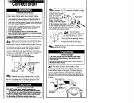
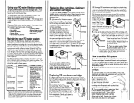
CONNECT FAUCET 1
l
Connect faucet spout, chrome
base plate, Indicator light disk
Q
and rubber washer to faucef base.
l
Connect green tubing and black tubing
to faucet.
l
Place faucet in sink opening. Secure
faucet to sink with slotted washer,
spacer, flat washer, hex nut and grey
connector. Connect blue tubing to
bottom of faucet assembly.
l
Connect faucet indicator wire to wire
harness on filtration assembly
Insert balterv.
Reverse Osmosis
Water Filtration System
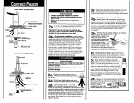
CONNECT TUBING
l
Install RO cartridge into flItration
assembly. Connect one end of
red tubing to bottom of RO
cartridge. Connect other end to green
tubing from faucet.
l
Connect orange tubing to saddle valve.
l
Use orange tubing from filtration
assembly to fill storage tank with water.
P-J w
l
Connect yellow tubing to storage tank.
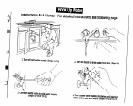
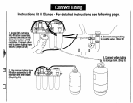
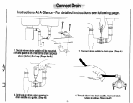
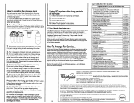
CONNECT DRAIN
I
l
Decide whereTdq@‘sa
l
Decide whereTd@t ‘sadd&Al ‘.: :
’
g
“../
I_^“’ *‘-”
be mou
a ho
:,&
;,. .,;*i’
?‘;
$.!Jk
on
0
;‘, (I
above (
g& I.
-1%: :
.%..
l
Connect drain saddle to drain pipe.
l
Connect drain saddle to drain pipe.
l
Drill hole In draln using openingjn drain
l
Drill hole In draln using openingjn drain
saddle as a guide. saddle as a guide.
* *
? *, ? *,
l
Thread elbow into drain saddle.
l
Thread elbow into drain saddle.
Connect black tubing to elbow. Connect black tubing to elbow.
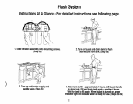
FLUSH SYSTEM
. Slide flItratIon assembly onto
mounting screws
. Turn on faucet and drain tank to
flush dlslnfectant from tank
*Turn on cold water supply and
saddle valve.
l
Allow tank to fill - approximately 4 hours
Lift faucet handle to drain tank. FIII and
drain tank agaln - another 4 hours. Walt
for tank to fill aoaln. When faucet is
0
r
turned on, gree% lndlcator light WIII
lndlcate water IS ready for use.
c
’ I