


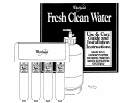
Product Damage
DO NOT connect to a hot water supply line.
Failure to follow this instruction could result in
product damage.
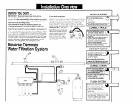
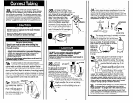
la
Take note of water requirements listed
. under the Use & Care section of this booklet.
The filtration system’s feed line (orange tubing)
connects to your cold water supply line using the
saddle valve.
Do not use saddle valve if it is prohibited by your
state or local plumbing codes.
The saddle valve is for use with 3/e” to %” outer
diameter (O.D.), soft copper pipe (plain or chrome
plated) or rigid metal or plastic pipe. Important: DO
NOT use the saddle valve on flexible ribbed
tubing. The wall thickness of flexible ribbed tubing is
thin and will not support the saddle valve supplied.
If your cold water supply is connected to the cold
water faucet with flexible ribbed tubing, contact your
local plumbing supply distributor to obtain special
connecting hardware.
Important: If local codes do not permit the use
of saddle valves, special feed valves can be
obtained from your local plumbing supply distrib-
utor. Use only I%” polyethylene tubing for water
line connection. DO NOT USE COPPER TUBING.
Property/Product Damage
l
DO NOT install tubing in an area where
temperatures drop below 32°F.
l
DO NOT overtighten saddle valve to copper
pipe. This will crush pipe.
l
Keep a bucket or towel under area where
saddle valve connection is made.
Failure to follow these instructions may result in
I
water damage to property or product damage.
lb
Turn off cold water
SUDDIV.
Turn on cold water
. faucet and allow all water to drain from line.
Turn off faucet. Determine if your cold water supply
line is soft copper pipe or rigid metal or plastic pipe.
If your cold water supply line is soft copper pipe
proceed to step 1 c. If your cold water supply line is
rigid metal or plastic pipe, skip ahead to step 1 h.
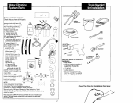
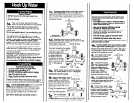
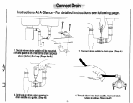
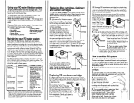
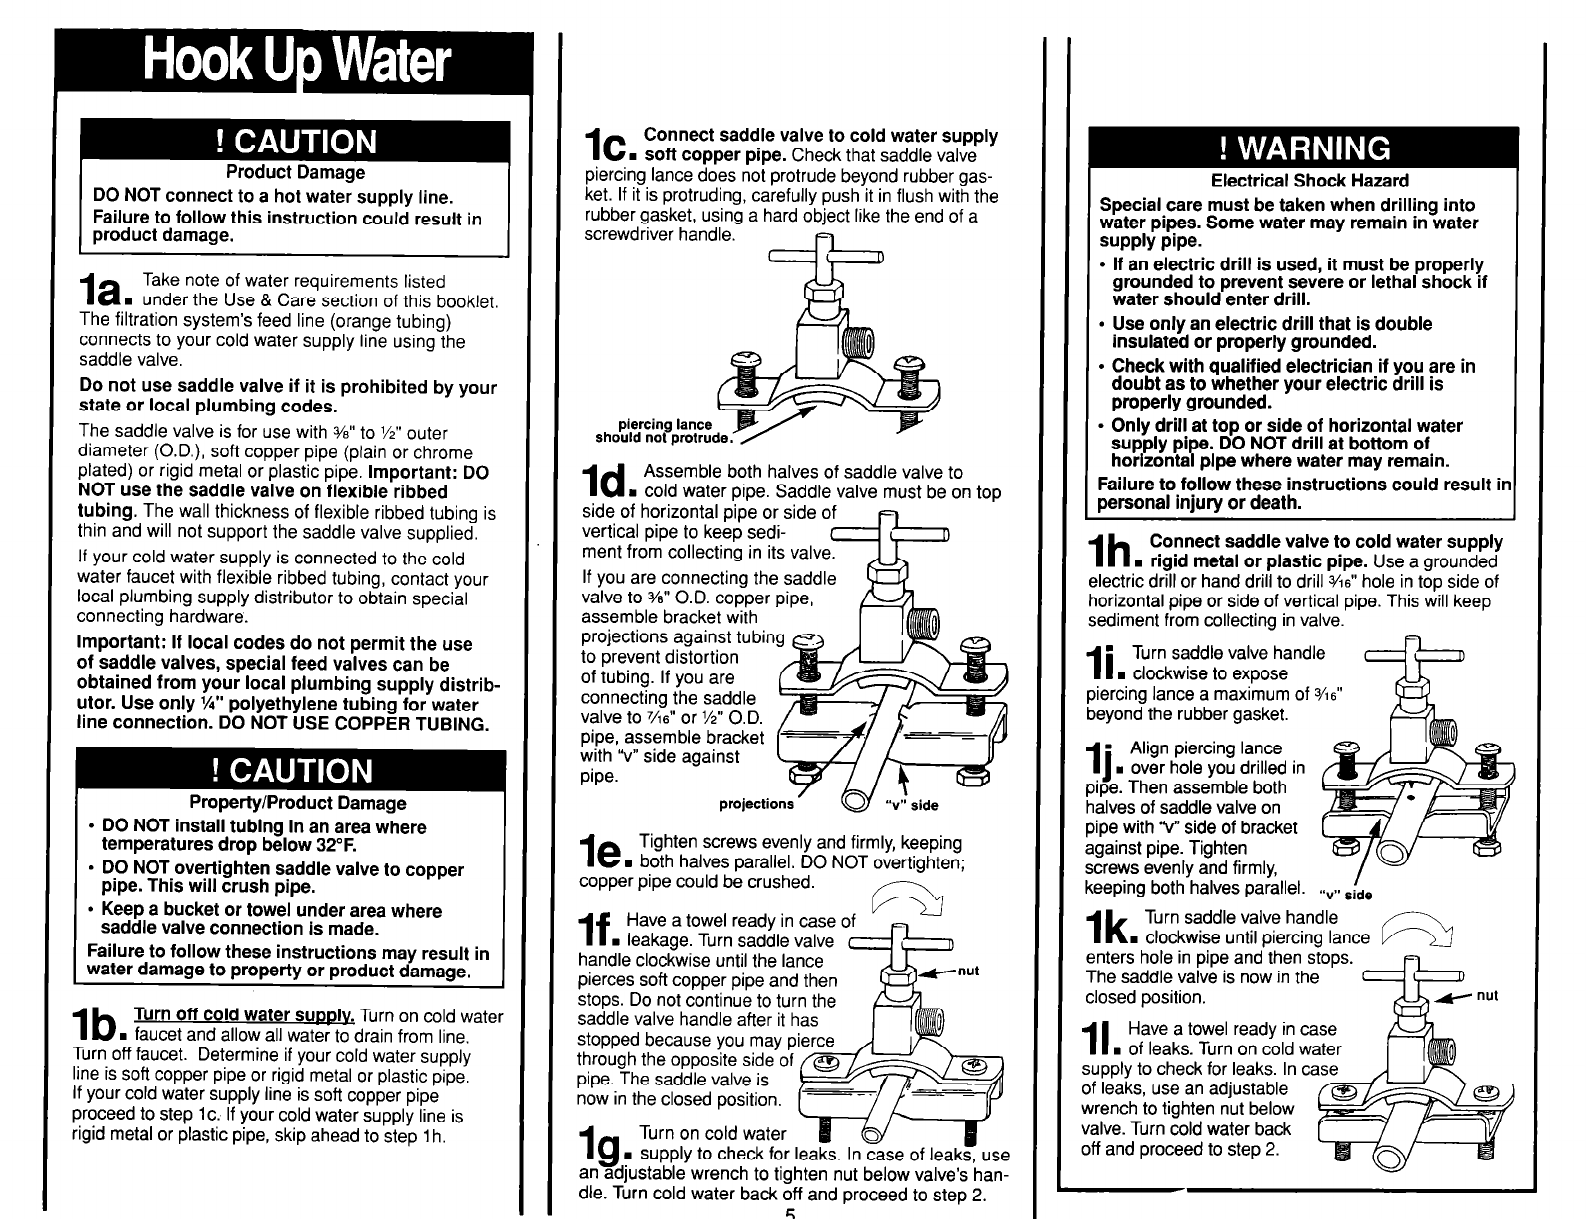
Ic
Connect saddle valve to cold water supply
. soft copper pipe. Check that saddle valve
piercing lance does not protrude beyond rubber gas-
ket. If it is protruding, carefully push it in flush with the
rubber gasket, using a hard object like the end of a
screwdriver handle.
piercing lance
should not protru
Id
Assemble both halves of saddle valve to
n
cold water pipe. Saddle valve must be on top
side of horizontal pipe or side o
vertical pipe to keep sedi-
ment from collecting in its valve.
If you are connecting the saddle
valve to YB” O.D. copper pipe,
assemble bracket with
projections against tubin
to prevent distortion
of tubing. If you are
connecting the saddle
valve to
7/d’
or %” O.D.
pipe. assemble bracket
--
with “v” side against
pipe.
projections ’ a “v’eide
le
Tighten screws evenly and firmly, keeping
. both halves parallel. DO NOT overtighten;
copper pipe could be crushed.
Turn on cold water
n
supply to check for leaks.
In case of leaks, use
an adjustable wrench to tighten nut below valve’s han-
dle. Turn cold water back off and proceed to step 2.
E
Electrical Shock Hazard
Special care must be taken when drilling into
water pipes. Some water may remain in water
supply pipe.
l
If an electric drill is used, it must be properly
grounded to prevent severe or lethal shock if
water should enter drill.
l
Use only an electric drill that is double
insulated or properly grounded.
l
Check with qualified electrician if you are in
doubt as to whether your electric drill is
properly grounded.
l
Only drill at top or side of horizontal water
supply pipe. DO NOT drill at bottom of
horizontal plpe where water may remain.
Failure to follow these instructions could result in
personal injury or death.
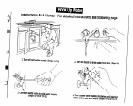
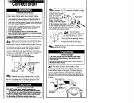
Ih
Connect saddle valve to cold water supply
. rigid metal or plastic pipe. Use a grounded
electric drill or hand drill to drill VW” hole in top side of
horizontal pipe or side of vertical pipe. This will keep
sediment from collecting in valve.
n
II
Turn saddle valve handle
. clockwise to expose
piercing lance a maximum of 54.5”
beyond the rubber gasket.
n
Align piercing lance
9
. over hole you drilled in
pipe. Then assemble both
halves of saddle valve on
pipe with ‘v” side of bracket
against pipe. Tighten
screws evenly and firmlv.
keeping both-halves pa&llel. .,v,, sLe
Ik
Turn saddle valve handle
. clockwise until piercing lance
enters hole in pipe and then stops.
The saddle valve is now in the
closed position.
II
Have a towel ready in case
. of leaks. Turn on cold water
supply to check for leaks. In
case
of leaks, use an adjustable
wrench to tighten nut below
valve. Turn cold water back
off and proceed to step 2.