6
Oven Temperature Offset Control
IMPORTANT: Do not use a thermometer to measure oven
temperature. Elements will cycle on and off as needed to provide
consistent temperature, but they may run slightly hot or cool at
any point in time due to this cycling. Most thermometers are slow
to react to temperature change and will not provide an accurate
reading due to this cycling.
The oven provides accurate temperatures; however, it may cook
faster or slower than your previous oven, so the temperature can
be adjusted to personalize it for your cooking needs. It can be
changed to Fahrenheit or Celsius.
To Adjust Oven Temperature:
1. Press SETTINGS/CLOCK until “TEMP CALIB” is displayed.
2. The current setting will be displayed.
3. Press START LOWER to select the choice displayed in Step 2.
Wait several seconds for the display to change or press START
LOWER, and then continue with Step 4.
4. Press the “3” keypad to increase the temperature in 5°F
(3°C) increments, or press the “6” keypad to decrease the
temperature in 5°F (3°C) increments. The range is from
-30°F to +30°F (-18°C to +18°C).
5. Press START LOWER.
6. Press CANCEL LOWER to exit and display the time of day.
Demo Mode
IMPORTANT: This feature is intended for use on the sales floor
with 120V power connection and permits the control features
to be demonstrated without heating elements turning on. If this
feature is activated, the oven will not work.
1. Press SETTINGS/CLOCK until “DEMO MODE” is displayed.
2. The current setting will be displayed.
3. Press the “1” keypad to adjust the setting.
4. Press CANCEL LOWER to exit and display the time of day.
Sabbath Mode
The Sabbath Mode sets the oven to remain on in a bake setting
until turned off.
When the Sabbath Mode is set, only the Bake cycle will operate.
All other cooking and cleaning cycles are disabled. No tones will
sound, and the displays will not indicate temperature changes.
When the oven door is opened or closed, the oven light will not
turn on or off and the heating elements will not turn on or off
immediately.
NOTE: If a power failure happens while Sabbath Mode is running,
the oven will show Sabbath Mode is on, but the Bake cycle will not
be on. If the oven door is opened during this time, the oven light
will turn on.
To Enable Sabbath Mode Capability (One Time Only):
1. Press SETTINGS/CLOCK until “SABBATH” is displayed.
2. Press the “1” keypad. Sabbath Mode can be activated
for baking.
3. Press CANCEL LOWER to save the setting and exit to display
the time of day.
NOTE: To disable the Sabbath Mode, repeat Steps 1 through 3
to change the status from “SABBATH ON” to “SABBATH OFF.”
To Activate Sabbath Mode:
1. Press BAKE.
2. Press the number keypads to set the desired temperature. If
the temperature entered is not in the range of the temperatures
allowed, the minimum or maximum allowed temperature will
be displayed. Enter a temperature in the allowable range.
3. Press START LOWER.
For timed cooking in Sabbath Mode, press COOK TIME, and
then press the number keypads to set the desired cook time.
Press START LOWER.
4. Press SETTINGS/CLOCK. Three tones will sound. Then
press “7.” “SAb” will appear in the display.
To Adjust Temperature:
1. Press the number keypad as instructed by the scrolling
text to select the new temperature.
NOTE: The temperature adjustment will not appear on
the display, and no tones will sound. The scrolling text
will be shown on the display as it was before the keypad
was pressed.
2. Press START LOWER.
To Deactivate Sabbath Mode:
Press SETTINGS/CLOCK, and then press “7” to return to regular
baking or press CANCEL LOWER to turn off the oven.
Aluminum Foil
IMPORTANT: To avoid permanent damage to the oven bottom
finish, do not line the oven bottom with any type of foil or liner.
For best cooking results, do not cover entire oven rack with foil
because air must be able to move freely.
Positioning Racks and Bakeware
IMPORTANT: To avoid permanent damage to the porcelain finish,
do not place food or bakeware directly on the oven door or bottom.
Racks
■ Position racks before turning on the oven.
■ Do not position racks with bakeware on them.
■ Make sure racks are level.
■ Place food so it will not rise into the broil element. Allow
at least ¹⁄₂" (1.3 cm) between pans and the broil element.
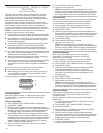
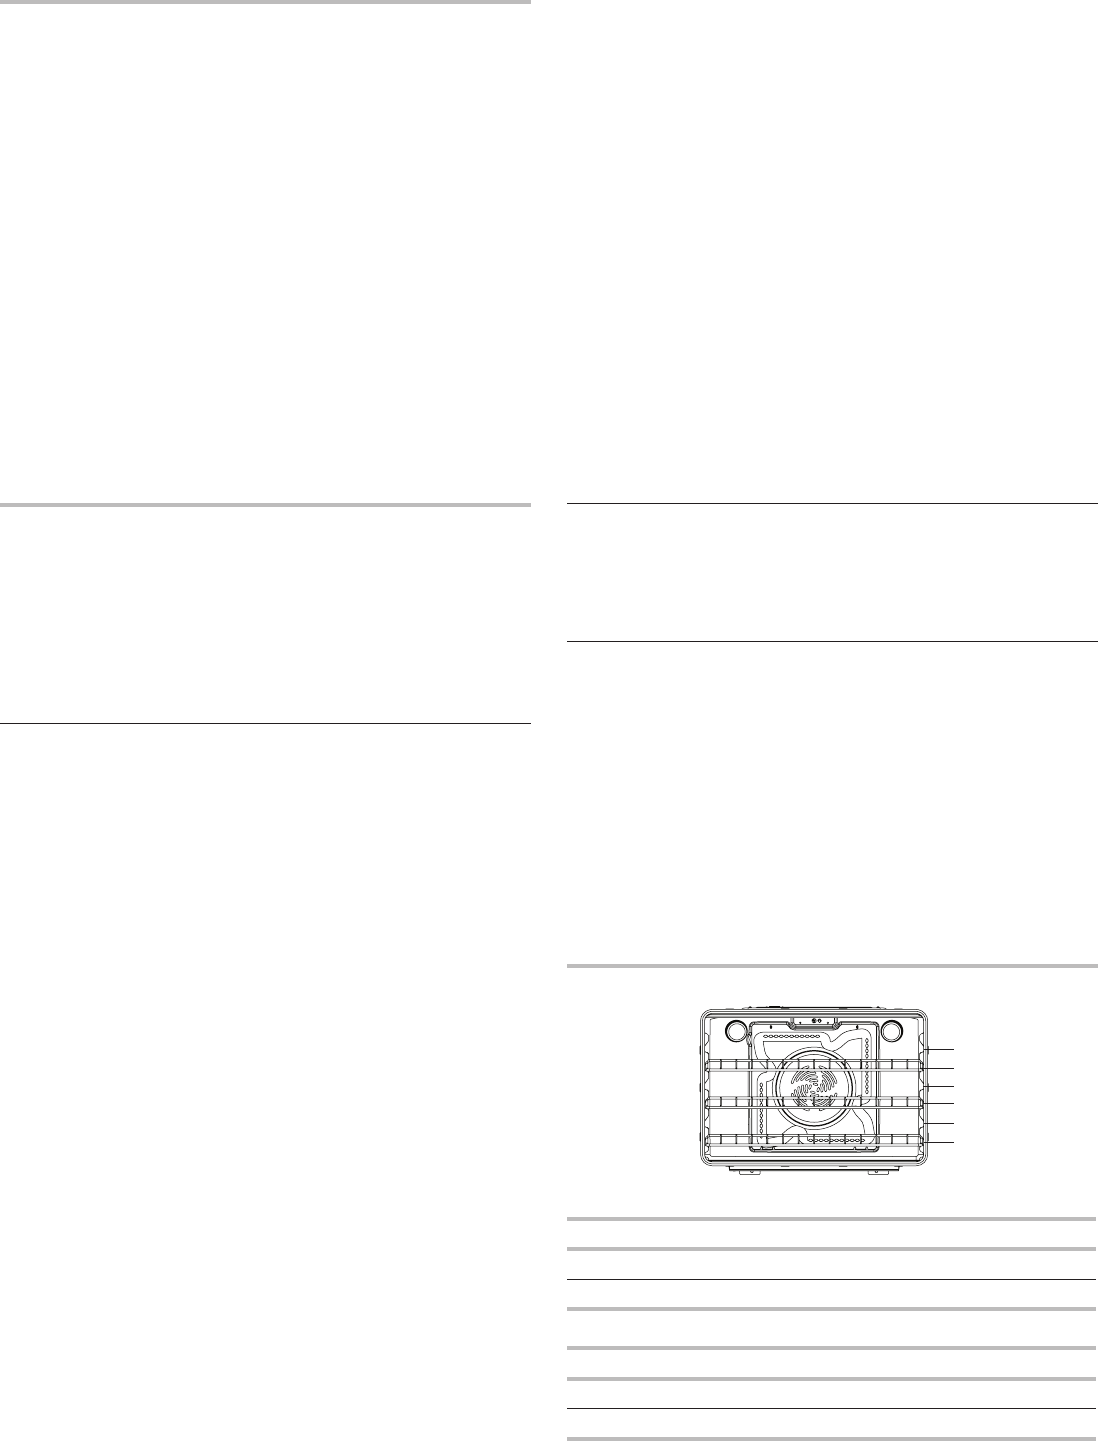
To move a rack, pull it out to the stop position, raise the front
edge, and then lift it out. Use the following illustrations and
charts as a guide for positioning racks.
Rack Positions
6
5
4
3
2
1
Food Rack Position
Broiled meats, poultry, fish 6
Broiling/searing meats, hamburgers, steaks 6
Broiling
Food Rack Position
Large roasts, roasted meats, or poultry 1 or 2
Most baked goods, casseroles 2 or 3
Baking


