


4. At the end of the cooking time, the oven will beep four times and the time of day will reappear
in the display window. Press the door release to open the door and using oven mitts, remove the food.
If the oven does NOT find the barcode in its database:
If the oven does not find the barcode in its database, the message NOT IN MEMORY appears on the display window.
Why Does NOT IN MEMORY Appear in the Display Window?
Your Westinghouse Microwave Oven comes pre-programmed with thousands of cooking directions for national
brand microwave foods. However, your oven may not recognize the barcodes for new, regional, private label, store,
or distributor foods. When you scan a barcode that your oven does not recognize,
NOT IN MEMORY appears
in the display window.
Using the Learn Function
When you scan a barcode that’s not already in the oven’s database, the message NOT IN MEMORY appears on
the display window. If this happens, you can use the Learn function to manually enter and save the required
cooking program to the oven’s database. This will allow your oven to recognize the barcode in future uses.
Refer to package directions or the recommended cooking power level guidelines in the chart on page 21.
Manually Adding a New Cooking Program to the Oven’s Memory:
1. Press LEARN. The red light at the end of the scanning wand will illuminate.
2. Scan the barcode on the package. (Please refer to Figure 4 for scanning procedure.)
3. Press the Power button to select the power setting. P 10 will appear in the display window.
Pressing
POWER repeatedly will reduce the power setting one level at a time from
P 10 (hightest) to P 1 (lowest).
4. Enter the desired cooking time by pressing the digits on the number pad.
If Two Stage Microwave cooking is required, enter the second power level and cooking time. If it is necessary
to perform any step such as stir, turn, uncover etc., it will be necessary to manually stop the oven at the
appropriate time and do so. It is not possible to program in a pause (stir) feature using the Learn Feature.
5. Press the
LEARN button to save the cooking program.
The next time you scan a package of this same food, the oven will recognize the barcode and automatically
program itself to cook the food according to the instructions that you entered.
The Learn Function can also be
used to customize the programmed cooking instructions.
While our test kitchens have programmed your oven
to cook foods according to popular taste, you may find that you prefer a longer or shorter time for some foods.
You may use the Learn function to tailor the oven’s pre-programmed cooking instructions to your individual
preferences. Cooking instructions that you manually enter using the Learn function take priority over pre-
programmed cooking instructions.
17
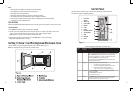
Using the Scanning Wand
Your Westinghouse Microwave Oven is equipped with a scanning wand that is similar to scanning equipment
used in many retail settings. The scanning wand on your Westinghouse Microwave is like having a “magic” wand
that tells your oven to automatically program itself for the ideal cooking time and power levels for packaged,
microwaveable foods.
To use the scanning wand:
1. Locate the barcode on the package of food that you wish to prepare. On the oven control panel, press SCAN.
The red light will come on in the end of the scanning wand.
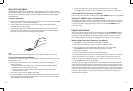
2. Hold the scanning wand as you would hold a pencil. Place the lighted end of the wand flat against
the package and to the left of the barcode.
3. Using a steady sweeping motion, move the wand across the bar code from left to right and from right
to left at a medium to fast speed. Be sure to scan the
entire barcode and to keep the wand tip touching
the package. A beep tells you that the barcode was scanned successfully.
Figure 4.
Scan the entire barcode from left to right beginning outside the left edge then back across it right to left.
If the oven finds the barcode in its database:
If the oven finds the barcode in its database, it will automatically program itself for the correct time and power
setting to prepare the food.
1. Before placing the food in the oven, be sure to follow label instructions for the recommended
container type and size.
• If the food is prepared in the original packaging, follow label instructions for package preparation
(peeling back a corner, piercing, puncturing, or slitting).
• Or, follow label directions for selecting an appropriate microwave-safe container and covering
or uncovering the dish as needed.
2. Place the food in the oven and press
START to begin cooking.
3. If the message
STIR appears on the display window durnig cooking, open the oven door using oven mitts
and perform the appropriate steps indicated on the package, ie. stir, turn, uncover, etc. Close the door
and press
START to resume the cooking program.
16