S M A R T R O O M S Y S T E M F O R M I C R O S O F T L Y N C
Software configurationguide
6 1022893 Rev02
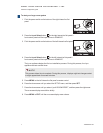
To start your medium room system with dual panels
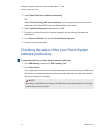
1. Flick the power switch on the bottom of the right interactive flat
panel.
2.
Press the Input Select button on the right interactive flat panel’s
front control panel until the input source is HDMI1.
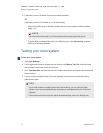
3. Flick the power switch on the bottom of the left interactive flat panel.
4.
Press the Input Select button on the left interactive flat panel’s
front control panel until the input source is HDMI1.
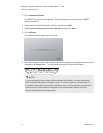
The Lync appliance begins the first-run installation process. During this process, the Lync
appliance restarts several times.
N O T E
This process takes time to complete. During this process, displays might not change content
or might appear blank for several minutes.
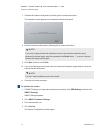
5. Press MENU on the left interactive flat panel’s remote control.
6. Press the down arrow until you select the SETUP menu, and then press SET.
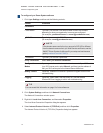
7. Press the down arrow until you select USBSETTING, and then press the right arrow.
8. Press the left or right arrow until the USB1 option is set to HDMI1.
9. Press MENU or EXIT until the on-screen display menu closes.
10. Repeat steps 5 to 9 for the right interactive flat panel.
11. Continue to Configuring Lync Room System software first-run installation settings on page 8.