


35
Read all instructions before installing or using this appliance.
Installation Instructions
Save these instructions for future reference.
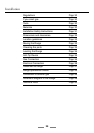
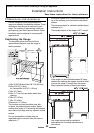
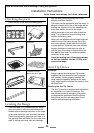
Checking the parts
Check that the range has the following parts.
4 grates Broiler pan and trivet
Leveling tool Handyrack
Meat tin 6 oven racks
Splashback & Plinth Conversion kit from
Natural gas to LP gas
Rear spacer
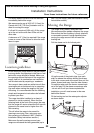
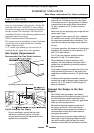
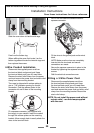
Leveling the Range
Place the range in its intended position taking
care not to twist it within the gap between the
kitchen units as damage may occur to the range
or the units. Install the oven shelves in the oven.
Check for levelness by placing a spirit level or a
cup, partially fi lled with water, on one of the oven
grids. If using a spirit level, take two readings-
with the level placed diagonally fi rst in one
direction and then the other.
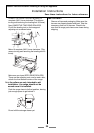
The rollers can be adjusted to level the range. To
adjust the height of the rear of the range use the
leveling tool supplied to turn the adjusting nuts
at the front bottom corners of the range.
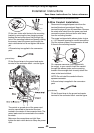
Adjust the height of the front roller to level the
range. Turn clockwise to raise the range and
counter clockwise to lower.
When you are satisfi ed with the height and level
raise the front of the range by one turn of the
front roller adjuster. Screw down the front feet
to meet the fl oor. Screw the front roller adjuster
counter clockwise to raise the front roller so
that the front of the range is supported on the
feet, not the front roller, to prevent accidental
movement of the range.
Leave the leveling tool in the storage drawer,
so that the customer can use it if they wish
to move the range.
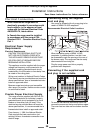
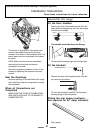
Anti-Tip Device
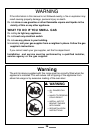
WARNING
Range must be secured by Anti-Tip bracket
supplied. See instructions to install (supplied
with bracket). Unless properly installed, the
range could be tipped by leaning on the door.
Injury might result from spilled hot liquids or from
the range itself.
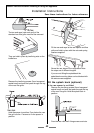
Installing the Anti-Tip Device
The Anti-Tip bracket is supplied with instructions
for installation in a variety of locations. The
instructions include all necessary information
to complete the installation. Read the Safety
Instructions and the instructions that fi t your
situation before beginning installation.