


40
Read all instructions before installing or using this appliance.
Installation Instructions
Save these instructions for future reference.
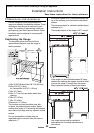
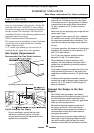
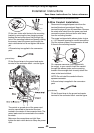
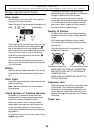
Fit the new strain relief device to the mounting
bracket by removing the two clamping screws,
feeding the two halves (ears fi rst) through the
hole in the mounting bracket and loosely refi tting
the screws. Insert the power cord through the
strain relief device but do not tighten the device
yet.
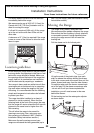
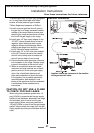
A Ground strap is supplied in the conversion
pack.
ground strap.
Fit the Ground strap to the ground and center
terminal of the connector block - see the fi gure.
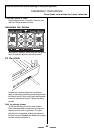
The neutral or ground wire of the power cord
must be connected to the neutral terminal
located in the center of the connector block. The
power leads must be connected to the outside
terminals.
Make sure the connections are tight. Now
tighten the stain relief device to clamp the power
cord.
Refi t the electrical connection cover
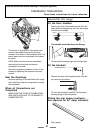
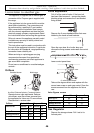
3-Wire Conduit Installation
Disconnect the supplied power cord from the
terminal block and ground post. Keep the
terminal block parts; you will need them. Remove
the strain relief clamp from the power cord and
remove the power cord and strain relief clamp
from the mounting bracket.
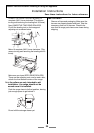
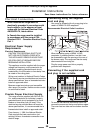
The range is shipped with reducer plates to give
a 1 1/8’’ diameter opening for conduit connection.
Find the reducer plates in the conversion kit and
fi t them to the mounting bracket.
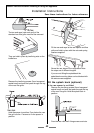
Fit a squeeze connector (not supplied with
the range), to your conduit. Insert the conduit
through the reducer plates on the mounting
bracket. Allow enough slack to easily attach the
wires to the terminal block.
NOTE: Do not install the conduit without a
squeeze connector.
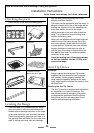
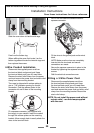
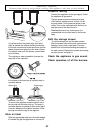
A Ground strap is supplied in the conversion
pack.
ground strap.
Fit the Ground strap to the ground and center
terminal of the connector block - see the fi gure.