


SERVICING - WARNING
Disconnect from electricity and gas before servicing. Check ap pli ance is safe when you have finished.
44
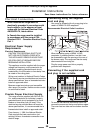
Range operational checks
Oven check
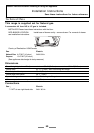
Set the clock to the time of day - the ovens will
not work if the clock is not set.
When the clock is fi rst connected the display will
fl ash (
) and ( ) alternately.
To set the clock to read the time of day turn and
hold the Setting knob to the clock symbol ( )
and at the same time turn the Adjusting knob
left or right until the clock shows the time of day.
This is a 12 hour clock. Let go of the Setting
knob and it will spring back to the vertical (
)
oven manual setting.
Turn on the oven and check that the oven fan
starts to turn and that the oven starts to heat up.
Turn off the oven.
Broiler
Open the broiler compartment door. Turn on the
broiler control and check that the broiler heats
up.
Oven Light
Press the oven light switches and check that the
lights are working.
Note. The oven light bulbs are not included in
the guarantee
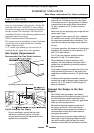
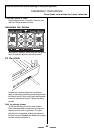
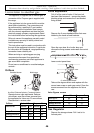
Check Ignition of Cooktop Burners
Operation of all cooktop burners should be
checked after the range and gas supply lines
have been carefully checked for leaks.
Check each burner in turn. There is a fl ame
safety device that stops the fl ow of gas to the
burner if the fl ame goes out. There is also a
spark ignition system that works when the knob
is pressed in.
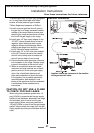
For each burner, push in and turn a knob to the (
) lighting position.
The igniter should spark and light the gas.
Keep holding the knob pressed in to let the gas
through to the burner for few seconds.
If, when you let go of the control knob, the
burner goes out, the safety device has not held
in. Turn the control to the off position and wait
one minute, then try again this time holding in
the control knob for slightly longer.
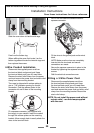
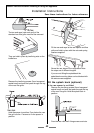
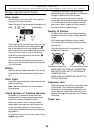
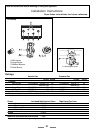
Quality of Flames
On Natural Gas the burners fl ames should be
a blueish color with, at most, a slight yellowish
fringe.
On Propane gas the fl ames may be “softer”.
The cooktop burner fl ames may have a slight
yellowish tip.
If the fl ame burns with a long white tip you
should call for service.
Normal fl ame appearance Burner not fi tted correctly
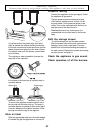
MAKE SURE THE FLOW OF COMBUSTION
AND VENTILATION AIR TO THE RANGE IS
UNOBSTRUCTED.
MAKE SURE ALL CONTROLS ARE LEFT IN
THE OFF POSITION.
Customer care
Please complete your details in the inside cover
of this Guide. Then replace this Installation
Guide back in the Customer Care Pack in the
correct position. Please inform the user how to
operate the range and hand over the Customer
Care Pack.
Thank you.