


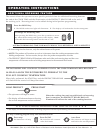


OPERATING INSTRUCTIONS
MN-28907 (Rev 0) • AR-7EVH Electric Rotisserie with Ventless Hood Operation & Care Manual • 17
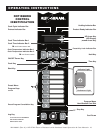
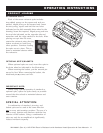
STANDARD SPITS
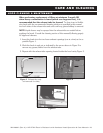
Each of the seven rotisserie spits includes
two welded prongs on the square end and one
welded, ridged prong on the tapered end. Insert
the two-prong, square end into the two holes
indicated on the disk assembly drive wheel in the
drawing. Insert the tapered, ridged-prong end into
the top hole indicated on the opposite side and
maneuver until the ridge catches in the hole. After
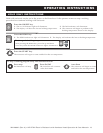
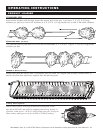
placing one spit into the oven,
rotate the rotisserie using the jog
button as shown to load every
other position. Continue loading
the spits one at a time. This is
done to maintain balance within
the rotisserie.
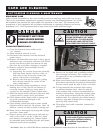
OPTIONAL SPITS/BASKETS
When optional spits are used, insert the spits in
the drive wheel as indicated in the illustration.
When inserting the basket, put the smooth pin
(A) end in first. When removing the basket, the
machined pin (B) comes out first.
IMPORTANT NOTE:
When using a partial quantity of standard or
optional spits, space the spits evenly as possible
around the drive wheel to maintain balance and
even rotation.
SPECIAL ATTENTION:
A combination of standard, piercing, and
basket spits can be used at the same time but
NOT
in every spit insertion position. The use of a
spit in every position will interfere with the free
rotation of the baskets. Using a combination of
spits can only be accomplished at significantly
reduced rotisserie capacity.
B
A
PRODUCT LOADING