15
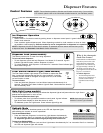
Ice Dispenser Operation
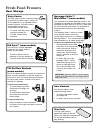
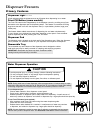
To dispense ice:
Select Cubed or Crushed ice mode by pushing button on dispenser control panel. A green indicator light above button
shows mode selection.
Press container against dispenser pad. When dispensing crushed ice, hold container as close to chute
as possible to reduce spraying. Selection mode may not be changed while ice dispenser is in operation.
NOTE: If dispenser is active for more than 3 minutes, an automatic lock out sensor will shut down power
to dispenser area. See Automatic Lock Out for further information.
Dispenser Features
Control Features
Dispenser Lock (some models)
This feature prevents ice or water from being dispensed.
To lock and unlock dispenser:
To lock dispenser, press and hold Dispenser Lock button for 3 seconds. A green
indicator light above button confirms dispenser is locked.
To unlock dispenser, hold Dispenser Lock button for 3 seconds. Green indicator light
above button will go out.
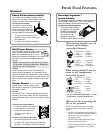
What is the Automatic
Lock Out feature?
The Automatic Lock Out feature
shuts down power to the water
and ice dispenser when either
dispenser has run continuously
for approximately 3 minutes. If
this mode goes into effect, the
green light will activate above the
Dispenser Lock button.
To unlock dispenser:
• To unlock dispenser, hold
Dispenser Lock button for 3
seconds. Green indicator
light above button will go
out.
Filter Status Indicator Light (some models)
The Filter Status Indicator Light serves as a reminder to replace the water
filter. A green light indicates that the filter is in good condition. A red light
indicates the filter should be changed. Once light turns red, it will remain
red until function is reset.
To reset indicator:
Press and hold both Dispenser Lock and Water buttons simultaneously for 4
seconds. The green Filter Status Indicator Light will flash 3 times when the function
has successfully reset.
Auto Light (some models)
The Auto Light function offers the ability to activate the dispenser light at half-power when the Light Sensor
detects that the light levels in room are low.
To activate and deactivate Auto Light:
To activate, press Auto Light button located on control panel. A green indicator
light above button displays to show that sensor is active.
To deactivate, press Auto Light button. Green indicator light will go out.
NOTE: Dispenser light will operate
whether or not Auto Light is selected.
NOTE: These directions pertain to 5-button and 3-button controls only. If your unit has
LCD controls, please refer to the information booklet located in your literature packet.
Sabbath Mode
This mode is intended to deactivate power to the LED and dispenser lights,
while allowing the controls to remain operational.
To activate Sabbath Mode:
Press and hold both Dispenser Lock and Auto Light buttons simultaneously
for 3 to 4 seconds. After 3 to 4 seconds, the LED and dispenser lights will turn
off. Dispenser light will not activate during dispensing while in this mode.
To deactivate Sabbath Mode:
Press and hold both Dispenser Lock and Auto Light buttons simultaneously for 3 to 4 seconds. After 3 to 4 seconds,
the LED and dispenser lights will activate.
NOTE: In the event that power is
interrupted while the Sabbath Mode
is active, the control will remain in
Sabbath Mode when power returns.
+


