HELPFUL HINT:
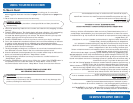
1. Read all instructions and important safeguards.
2. Remove all packaging materials and check that all items have been received
in good condition.
3. Tear up all plastic bags as they can pose a risk to children.
4. Wash lid, steam vent and accessories in warm, soapy water. Rinse and dry
thoroughly.
5. Remove the inner cooking pot from rice cooker and clean with warm, soapy
water. Rinse and dry thoroughly before returning to cooker.
6. Wipe body clean with a damp cloth.
USING YOUR RICE COOKER
Before First Use:
To Cook Rice:
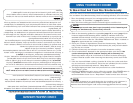
1. Using the measuring cup provided, measure out the desired amount of rice.
One full, level cup of uncooked rice will yield 2 cups of cooked rice. The
measuring cup provided adheres to rice industry standards (180mL) and is not
equal to one U.S. cup (240 mL).
2. Rinse rice in a separate container until the water becomes relatively clear;
drain.
3. Place rinsed rice in the inner cooking pot.
4. Using the measuring cup provided or the water measurement lines located
inside the inn
er cooking pot, add the appropriate amount of water. See the
“Rice/Water Measurement Table” on page 6 for suggested rice/water ratios.
4
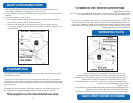
5. Making sure that the exterior of the inner cooking pot is clean, dry and free of
debris; set the inner cooking pot into the rice cooker. Snap the lid closed
securely and plug the power cord into a wall outlet.
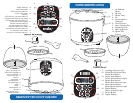
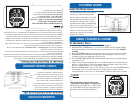
6. Turn the rice cooker on by pressing the POWER button. Each button’s indicator
light will flash in succession and the digital display
will show two blue dashes.
7. To begin cooking, press the WHITE RICE or BROWN RICE button, depending
upon the type of rice to be cooked. The selected function’s indicator light will
illuminate.
8. After approximately 5 seconds, the COOKING INDICATOR LIGHT will illuminate to
show that the rice cooker has begun cooking. Once cooking is complete, the
rice cooker will automatically switch to “Keep-Warm” mode.
CONTINUED ON NEXT PAGE
NOTE:
• Do not use abrasive cleaners or scouring pads.
• Do not immerse the rice cooker base, cord or plug in water at any time.
• To add an extra dimension of flavor to rice, try substituting a favorite variety
of meat or vegetable broth or stock. The ratio of broth/stock to rice will be
the same as water to rice.
CONSEJO ÚTIL:
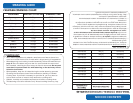
1. Lea todas las instrucciones y todas las medidas de seguridad.
2. Desempaque los materiales de embalaje y verifique que todos los artículos hayan
llegado en buen estado.
3. Deshágase de todas las bolsas de plástico ya que pueden significar un riesgo para
los niños.
4. Ventile al vapor y lave la tapa y los accesorios con agua limpia, tibia y jabonosa.
Enjuague y seque concienzudamente.
5. Desmonte la charola interior de la olla y límpiela con agua limpia, tibia y jabonosa.
Enj
uague y seque concienzudamente antes de regresarla a la olla.
6. Enjuague el bastidor con un trapo húmedo.
Antes de usarse por primera vez:
Para cocinar el arroz:
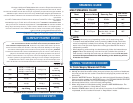
1. Utilizando la taza para medir, mida la cantidad de arroz deseada; una taza llena
de arroz crudo debe de rendirle dos tazas de arroz cocido. La taza medidora
provista se adhiere a los estándares de la industria arrocera (180 ml.) y no es igual a
la taza americana (240 ml.).
2. Enjuague el arroz en un recipiente separado hasta que el agua se vuelva clara,
después drene.
3. Ponga el arroz enjuagado en la olla de cocinar.
4. Usando la taza para medir que viene con el equipo, o las líneas
para medir el agua
que están localizadas adentro de la olla de cocinar, agregue la cantidad de agua
apropiada. Vea las “Tablas para Medir el Arroz/Agua” en la página 6 para accesar
las proporciones sugeridas de arroz/agua.
4
5. Para asegurarnos que el exterior de la olla de cocinar esté limpio, seco y libre de
deshechos, coloque la olla de cocinar en la olla de presión, asegúrese que la tapa
esté cerrada propiamente y conecte el cordón eléctrico en el enchufe del muro.
6. Prenda la arrocera presionando el botón de Poder (Power). Cada una de las
luces indicadoras de los botones tendrán destellos sucesivos y la pantalla digital
enseñará dos rayas azules.
7. Para empezar a cocinar, presione los botones de ARROZ BLANCO o ARROZ
INTEGRAL, dependiendo del tipo de arroz que se va a cocinar. La luz de la
función seleccionada se iluminará.
8. Después de aproximadamente 5 segundos la LUZ INDICADORA DE COCIMIENTO
se prenderá para indicar que la olla ha empezado a
cocinar. Una vez
terminado el cocimiento, la arrocera automáticamente cambiará a la
modalidad de Manténgase Caliente (Keep-Warm).
NOTA:
• No use limpiadores abrasivos o estropajos.
• Nunca meta al agua la base de la olla, cordones, clavijas o enchufes.
• Para agregarle una dimensión extra de sabor al arroz, trate de sustituirlo con
una variedad de su caldo de carne o de verduras favoritos; el índice
porcentual de caldo/arroz debe de ser el mismo que el de agua con el arroz.
CONTINÚA EN LA PÁGINA SIGUIENTE
COMO USAR SU APARATO


