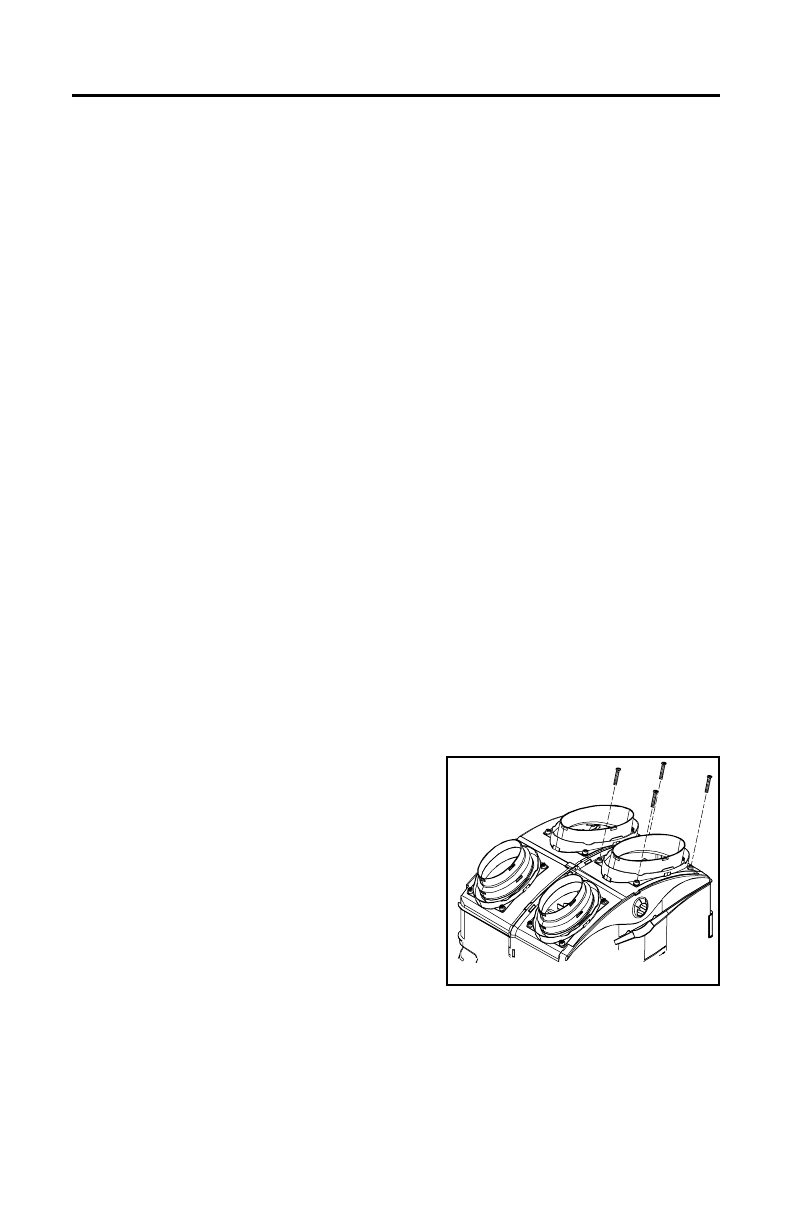
4.2 MOUNT THE PORTS ON THE UNIT
Mount the 8” oval ports and the 5” to 6” oval
ports on the top of the unit using the screws
provided in the hardware box (4 screws
#8 x 3/4” long per port).
NOTES: 1. The HEPA 1000 and the HF 1.0
units don’t have the 5” to 6” oval
ports.
2. If an optional wall control has to be
installed, do not install the front
8’’ oval port at this time.
4. INSTALL THE UNIT
Here are the tools and materials needed to perform the installation:
- Phillips screwdriver #2 or Robertson #1
- Hammer and flat blade screwdriver (for plenum connection installation only, to
make holes in existing metal duct)
- Scissors or utility knife (to cut duct tape)
- Duct tape
- Tin snips or metal shear (for plenum connection installation only, to cut ductwork)
- Aluminum duct tape (for plenum connection installation only)
- Jig saw (except for the HEPA 1000 unit)
- Caulking gun and caulking (except for HEPA 1000 and HF 1.0 units)
- 17 -
VO0018
4.1 LOCATING AND MOUNTING THE UNIT
Choose an appropriate location for the unit.
• Within an area of the house where the ambiant temperature is between 10°C
(50°F) and 65°C (149°F) (basement, furnace room, closet, etc.).
• So as to provide easy access to the interior of the unit, for filter maintenance.
• Close to an exterior wall, so as to limit the length of the insulated flexible
duct to and from the unit (not necessary for HEPA 1000 and HF 1.0 units).
• Away from hot chimneys and other fire hazards.
• Allow for a power source (standard 3-prong grounding outlet).
• Close to a drain. If no drain is close by, use a pail to collect run-off.
(for HEPA 3000 and HF 3.0 units only).


