


Note the numbers on the color control dial. The pizzelle will be darker or lighter in color depend-
ing on the exact setting of this dial. The color control dial is relatively sensitive and fractional
numerical changes can make a noticeable difference in color and baking time. The common
operating range for the color control dial is 3 to 3 ½. To darken the pizzelle, move toward a
higher number.
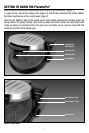
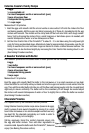
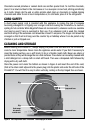
The PizzellePro
®
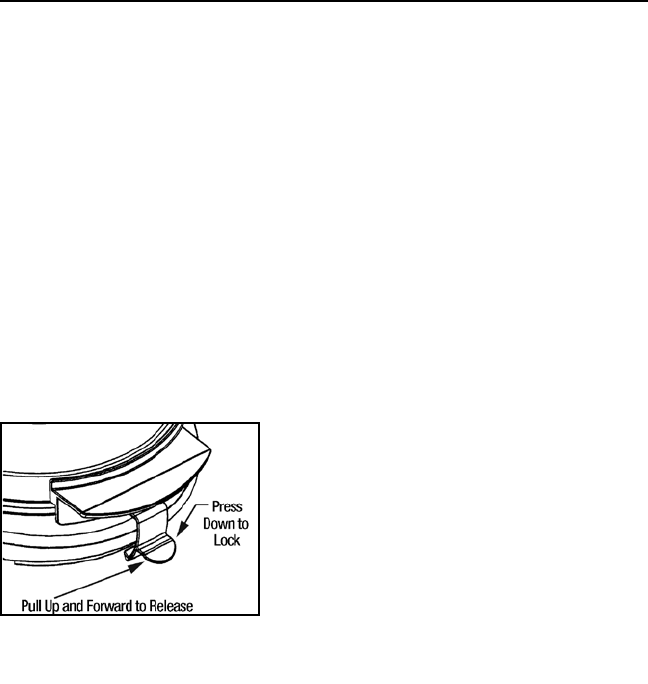
is equipped with a locking latch designed to minimize lifting of the lid during
the baking cycle. This will help maintain uniform thickness of each of the three pizzelles. This
latch can be conveniently unlocked by lifting the finger release (Figure 3), which is an integral
part of the latch.
Provision has been made for cord storage as described in Cleaning and Storage section. The cord
can be wrapped under the PizzellePro
®
with the plug secured in a slot molded into the base.
The PizzellePro
®
can be stored upright to save shelf space. Simply close the lid and stand it
upright resting on the flat hinged end.
PREPARING THE PizzellePro
®
FOR BAKING
Insert the PizzellePro
®
power cord into a grounded 120 volt, 60 cycle outlet and close the
cover. The red “Baking” light will turn on immediately, indicating the pizzelle plates are heating. In
order to avoid injury as the PizzellePro
®
heats, do not touch the hot metal lid or the pizzelle plates.
Handle the PizzellePro
®
only by the handle of the lid and by other plastic parts. Set the color
control dial at 3. As you close the lid, the latching mechanism under the lid handle should snap
securely under the base of the PizzellePro
®
, locking down the lid. If the latch did not automati-
cally snap under the base, use your finger to depress the release arm (Figure 3) to complete the
latching action.
In about 3-4 minutes the red “Baking” light will turn off and simultaneously the green “Ready” light
will turn on, indicating the pizzelle plates are hot and ready for baking. On the first heating cycle
you may detect a slight odor, typical of new heating elements with non-stick surface coatings.
When the green “Ready” light turns on, pull up on the release arm to release the latching mecha-
nism and open the lid of the PizzellePro
®
. Do not attempt to force the lid open without unlatching
– or you will damage the latch. Brush or spray a light coating of vegetable oil, corn oil, non-stick
cooking spray, melted margarine or butter over the entire surface of both the upper and lower
heated plates. Because both of the baking surfaces are factory finished with a non-stick coat-
ing, it is necessary to oil the surfaces only the first time you use the PizzellePro
®
. It should not
be necessary to oil again on subsequent use so long as the plates are at sufficient temperature
before use and enough time is allowed for the pizzelles
to fully bake before opening the lid.
If you are looking for a good pizzelle recipe, see section
“Some Favorite Pizzelle Recipes” (page 7).
It takes only about one measuring teaspoon of batter to
make a single pizzelle. Most table teaspoons in use are
actually 1 ½ standard teaspoon measuring spoons and
are too large for dispensing pizzelle batters, which typical-
ly are thick and tend to heap up on the dispensing spoon.
Some demi-tasse spoons are well sized and shaped for
Figure 3. Locking Latch.
5