


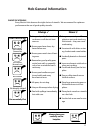
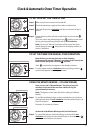

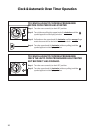
Step 1 Check that the correct time of day is set, if not follow instructions
for setting the time of day.
Step 2 Place food onto the correct shelf position in the oven and close the
oven door(s).
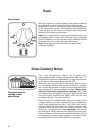
Step 3 Turn the upper knob (A) (without pulling), clockwise, until the
symbol appears in the display window.
This allows the auto function to be set.
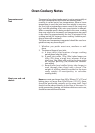
Step 4 Set the orange finger to the "Start" time by pulling the upper knob
(A) and turning it clockwise.
e.g. 5 o'clock (as shown).
Note: The "Start Time" is the time of day you want the Auto
Cooking programme to start.
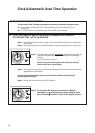
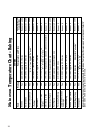
Step 4 Set the "Cook Period" by turning (without pulling) the upper knob
(A) clockwise, until the required cook period in minutes is
indicated in the display window.
e.g. 120 minutes (as shown).
Note: The "Cook Period" is the length of time that you wish the
food to cook, and it can be set for up to 180 minutes.
Step 5 Turn the oven control(s) to the required temperature, and if
necessary select the appropriate oven function.
Note: If an “Auto Cooking Programme” has been set the oven(s)
will ONLY operate during the pre-programmed times.
At the end of the Auto Cook Period the oven(s) will switch off
and a bell will ring for approximately 4 minutes.
Step 6 Return the oven controls to the OFF position.
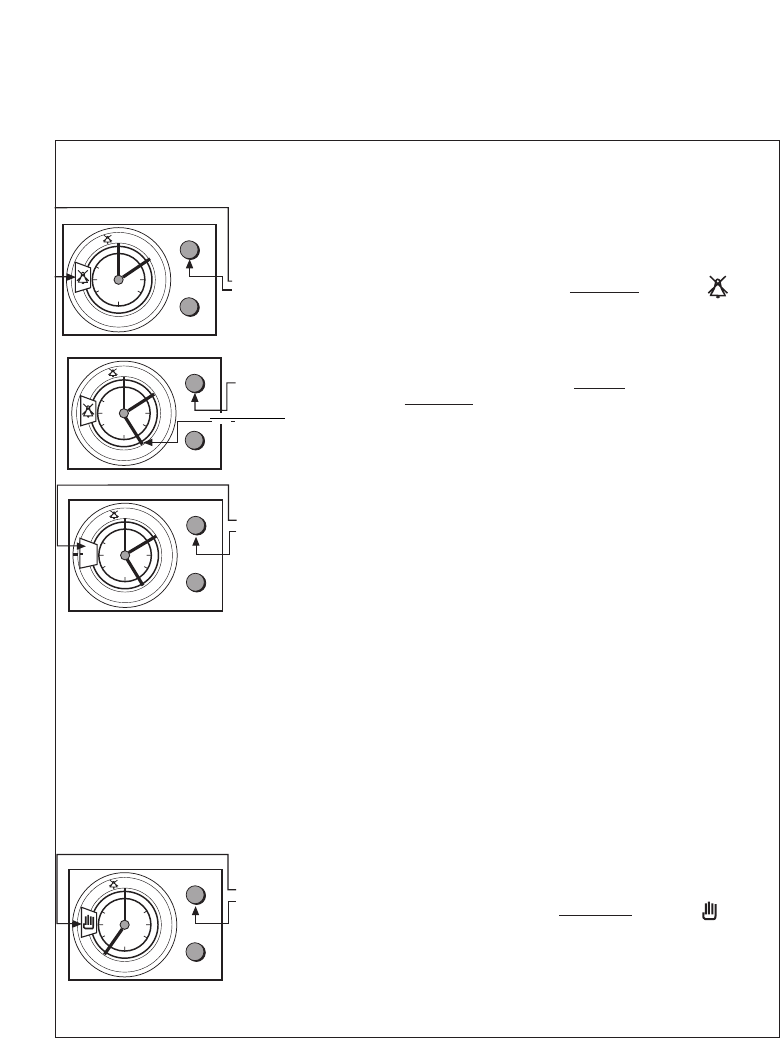
Step 7 To cancel the Bell and return the timer to "Manual Operation",
turn (without pulling), upper knob (A) clockwise, until the
symbol is shown in the display window.
b) TO SET THE TIMER TO SWITCH THE OVEN(S) ON AND OFF AUTOMATICALLY
12
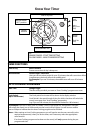
1
2
3
4
5
6
7
8
10
11
20
30
40
50
A
B
12
1
2
3
4
5
6
7
8
10
11
20
30
40
50
A
B
12
1
2
3
4
5
6
7
8
10
11
30
40
50
A
B
20
120
12
1
2
3
4
5
6
7
8
10
11
10
30
40
50
A
B
20
Clock & Automatic Oven Timer Operation
19