


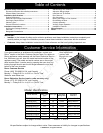


7
Installation Instructions
Backguard Kit Installation
See page 3 for available model numbers and compatibility.
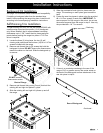
If installing a backguard other than the standard size,
install it before pushing the range into place. Install the kit
according to the accompanying installation instructions.
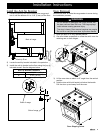
Self-Rimming Trim Installation
The self-rimming trim kit is for use with model ER36GI with
a self-rimming cutout and low profile (1 3/4”) backguard
only. When installed, the kit accommodates countertop
thicknesses up to 1 5/8”. Install the trim pieces and side
panels before pushing the range into place. A T-20 Torx
driver is required.
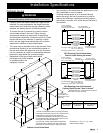
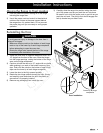
Locate the three (3) trim pieces, the two (2) self-1)
rimming side panels and the fourteen (14) #8 x 1/4 Torx
screws included with the range.
Remove and discard the six (6) screws that hold the 2)
backguard in place. DO NOT remove the three screws
toward the center on the back. Slide the backguard up
to remove.
Remove and discard the screws (5 each) that hold the 3)
existing left and right trim pieces in place.
Slide the existing left and right trim pieces up and off 4)
the range.
Slide the provided left and right trim pieces onto the 5)
range. The overhang on each piece goes toward the
back.
Fasten the new trim pieces in place using the provided 6)
#8 x 1/4 Torx screws (3 each side). IMPORTANT: To
ensure proper fit of the range in the cutout, do not use
the screws removed from the range in step 3. Use only
the provided #8 x 1/4” Torx screws.
If there is a countertop overhang to the rear of the 7)
range of 3/4” or greater, remove the center screw on
the back of the backguard to allow attachment of the
rear trim piece in step 8.
Continued...
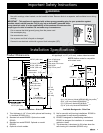
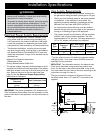
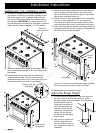
Overhang
Back of Range
DO NOT remove
three center screws
Rear of Backguard