


11
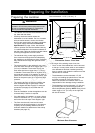
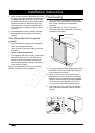
4. Once the dishwasher is in place check to make
sure all slack is pulled out of the power cable,
water supply line and drain hose. Check to make
sure none of them are pinched or kinked.
NOTE: Do not attach the mounting screws until after
Verifying Operation.
Water Line Connection
CAUTION
• The unit has a float switch in the base pan
to protect against flooding. If the inlet valve
connection on the dishwasher is not seated
properly, water may leak into the base pan and
activate the float switch.
• To avoid water leaks, use only the water supply
line provided with the dishwasher.
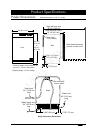
1. Before connecting the water supply line, make
sure the water pressure and flow rate meet the
specifications on page 4.
2. Flush the water supply line prior to connecting it
to the dishwasher’s water supply line.
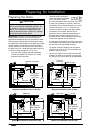
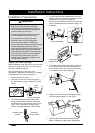
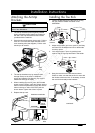
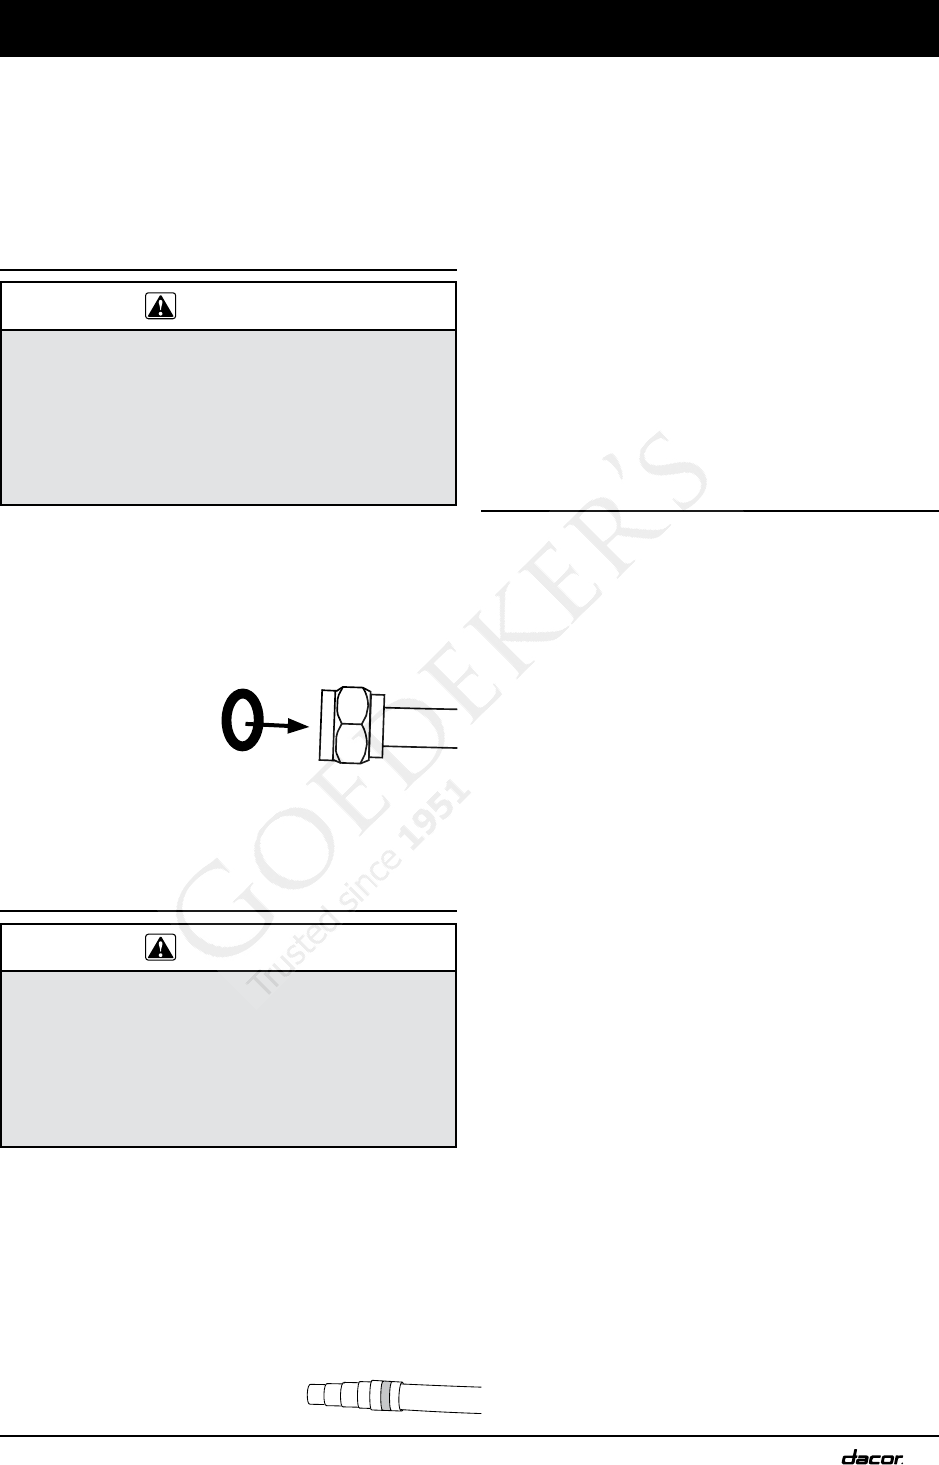
3. Insert the provided “O” ring in the end of the
water supply line.
Make sure it is
evenly seated on
the end of the
tubing.
4. Connect the end of the water supply line to the
water line. Tighten the connection by hand plus a
quarter turn with a crescent wrench.
Drain Line Connection
CAUTION
• For proper dishwasher operation and drainage,
the drain line must be routed through the bottom
of the cabinet and up to the drain or air gap
connection. The drain hose or air gap outlet
must connect above the sink trap.
• If required, the air gap must be installed at
countertop level.
1. If the drain will connect to a waste disposer,
see the disposer manufacturer’s installation
instructions for correct drain hose mounting
techniques. Most disposers have a plug on the
drain line connection that must be removed prior
to attaching the drain line. Also, any joints must
have a minimum 7/8” (2.2 cm) inside diameter.
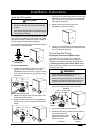
2. Cut the drain hose adapter on the end of the
drain hose to the appropriate size for the air
gap, waste tee, disposer
connection or hose extension.
Installation Instructions
3. Connect the drain hose to the air gap or directly
to the waste tee or disposer above the sink trap
as shown in one of the examples on page 6.
4. Tighten the holding clamp.
5. For installations with an air gap, make sure that
the drain line between the air gap and the waste
tee or disposer is in place and that it is clamped
tightly on both ends.
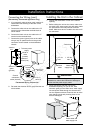
6. To ensure proper operation, inspect the drain
system to make sure that:
• No part of the drain hose is higher than 35”
(88.9 cm) from the bottom of the dishwasher.
• The connection to the waste tee or disposer is
a minimum of 20” (50.8 cm) above the bottom
of the dishwasher base.
Verifying Operation
Pre-verification Check List
1. Confirm that the power to the dishwasher is shut
off at the circuit breaker panel.
2. Make sure all packing material has been
removed from inside the dishwasher.
3. Familiarize yourself with operation of the
dishwasher by reading the use and care manual.
4. Remove any protective film, if present from the
control panel, door panel, etc.
5. Check again that the entire length of the power
cable, water line and drain hose are free of
pinches or kinks.
6. Verify that the dishwasher is level front to back
and side to side inside the cutout. Re-level if
necessary before testing the unit.
Wet Test Checklist
1. Turn on the water supply and wait for five
minutes. Check for leaks. Tighten connections
if necessary. NOTE: Improper installation of the
water supply line “O” ring can cause the water
line to leak at the connection.
2. Turn on power to the dishwasher at the circuit
breaker panel or fuse box. Make sure the power
cord is connected to the electrical outlet (if
applicable).
3. Test dishwasher operation by running a Rinse
and Hold cycle (which takes about six minutes).
See the use and care manual for specific
operating instructions. Check to make sure that
the dishwasher takes in water and drains.
continued...