11
ባ
I
I
I
I
I
I
I
I
II
I
I
I
I
I
I
3
➂
2
56
I
I
I
I
I
I
I
I
I
I
I
➃
➄
HOW TO START THE SELF CLEANING CYCLE
Important: the self cleaning cycle must only be performed with the oven empty; so,
before starting the cycle take all the accessories (shelves, broiling pan, ...) out of
the oven cavity and dry any traces of overflowed liquid.
Do not use any degreasing products (e.g. degreasing sprays, detergents, etc.).
1. Close the oven door (if it is open or not closed properly the self cleaning cycle will
not start).
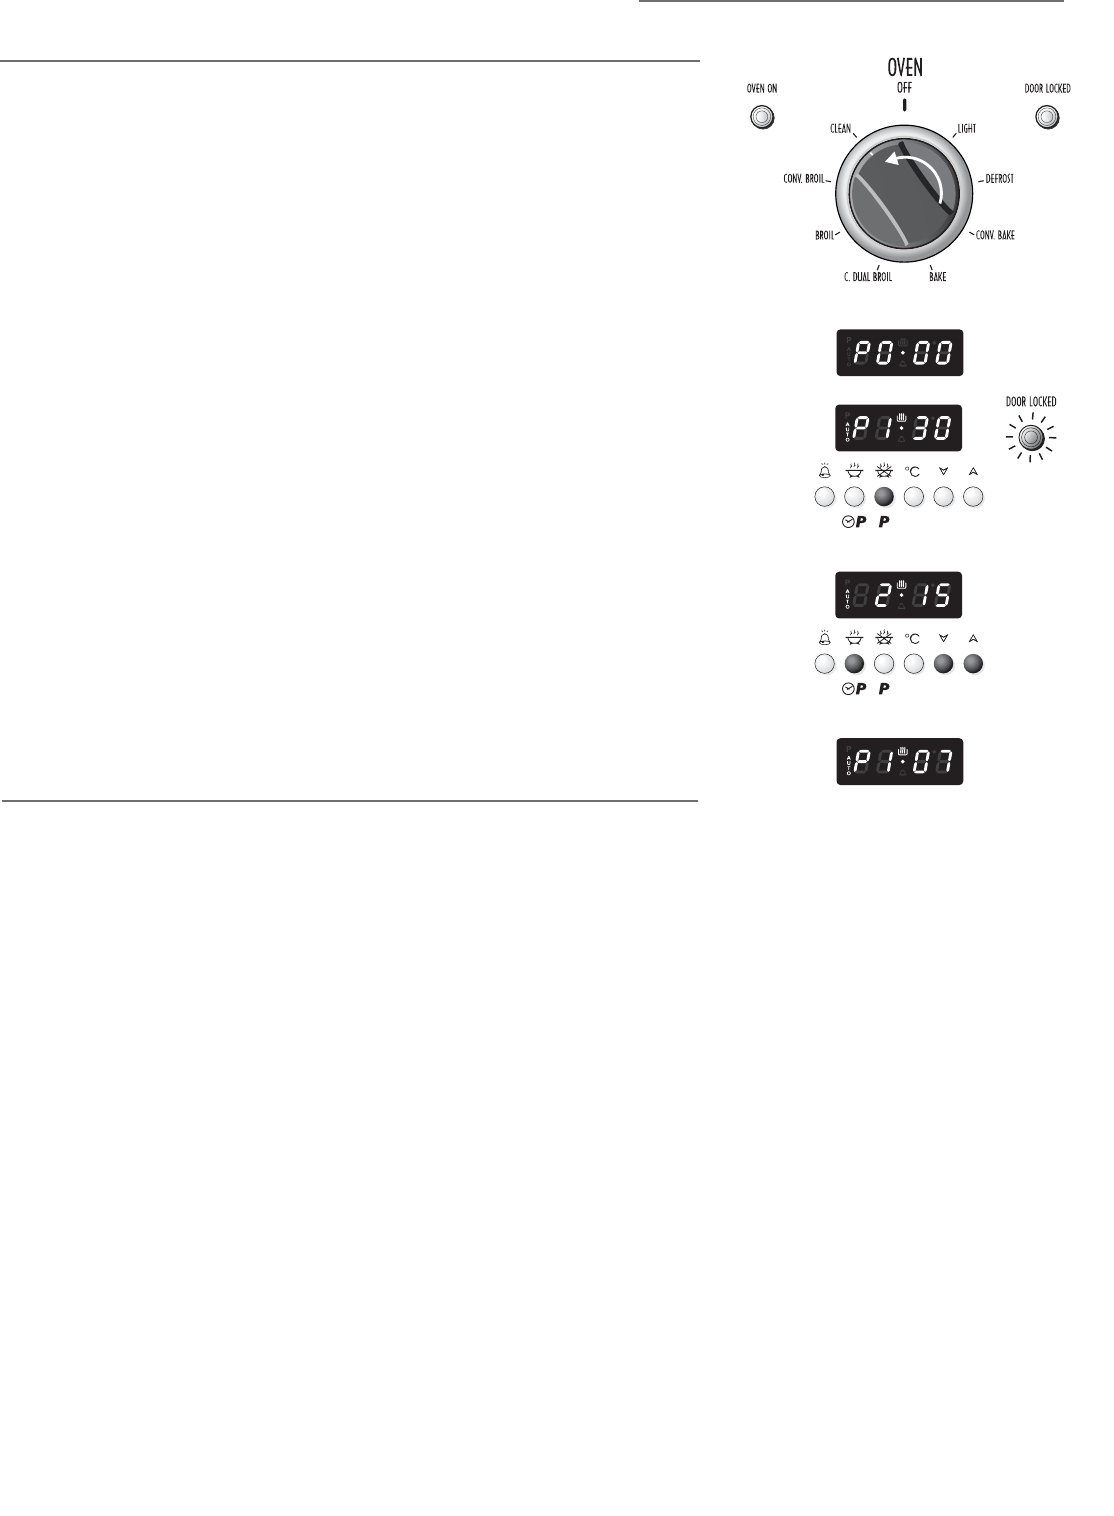
2. Turn the oven selector knob to the self cleaning position (CLEAN); P0•00
appears on the electronic program display with the letter P flashing.
3. Press push button 3 on the program to start the cycle.
This combined confirmation operation offers greater safety when there are children;
in fact turning the knob to the self cleaning function has no effect if key 3 of the pro-
gram is not then pressed.
•
P1•30 (self cleaning time, 1 hour and 30 minutes) appears and the door is locked
after about 30 seconds;
• On the control panel the door locked pilot light lights up to indicate that the door is
locked.
4. To increase the self cleaning cycle time (max 5 hours) press key 2 of the program
then key 6. To go backwards to the minimum of 1 hour and 30 minutes press key 2
then key 5.
• During the setting
AUTO flashes and P disappears.
5. The self cleaning cycle starts immediately and is completed in the programmed
time.
• Throughout the self cleaning cycle the program displays the time (hours and min-
utes) remaining until the cycle is finished.
➁
VERY IMPORTANT:
The self cleaning cycle only starts with the oven door closed. If the door is open
or not closed properly the oven CANNOT perform the self cleaning cycle; elec-
tronic safety devices prevent the self cleaning cycle from starting.


