15
Chapter 2 - Using the control and setting the modes
2.5 - KEEP WARM FUNCTION
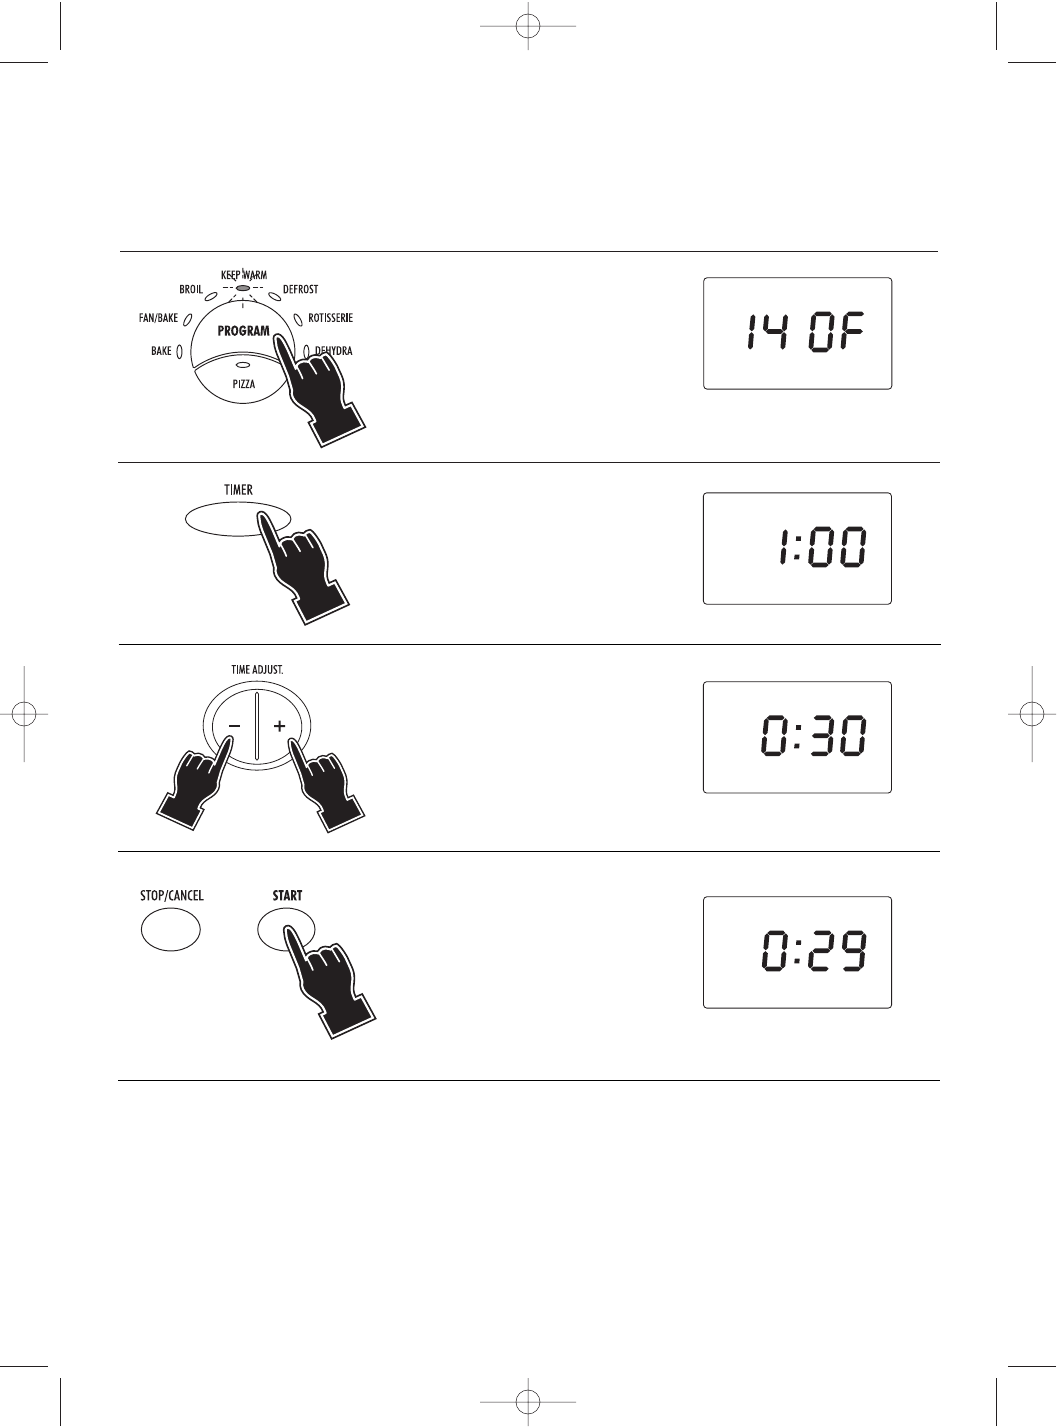
1 Select the KEEP WARM func-
tion by pressing the PRO-
GRAM button (7) until the
KEEP WARM indicator light
(3) will be illuminated. The
display will show the temper-
ature 140°F
2 Press the TIMER button (9).
The display will show
1:00.
4 Press the START button (17).
As you press START, time
selected is reduced of 1 minute.
The oven will start the count-
down. At the end of the set
time the control will emit 4
beeps and the display will
return to stand-by (showing
the time of the day, if previ-
ously set).
• For this function, should be placed in the lowest position (see page 6).
• If the keep warming time is not set, (skipping points 2 and 3) the display will show the countdown start-
ing from the default duration of
1:00 (1 hour).
• The set time can be modified during cooking by simply repeating points 2 and 3. The countdown will
automatically restart 3 seconds after the last setting.
• If the START button (17) is not pressed within 3 minutes from the previous setting, the control will return
to stand-by.
This feature is designed to keep foods warm, after they are cooked for short periods of time without over-
cooking. We do not recommend keeping foods warm for prolunged periods or using this feature to reheat
frozen or cold foods.
3 Set the time (max 2 hours) by
pressing the “-” (12) and “+”
(18) buttons. Keep the button
pressed for more than 2 sec-
onds to quickly scroll the time
up or down. For each press of
the button the time will
increase or decrease by one 1
minute.
GB 16-12-2002 15:15 Pagina 15


