


13
EN
To modify this quantity, proceed as follows:
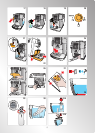
1. Place a cup under the coffee spouts (fig.
11).
2. Turn the selection knob until “MY COFFEE” is
displayed.
3. Keep the button (fig. 8) pressed until the
message “1 MY COFFEE Program quantity”
is displayed and coffee delivery begins.
Release the button.
4. As soon as the coffee in the cup reaches the
required level, press the button (fig. 8)
again.
The quantity of coffee in the cup has now been
programmed.
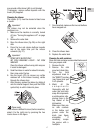
Adjusting the coffee mill
The coffee mill is preset in the factory to make
coffee correctly and should not require adjusting
initially.
However, if after making the first few coffees you
find that the coffee is too thin and not creamy
enough or that delivery is too slow (a drop at
a time), this can be corrected by adjusting the
grinding adjustment knob (fig. 9).
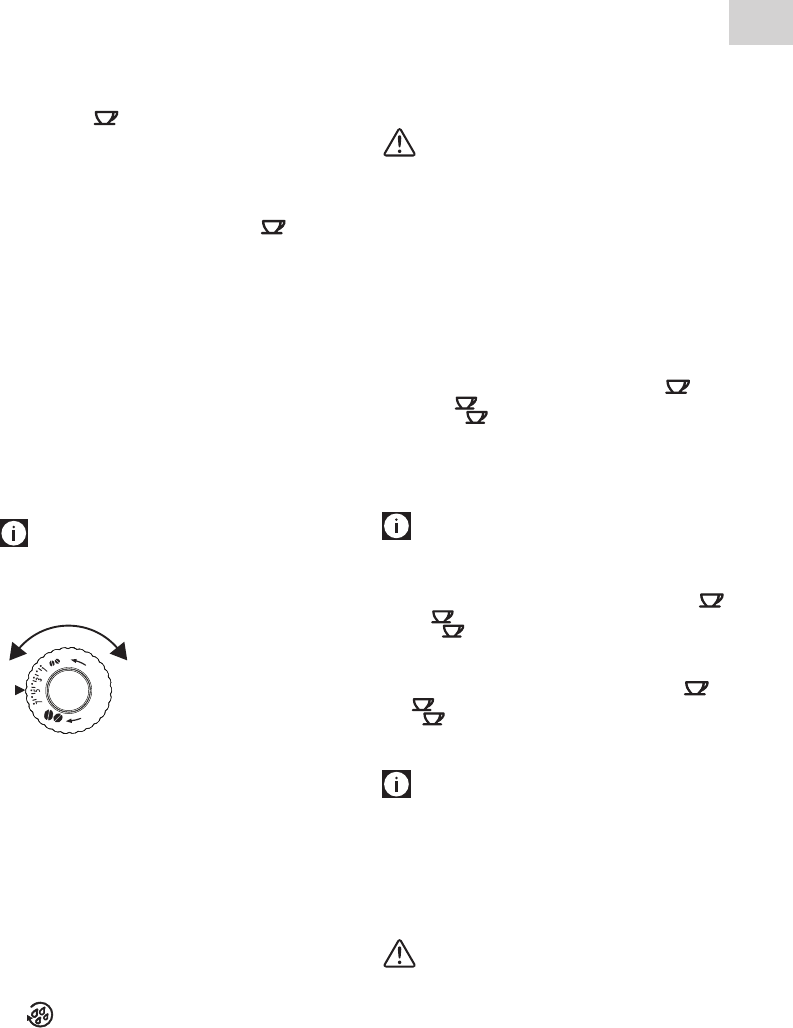
Please note!
The grinding adjustment knob must only be
turned when the coffee mill is in operation.
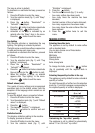
If the coffee is delivered too
slowly or not at all, turn one
click clockwise towards “7”.
For fuller bodied creamier
coffee on the other hand,
turn one click anticlockwise
towards “1” (do not turn
more than one click at a time
otherwise the coffee could be delivered a drop
at a time).
These adjustments will only be evident after at
least 2 cups of coffee have been delivered.
If this adjustment does not obtain the desired
result, turn the knob another click.
Tips for a hotter coffee
For a hotter coffee, before delivery you are
recommended to:
• rinsetheappliancethroughbypressingthe
button. Hot water flows out of the coffee
spouts and heats the internal circuit of the
machine so that the coffee delivered will be
hotter.
• warmthecupswithhotwater(usingthehot
water function);
• selectthe“high”coffeetemperatureinthe
menu.
Making coffee using coffee beans
Important!
Do not use caramelized or candied coffee beans
as this could damage the appliance.
1. Fill the container with coffee beans (fig. 10).
2. Place under the coffee spouts:
- 1 cup if you want one coffee;
- 2 cups if you want 2 coffees.
3. Lower the spouts as near as possible to the
cup. This makes a creamier coffee (fig. 11).
4. Press the button corresponding to the
number of coffees required (1 cup or 2
cups , figs. 8 and 12).
5. Preparation begins. The amount of coffee
selected is displayed together with a progress
bar which gradually fills as preparation
progresses.
Please note:
•
While the coffee maker is making coffee,
delivery can be interrupted at any moment by
pressing one of the two coffee buttons (
or ).
• Attheendofdelivery,toincreasethequantity
of coffee in the cup, just press (within 3
seconds) one of the coffee buttons ( or
).
Once the coffee has been made, the appliance is
ready to use again.
Please note!
• Forhottercoffee,seethesection“Tipsfora
hotter coffee” (page 13).
•
Various messages (fill tank, empty grounds
container, etc.) will be displayed while using
the machine. Their meaning is explained in
the section “Displayed messages” (page
21).
Important!
• Ifthecoffeeisdeliveredadropatatime,too
thin and not creamy enough or too cold, read
the tips in the “Troubleshooting” section on
page 22.