13
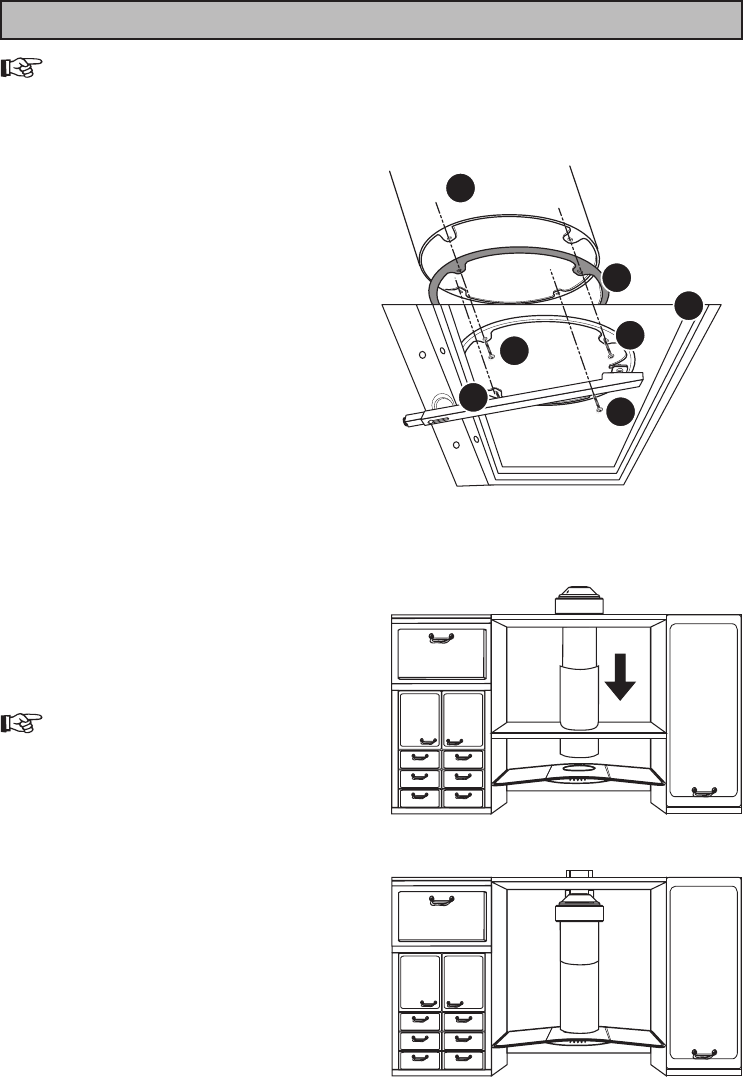
Fixing the Chimney to the Canopy
1. Remove the metal grease filter cassette by
pushing inwardly on the two steel handles.
2. To remove the charcoal filter push inwardly on
the two retaining clips to disengage the security
fixing and remove.
3. Align the fixing points on the chimney with the
corresponding fixing points on the canopy. Ensure
the guide in the two chimney sections is
positioned at the back to face the wall.
4. Fixing the chimney stack :
Insert gasket G1 (found in the accessory bag) on
the base of chimney stack A, so that it adheres
perfectly to the shape of chimney stack A. Then
fix chimney stack A to the hood unit C using four
of the screws provided E.
5. Connect the supply cable from the canopy
(marked with adhesive tape), to the cable from
the fan motor by pushing together the two (male
and female) connectors.
The metal grease filter and charcoal filter should not
be refitted until after the hood has been fixed to the
wall.
If the hood is to be fitted in conjunction with wooden
shelves or cornice see the separate installation
instructions before fixing the hood in position.
Fixing the hood to the wall:
Whichever type of installation is to be carried out, if the
hood is to be fitted in conjunction with wooden shelves
these will require drilling before the hood can be
installed.
Drilling the shelves:
Bottom Shelf
1. Use the cardboard template provided to mark the
hole positions on the shelf.
2. Using hole ‘B’ as a reference point, drill the shelf
along the centre axis, for the chimney to pass
through.
INSTALLING INSTRUCTIONS
S07_08
S07_09
E
E
E
E
A08_TL
A
G1
C


