


16
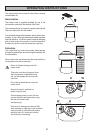
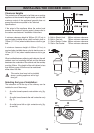
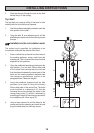
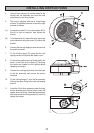
5. Mark the position on the wall and drill the hole
for the ducting. To calculate the centre of the hole
on the wall for the ducting, draw a horizontal line
(D) through the vertical line 80mm above line (X)
The round ducting to be used must be Ø125mm.
6. Fix the round eyelet screws provided tightly into
holes (1) and hook on the canopy (C) ensuring
the hooks are located into the eyelets before
releasing the canopy.
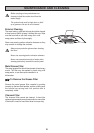
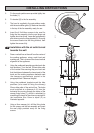
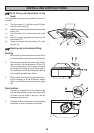
7. Unscrew the self tapping screws from the back
of the fan assembly and remove the plastic
surround.
8. Fit the ducting flange (F) onto the fan assembly
utilising the same fixing holes and self tapping
screws.
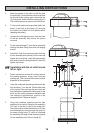
9. Insert the 4.2x44.4mm screws provided, for fixing
the fan assembly and chimney into the wall and
tighten about two thirds. Lower the fan assembly
and chimney onto the fixing bracket (S), than fully
tighten the screws.
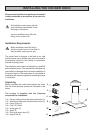
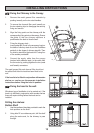
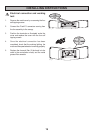
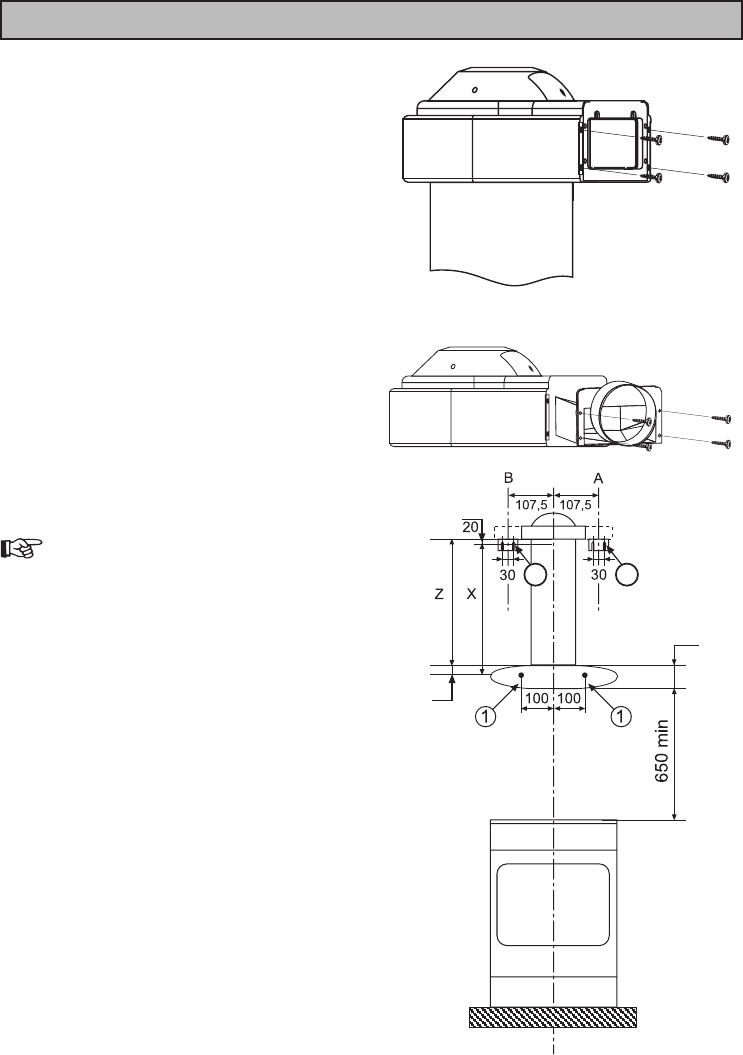
Installation with the air outlet turned
left or right:
1. Draw a vertical line on the wall from the centre of
the cooking appliance, using a spirit level and
marking pen. This is to ensure the correct vertical
alignment of the appliance.
2. Using the cardboard template provided mark the
hole positions (1) on the wall 100mm either side
of the vertical line ensuring they are level and
that the distance between the lowest point of the
hood and the cooking appliance beneath meet
the clearance requirements quoted in the
paragraph titled ‘Clearance Heights’.
3. Using the cardboard template mark the hole
positions (to be used for fixing the fan assembly)
107.5mm on the left or right of the vertical line.
The holes must be drilled at a distance of (X) from
the horizontal line running through the centre of
the canopy fixing holes (1), which is calculated
by measuring the lenght of the chimney required
for the installation plus 15mm to equal (Z).
INSTALLING INSTRUCTIONS
S07_14
S07_16
48
S07_20
35
2 2