


6
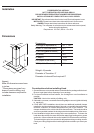
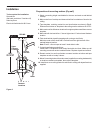
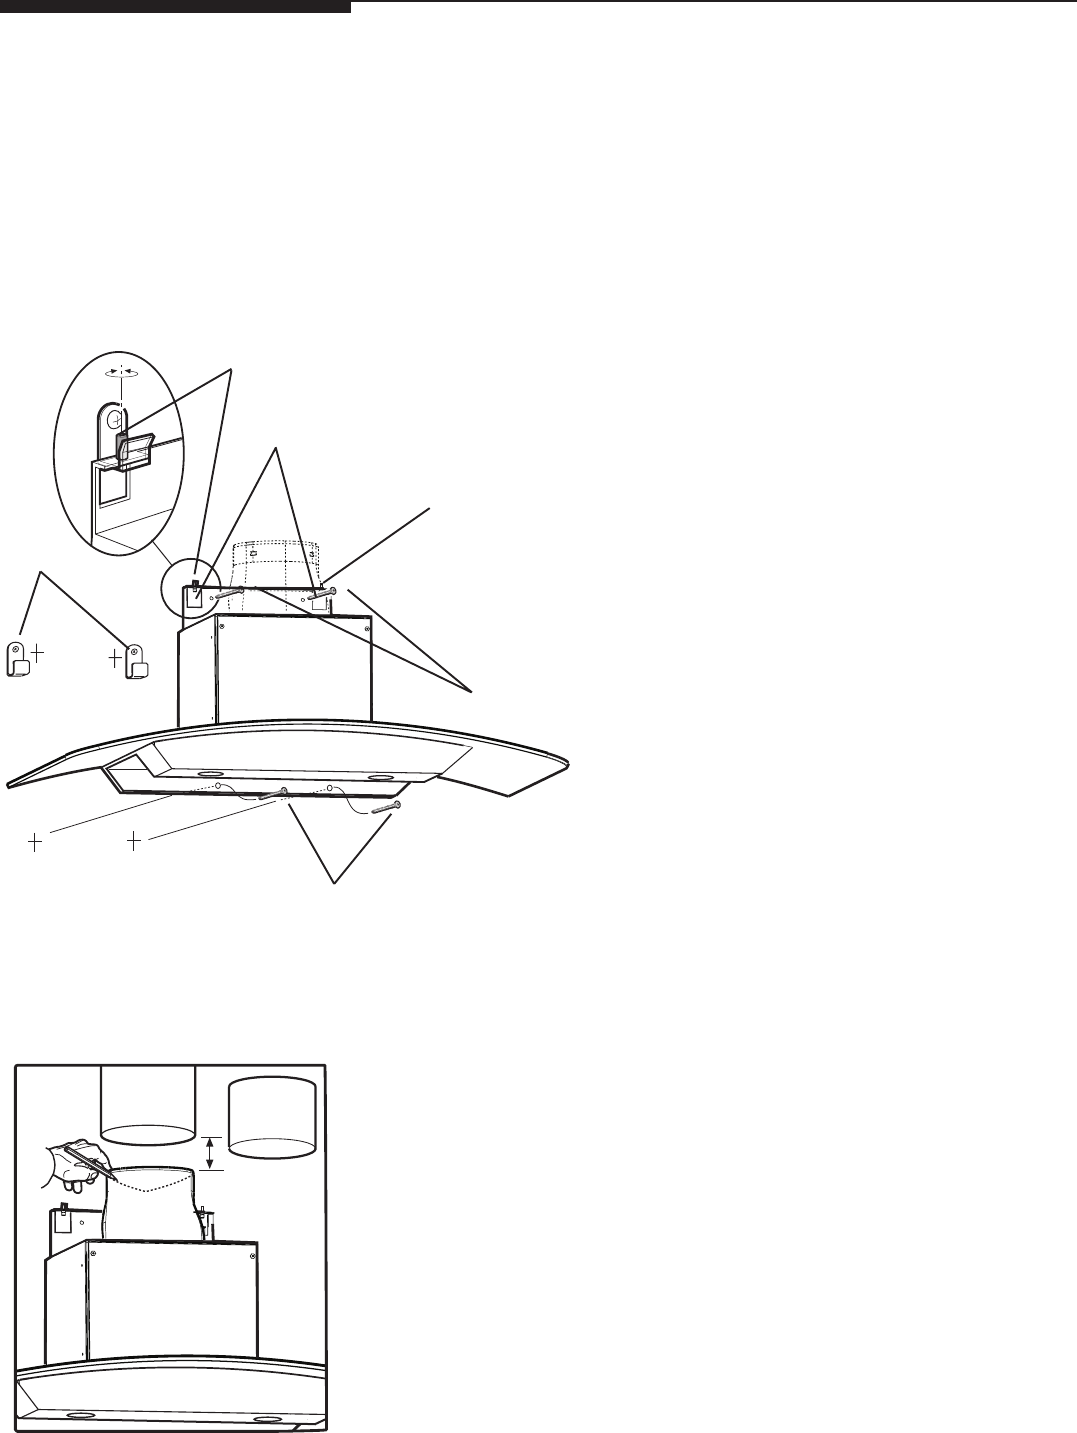
Rectangular
Cutouts
Leveling Screw
Leveling Screw
Bottom Fixing
Screws
Hooks
Top Fixing Screws
Installation
Appliance Installation:
1. Hang hood on 2 mounting hooks through the rectangular cutouts on back of
hood.
2. Level the appliance, using a carpenters level across bottom of hood with
leveling screws in rectangular cutouts.
3. Secure hood with 2 screws on bottom and 2 on top.
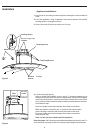
4. Connect ducting (Figure 4):
Note: for blower serviceability, leave a gap of 1" minimum between top of
transition and sheet metal duct and cover gap with a starting collar wrapped
around duct and transition. Locate collar screws so they fit into corner of duct
cover. Secure collar to transition and duct with three sheet metal screws each.
Seal with duct tape.
Be sure to locate screws below damper lines drawn on transition.
Mark onto exterior of transition the V location of the damper within.
Secure ducting to transition with three sheet metal screws each.
Be sure to locate screws below damper lines drawn on transition.
Seal with duct tape.
Note: Do not use duct smaller than the transition.
Rear discharge: A 90° elbow may be installed immediately above the hood. For
serviceability,a mounting similar to the straight up discharge should be used.
Figure 3
Figure 4
1
Duct
Transition
Collar