


9
CARE AND CLEANING
• Follow these care and cleaning recommendations after each use to keep the cooker in perfect
working order.
• Wash your cooker in warm water with liquid dishwasher detergent after each use. It is not necessary
to remove the central unit located on the top of the lid after each use.
• Wash in the dishwasher, if desired. The pan, basket and the whole lid are all dishwasher-safe.
Pan Interior: (Non-stick interior)
To Preserve the Nonstick Coating :
• Never heat fat or oil to the extent that it burns or turns black.
• Center the One Pot over the heat source (this prevents damage to the handle and coating.)
• Most metal utensils may be used with the exception of knives. Avoid using sharp-edged utensils, and
avoid cutting directly in the pan. Do not gouge the non-stick surface. Slight surface marks or
abrasions are normal and will not affect the performance of the non-stick coating.
Cleaning
• Clean the inner and outer coating of your pan with hot water, liquid detergent and a sponge
(scouring powder and pads are not recommended).
Pan Exterior and Lid :
• The polished stainless steel exterior requires very little care. Wash with warm soapy water and dry
immediately to prevent water spotting. It may also be polished with one of the available
commercial stainless steel cleaners, rubbing in a circular motion. Rinse in lukewarm water.
• Use a sponge or soft dishcloth to wash. Steel wool, steel scouring pads and harsh detergents are not
recommended. Nylon scrubbing pads are safe to use.
• Never clean with bleach or other chlorinated products.
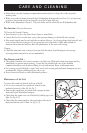
Maintenance of the Lid:
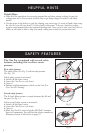
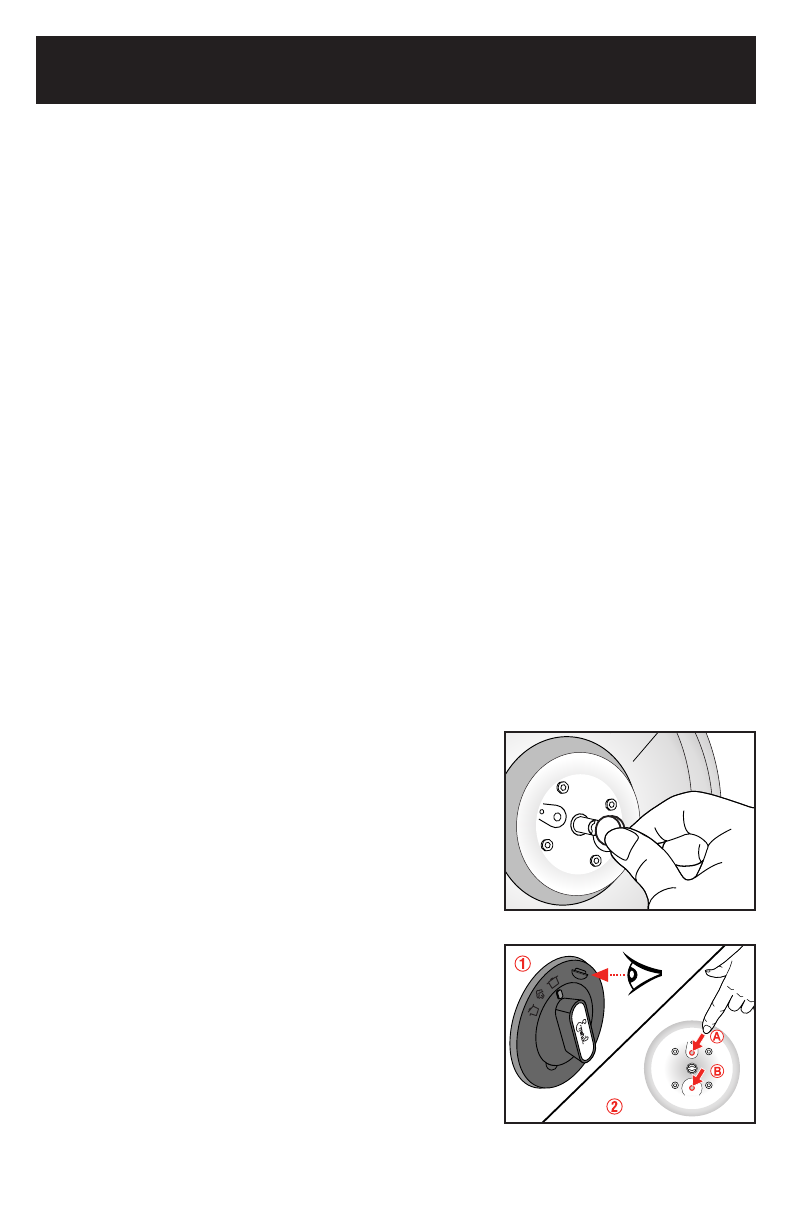
To remove the central unit located on the top of the lid:
• Use a coin to unscrew the central nut located on the
underside (interior) of the lid. See Fig. 7.
• Remove the central unit and clean with a sponge in warm
water and liquid dishwasher detergent.
• Check that the steam vent is not blocked by holding up to the
light. See Fig. 8 (1).
• Check that the steam regulator valve and safety valve move
freely and that the seal is clean. See Fig. 8 (2).
Fig 7
Fig 8 (1) and (2)