


7
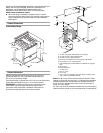
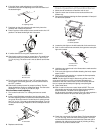
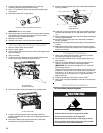
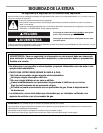
9. Open the broiler door. Use a ³⁄₈" drive ratchet to lower the rear
leveling legs one-half turn. Use a wrench or pliers to lower the
front leveling legs one-half turn.
10. Adjust the leveling legs to the correct height. Leveling legs can
be loosened to add up to a maximum of 1" (2.5 cm). A
minimum of ³⁄₁₆" (0.48 cm) is needed to engage the anti-tip
bracket.
11. Move range into its final location making sure rear leveling leg
slides into anti-tip bracket.
12. If installing the range in a mobile home, you must secure the
range to the floor. Any method of securing the range is
adequate as long as it conforms to the standards in the
“Location Requirements” section.
13. Continue installing your range using the following installation
instructions.
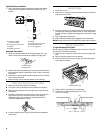
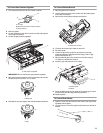
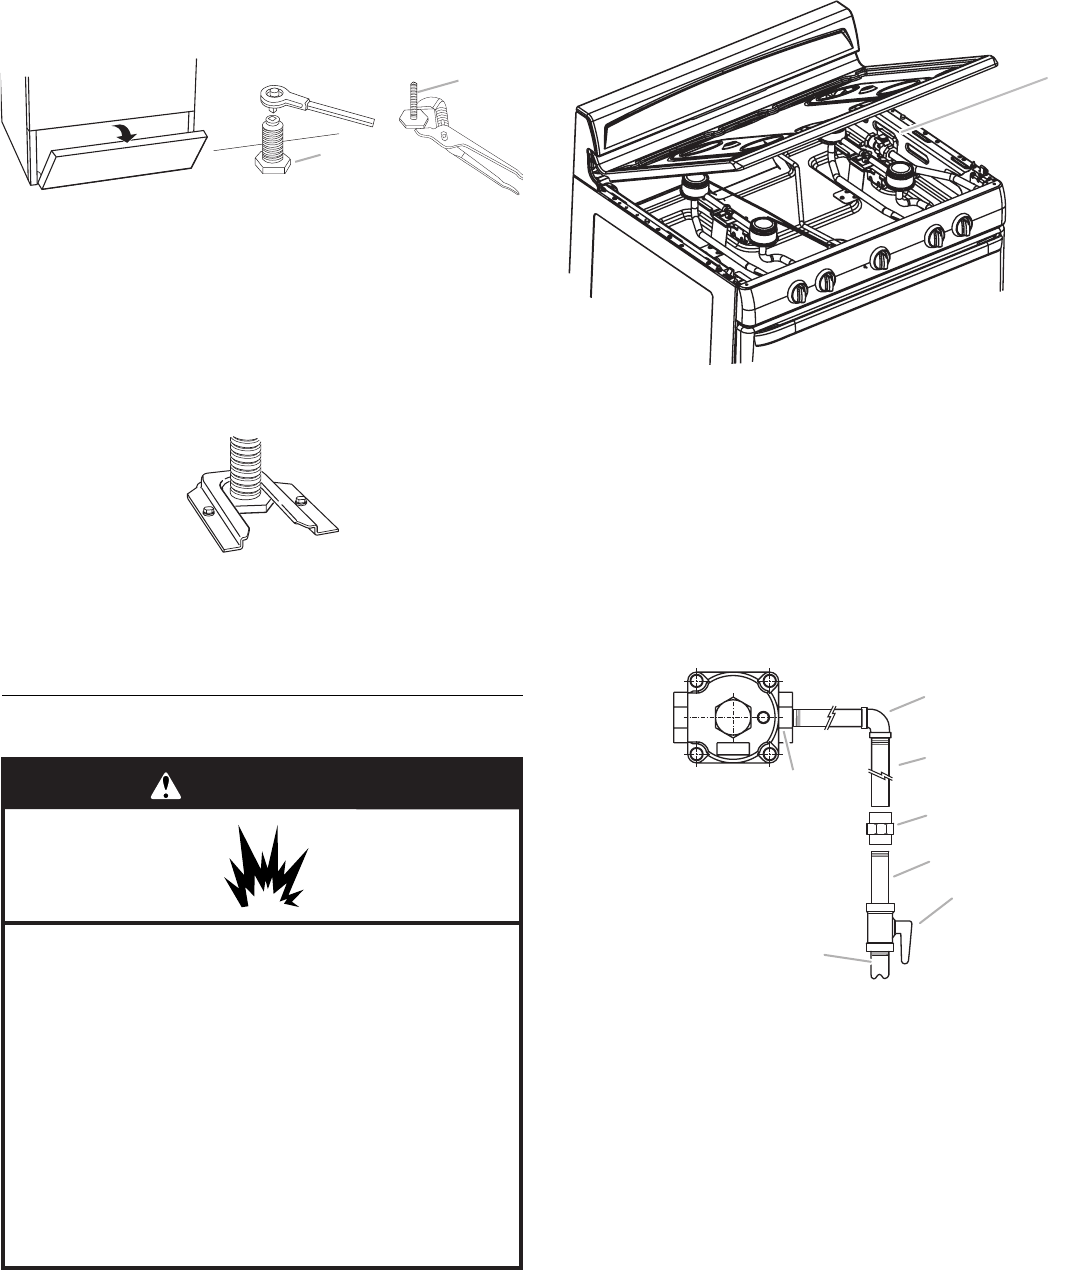
Make Gas Connection
1. Remove grates.
2. Lift the cooktop by both front corners until the side support
rods snap into place.
3. Locate gas pressure regulator inside the burner box.
IMPORTANT: Do not remove the gas pressure regulator.
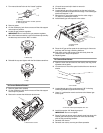
4. All connections should go over and through the burner box
and follow down the range back.
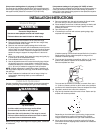
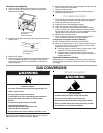
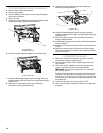
Typical rigid pipe connection
A combination of pipe fittings must be used to connect the range
to the existing gas line. Your connections may be different;
according to the supply line type, size and location.
1. Apply pipe-joint compound made for use with LP gas to all
pipe thread connections.
2. Using a pipe wrench to tighten, connect the gas supply to the
range.
A.Rear leveling leg
B. Front leveling leg
A
A. Rear leveling leg
B Front leveling leg
B
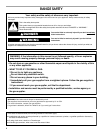
WARNING
Explosion Hazard
Use a new CSA International approved gas supply line.
Install a shut-off valve.
Securely tighten all gas connections.
If connected to LP, have a qualified person make sure
gas pressure does not exceed 14" (36 cm) water
column.
Examples of a qualified person include:
licensed heating personnel,
authorized gas company personnel, and
authorized service personnel.
Failure to do so can result in death, explosion, or fire.
A.Gas pressure regulator
A.Pressure regulator
connection fitting
B.90° elbow
C.Black iron pipe
D.Union
E.Nipple
F. Manual shutoff valve
G.½" or ¾" gas pipe
A
G
E
F
C
D
A
B