


9
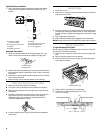
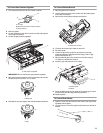
6. If the pilot flame needs adjustment, use a flat blade
screwdriver and turn the adjusting screw until the flame is of
the desired height.
7. Push back on the side support rods and slowly lower the
cooktop until it snaps into position.
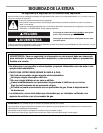
8. Push in and turn each surface burner control knob to the “HI”
position. The flame should light with 4 seconds.
9. If surface burners do not ignite, repeat steps 3 to 6.
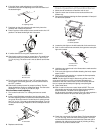
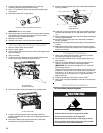
10. Check each cooktop burner for proper flame. The small inner
cone should have a very distinct blue flame ¼" (0.64 cm) to
½" (1.3 cm) long. The outer cone is not as distinct as the inner
cone.
11. Turn the control knob quickly to the “LO” position after the
burner lights. If the flame goes out, turn the control knob to
the “OFF” position.
12. Check each cooktop burner for proper low flame. The low
flame should be a minimum, steady blue flame. The flame size
should be ¼" to ³⁄₈" (0.64 cm to 0.95 cm) high.
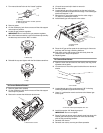
If the low flame needs adjusting:
1. Turn control knob to the “Lo” setting and remove control
knob.
2. Insert a small flat-blade screwdriver into the valve stem. Turn
the valve adjusting screw to obtain the smallest flame that will
not go out when the control of a cold burner is quickly turned
from “HI” to “Lo.” Turn right to decrease flame height. Turn left
to increase flame height. Repeat for other cooktop burners as
needed.
3. Replace control knob.
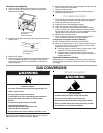
Check Operation of Oven/Broil Burner
1. Make sure all controls are off and the oven is cool.
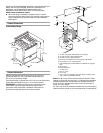
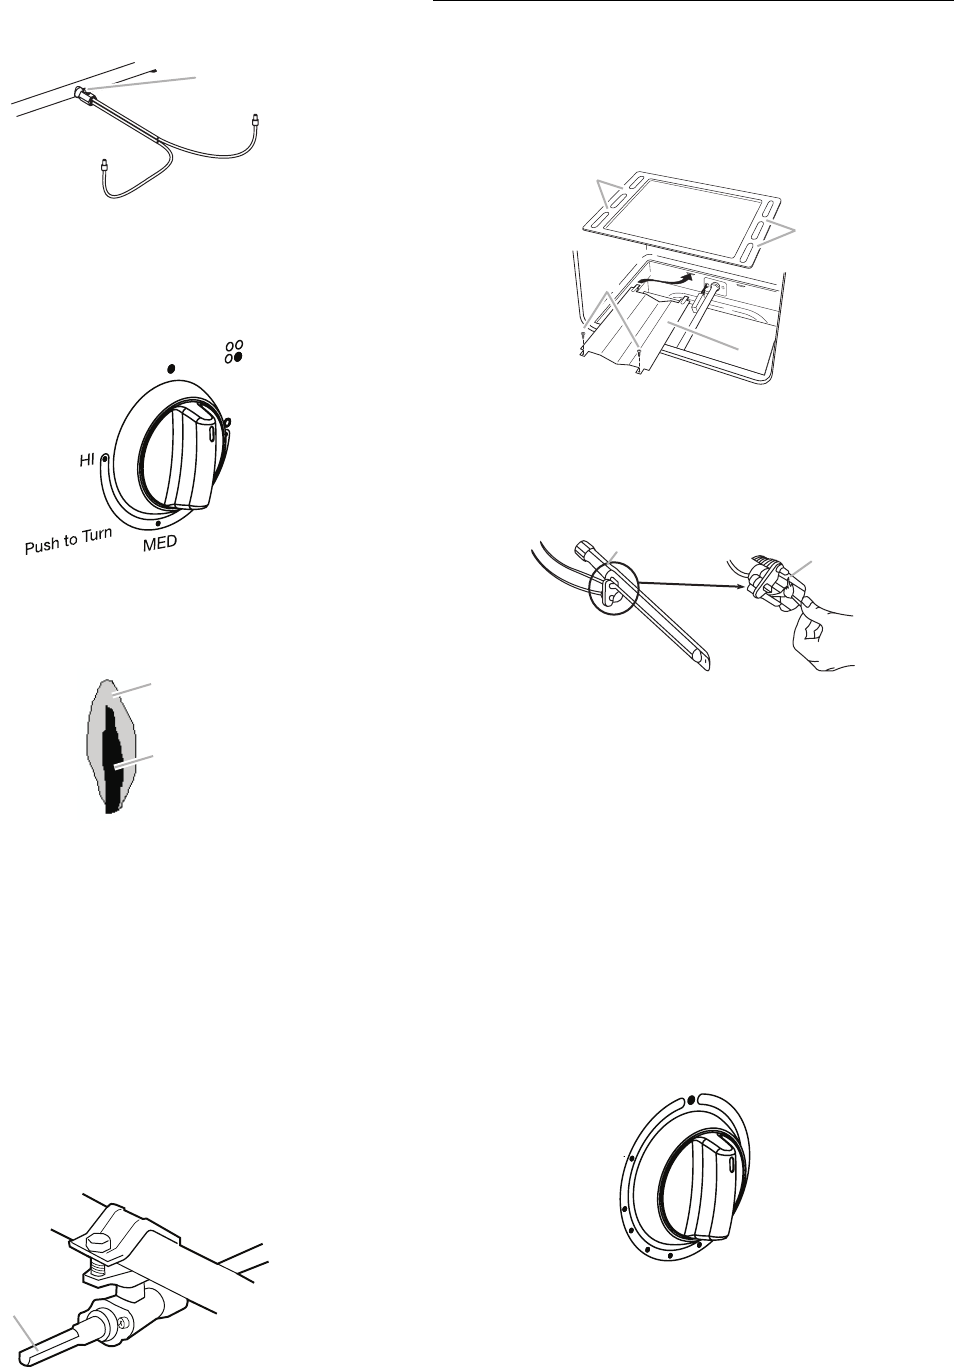
2. Open the oven door to remove oven racks and the oven
bottom tray.
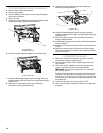
3. Remove the fasteners holding the flame spreader. Lift and pull
out the flame spreader.
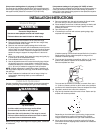
4. Locate the pilot light on the left-hand side of teh oven burner.
5. Push in oven control knob and hold, then ignite the oven pilot
light with a match.
6. Hold the oven control knob in for 10 seconds to make sure the
pilot will remain lit.
7. If the oven pilot light turns off after releasing the knob, repeat
steps 5 and 6.
8. When the oven pilot remains on, replace the flame spreader,
oven bottome tray and racks.
NOTE: The pilot light will stay lit after turning off the oven. The
oven burner should turn on the next time a temperature is
selected on the oven control knob. If the oven burner does not
turn on, repeat previous steps for lighting oven pilot lights.
9. Open broiler door.
10. Push in and turn the oven control knob to 350°F. The oven
pilot should now be larger with the flame burning against a
small metal bulb. The oven burner should light in
20-40 seconds; this delay is normal. The oven valve requires a
certain time before it will open and allow gas to flow.
11. Check the oven burner for proper flame. The flame should be
½" (1.3 cm) long, with inner cone of bluish-green. The outer
mantle should be dark blue and should be clean and soft in
character. No yellow tips (not enough air), blowing or lifting
(too much air) of flame should occur.
A.Adjusting screw
A.Outer cone
B. Inner cone
A.Valve stem
A
OFF
A
B
A
A. Oven bottom tray
B.Fasteners
C.Flame spreader
A.Oven burner
B.Oven pilot
B
C
A
A
A
B
OFF
240
300
350
OVEN TEMP
400
450
500
520
Broil
PUSH TO TURN