1-14
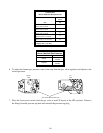
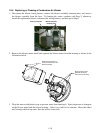
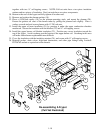
18. If the leak persists, use a rubber hammer and a small block of wood to tap the corners of the lower
combustion chamber insulation retainers. Repeat steps 15 through 17. Repeat this step until no
leakage is detected.
1.9.10 Replacing the Filter Motor, Filter Pump, or Filter Pump Solenoid Valve
1. Disconnect the unit from the electrical power supply.
2. Remove the filter pan from the unit.
3. Position a container beneath the oil return fitting at the front of the cabinet. Disconnect the
flexible oil line from the fitting, allowing any residual oil to drain into the container.
4. At the rear of the fryer, unplug the left connector (as viewed from the rear of the fryer) from the
transformer box.
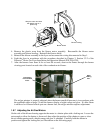
5. Remove the four nuts and bolts attaching the motor mount to the rear motor mount support.
6. At the front of the fryer, remove the cover plate from the front of the motor and disconnect the
motor wires.
7. Place a 1-foot (30.5-cm) length of wood (or similar support) beneath the motor mount near the
front of the unit and remove the two remaining nuts and bolts attaching the motor mount to the
front cabinet cross-brace.
8. Carefully remove the support and lower the motor mount to the floor, allowing the rear of the
mount to slide forward and off the rear motor mount support.
9. Disconnect the return flexline from the pump. The motor and pump assembly can now be pulled
from beneath the fryer and the failed component can be removed and replaced.
10. Position the replacement motor and pump assembly beneath the fryer and reconnect the oil return
flexline to the pump. Lift the rear of the motor mount up and onto the rear motor mount support.
11. Lift the front of the motor mount up and support it with a 1-foot (30.5-cm) piece of wood or a
similar support. Install but do not tighten the two nuts and bolts that attach the motor mount to
the front cabinet cross-brace.
12. Install and tighten the four nuts and bolts that secure the motor mount to the rear motor mount
support.
13. At the front of the fryer, tighten the two nuts and bolts at the front of the motor mount. Reconnect
the motor power wires and reinstall the wiring cover plate.
14. Reconnect the oil return flexline and reinstall the filter pan.
15. Reconnect the unit to the electrical power supply, fill the frypots with oil and check for proper
operation.
1.9.11 Replacing the Frypot
1. Disconnect the fryer from the electrical and gas supplies.
2. Remove the filter pan from the unit and drain one frypot at a time into a Shortening Disposal Unit
(SDU) or other appropriate metal container.
DANGER
DO NOT attempt to drain more than one full frypot into the SDU at one time.
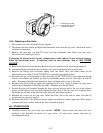
3. Dismount the topcap by removing the screws on the bottom of each front corner and lifting the
topcap straight up.
4. Remove the bezels by lifting them up to disengage the tabs along the lower edges from the slots
in the control panel frame. Remove the top screws in the upper corners of the computer.


