Part # P153 Rev 1 (02/21/08) Page 17
4. Carefully remove the thermostat dial, not disturbing the
dial setting.
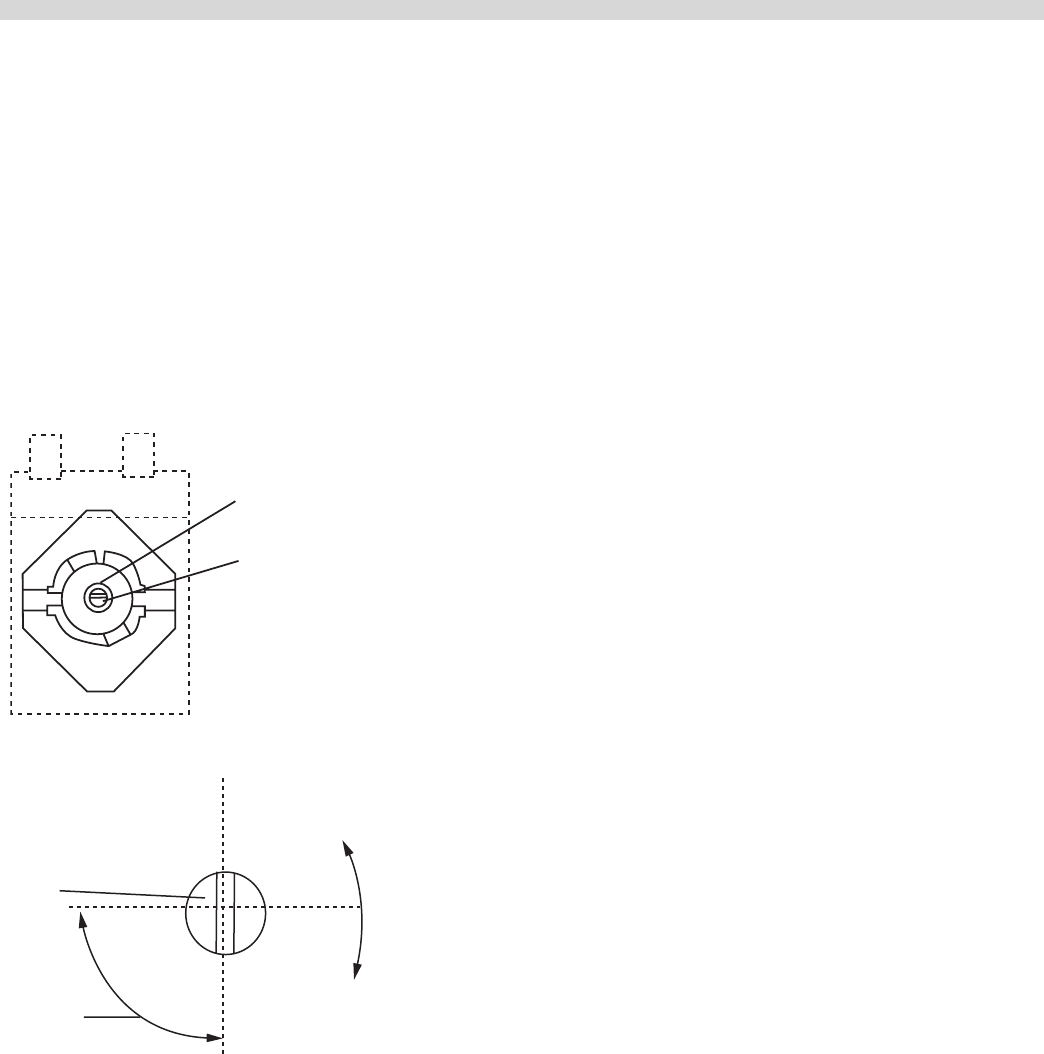
5. Hold the thermostat shaft steady with a small at blade
screw driver. Turn the calibration screw located inside the
shaft clockwise to decrease the temperature and counter
clockwise to increase the temperature. NOTE: each ¼ turn
of the screw will create a change of approximately 35° F
(20°C).
6. Replace the thermostat dial and repeat steps 1 though 3
to verify that the correct adjustment has been made.
Dial Shaft
Calibration Screw Head
Calibration
Screw Head
Increase
Decrease
1/4" Turn
MAINTENANCE AND CLEANING Continued
Griddle
1. Use a test instrument with a special disc type
thermocouple or a reliable surface type pyrometer. NOTE:
a drop of oil on the face of the disc will provide better
contact with the plate.
2. Set all griddle thermostats to 350°F (177°C). In order
to allow the griddle temperature to stabilize, the
thermostats must be allowed to cycle twice before taking
a test reading.
3. Check the griddle temperature when the thermostat just
cycles “OFF” by placing the thermocouple rmly on the
griddle directly about the sensing bulb of the thermostat.
The reading should be between 335° F (168°C) and 365°
F and (185°C). If the reading is outside of these limits,
calibrate as follows:
4. Carefully remove the dial, not disturbing the shaft
position.
5. Hold the shaft steady and with a small at screw
driver turn the calibration screw located inside the
shaft clockwise to decrease temperature and counter
clockwise to increase temperature. NOTE: Each ¼ turn
of the screw will create a change of approximately 35° F
(20°C).
6. Replace the thermostat dial and repeat steps 1 through 3
verify that a correct adjustment has been made.


