M
,-
...
-
.,
.
.
.
.
.
,,
q;,,,
Oven Shelves
CAm
AND CLEANING
Clean the shelves with a mild abrasive cleanser or
steel wool. After cleaning, rinse the shelves with
clean water and
dry with a clean cloth.
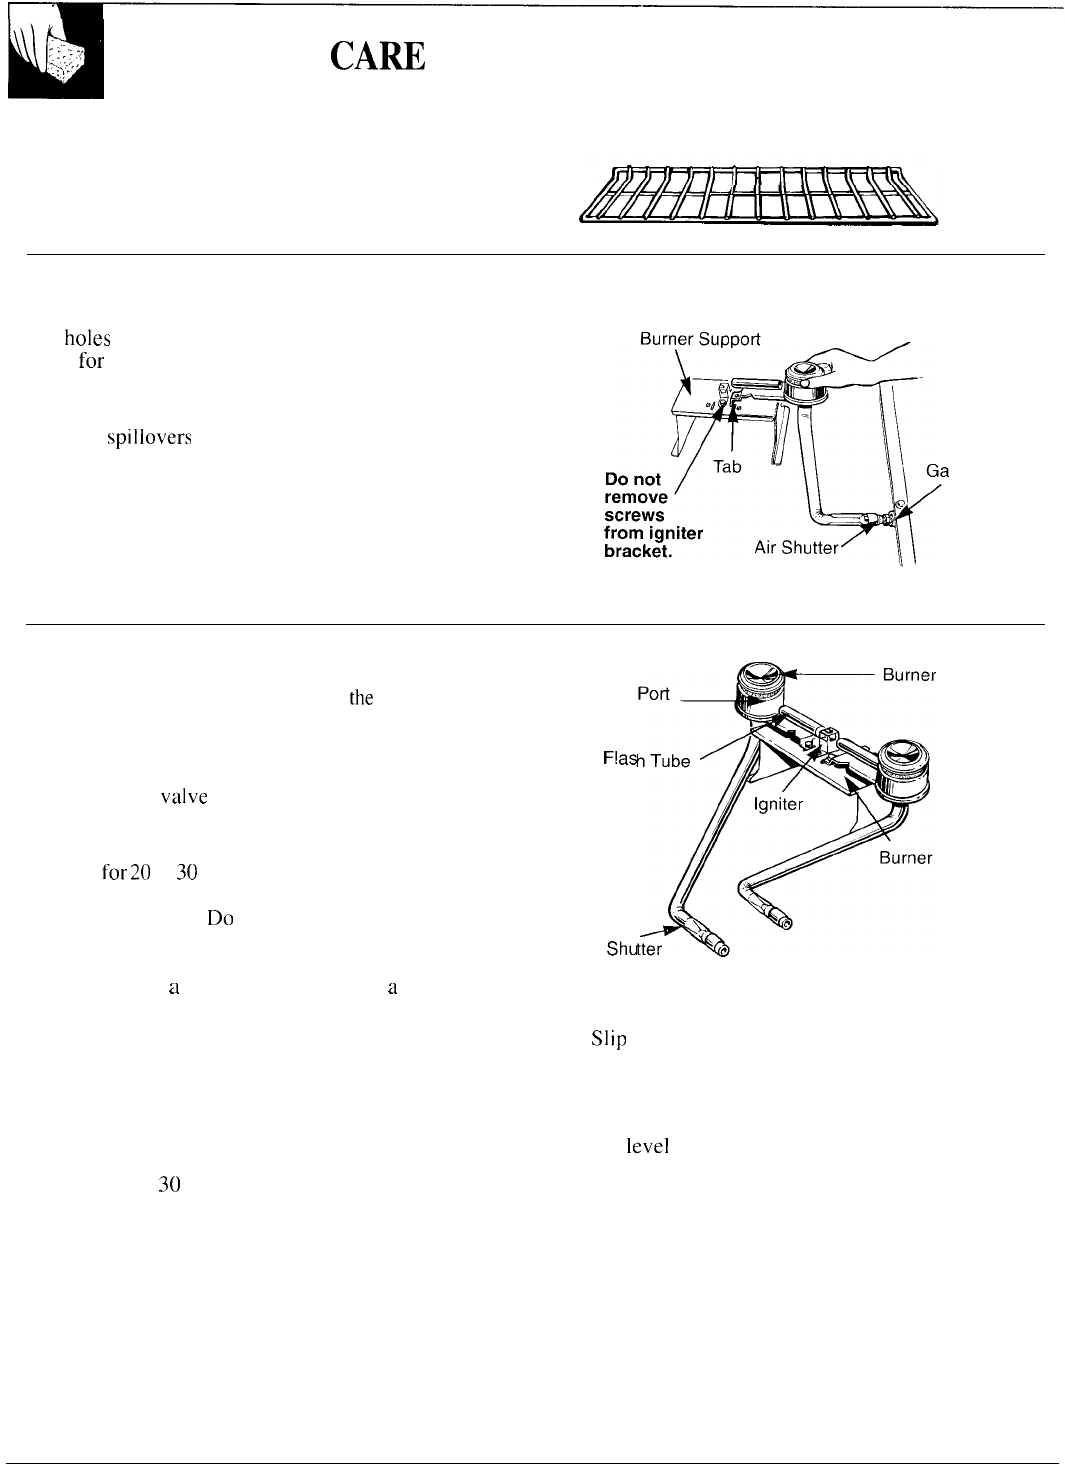
Range Top Burners
The
holes
in the burners must be kept clean at all
times
for
proper ignition and an even, unhampered
flame.
You should clean the burners routinely, especially
after bad
spillovers
which could clog these holes.
Burners lift out for cleaning if the shipping screws
were removed at installation.
s
Valve
Orifice
NOTE: A screw holds each burner
in place to keep
them from wobbling around during shipment.
Remove and discard the shipping screws. Be careful
not to remove the screws from the igniter bracket.
To remove the burners:
1. Grasp the burner head and tilt it to
[he
right to
release the two tabs from slots in the burner support.
2. Lift
the end of the burner assembly, then pull away
from the front of the range to free the air shutter
from the gas
valve
orifice.
To remove burned-on food, soak the burners in a
solution of mild liquid detergent and water. Soak the
burners
for
20
to
30
minutes.
If the food doesn’t rinse
off completely, scrub them with soap and water and a
brush or plastic pad.
Do
not use steel wool or abrasive
cleansers because they will clog the burner openings
and scratch the burners. If the holes become clogged,
clean them with
a
small sewing needle or
a
small
safety pin.
Do not attempt to clean burners in an automatic
dishwasher. Loosened
food soil can clog burner
holes, and the strong action of the dishwasher
detergent can damage the burner heads.
Before putting the burners back, shake out excess
water and dry them thoroughly by setting them in a
warm
oven for
30
minutes.
Ports
Lighter
F!as
support
Air
Shu
To replace the burners:
1.
Slip
the air shutter over the gas valve orifice.
2. Lower the burner assembly and hook the tabs in the
slots in the burner support.
3. Be sure both tabs are in their slots, that the burner
sits
level
and straight, and that the flash tube forms
a straight line from the igniter to the burner.
20


