Safety Instructions Operating Instructions Care and Cleaning Installation Instructions Troubleshooting Tips Customer Service
25
Read these instructions completely and carefully.
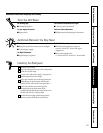
Additional Materials You May Need
■Gas line shut-off valve.
■Pipe joint sealant that resists action of LP gas.
■1/2-inch pipe nipple.
For Rigid Connection:
■Pipe fittings as required.
For Flexible Connection:
■Flexible metal appliance connector
(same 3/4-inch or 1/2-inch I.D. as gas
supply line).
■Flare union adapter line
(1/2-inch NPT x 3/4-inch or 1/2-inch I.D.).
Tools You Will Need
For leveling legs:
■Channel lock pliers
For gas supply connection:
■Pipe wrench
For conversion from Natural to LP gas:
■1/2-inch open-end wrench
For burner flame adjustment:
■Phillips head and blade-type screwdrivers
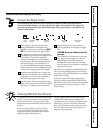
Installing the Backguard
Remove the cooktop.
Place the backguard on top of the end panels
at the rear of the range.
Connect the “disconnect plug” (for power to
the backguard from the range).
Insert the machine screws through the lower
inside flange of the end caps and the end
panels. Secure with the hex nuts provided.
Insert the machine screws through the
elongated holes at the bottom of the
backguard and side flange of the burner box.
Secure with the hex nuts provided.
Attach the lower edge of the backguard to
the vent outlet with 2 sheet metal screws.


