


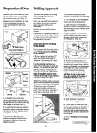
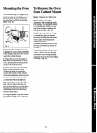
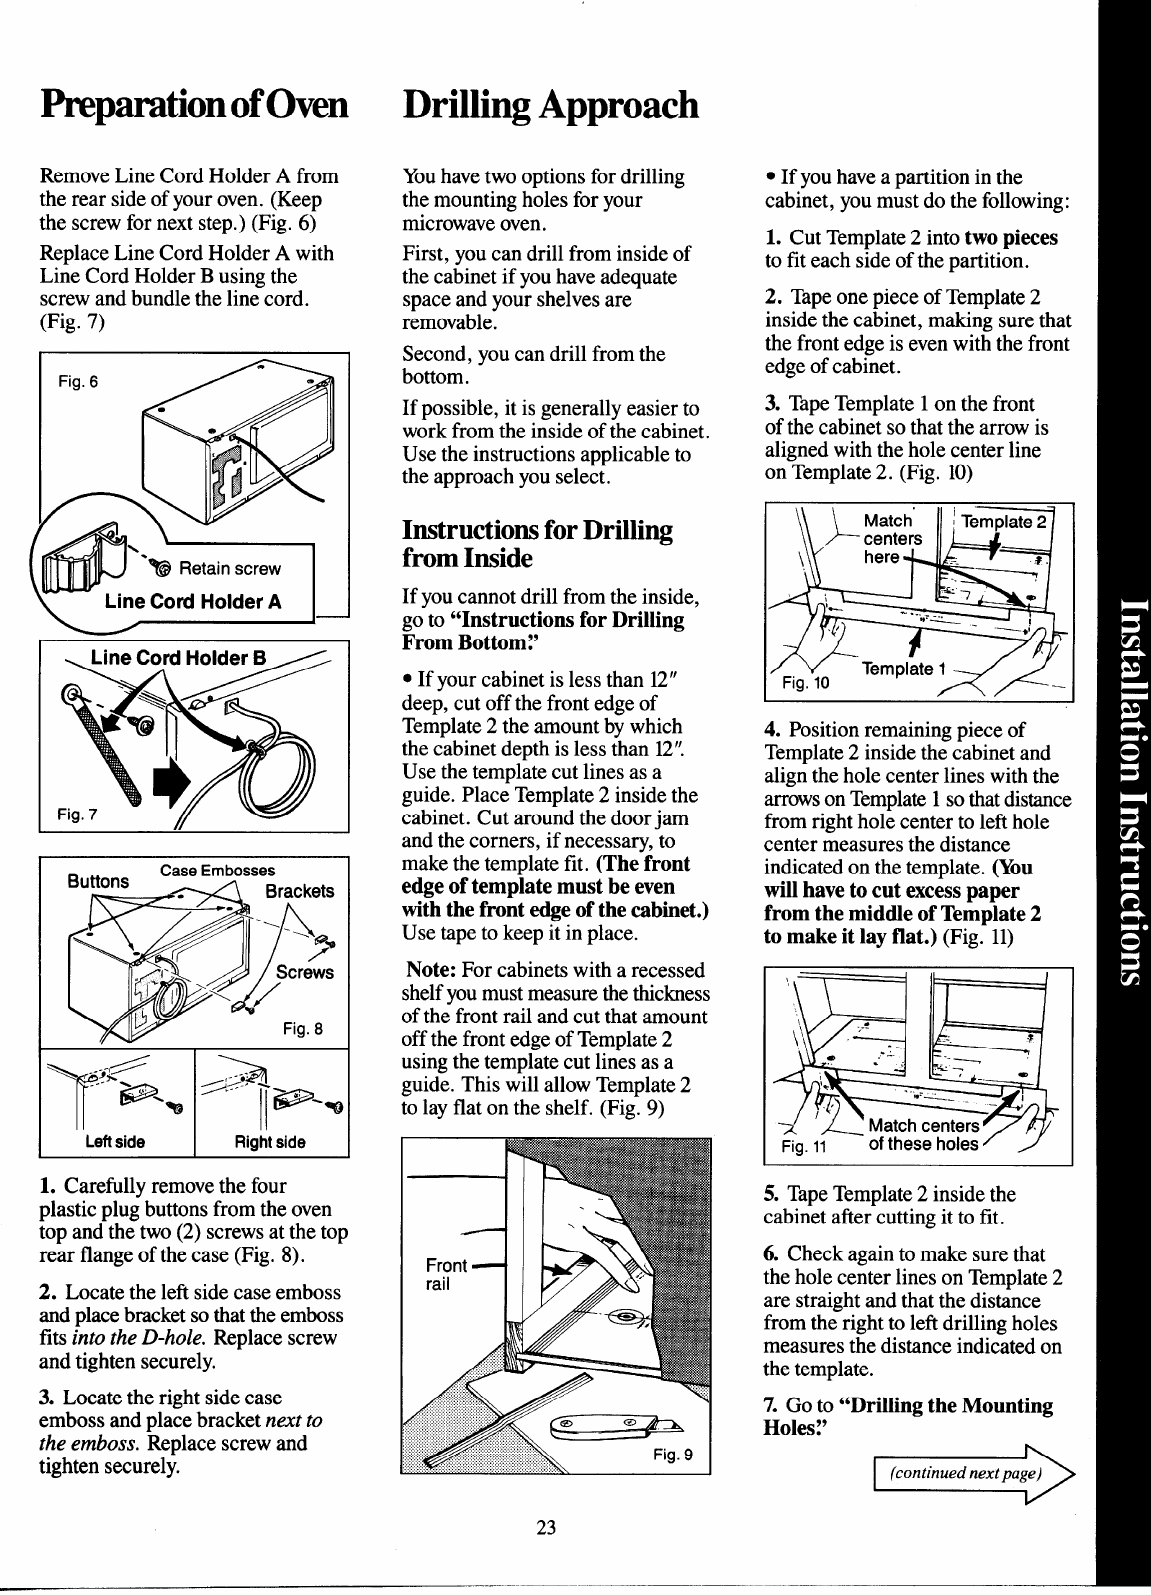
FreparationofOven
Remove Line Cord Holder A from
the rear side of your oven. (Keep
the screw for next step.) (Fig. 6)
Replace Line Cord Holder A with
Line Cord Holder B using the
screw and bundle the line cord.
(Fig. 7)
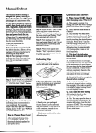
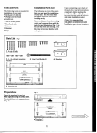
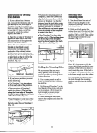
Buttons
Case Embosses
Fig. 8
T
\
r--3”~4
--- <
e
-.
(.’ ,
“w
Leftside
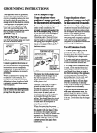
1. Carefully remove the four
plastic plug buttons from the oven
top and-the two (2) screws at the top
rear flange of the case (Fig. 8).
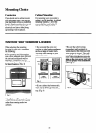
2. Locate the left side case emboss
and place bracket so that the emboss
fits into the D-hole. Replace screw
and tighten securely.
3. Locate the right side case
emboss and place bracket next to
the emboss. Replace screw and
tighten securely.
Drilling Approach
Youhavetwo options for drilling
the mounting holes for your
microwave oven.
First, you can drill from inside of
the cabinet if you have adequate
space and your shelves are
removable.
Second, you can drill from the
bottom.
If possible, it is generally easier to
work from the inside of the cabinet.
Use the instructions applicable to
the approach you select.
Instructions for Drilling
from Inside
If you cannot drill from the inside,
go to “Instructions for Drilling
From Bottom?
● If your cabinet is less than 12”
deep, cut off the front edge of
Template 2 the amount by which
the cabinet depth is less than 12”.
Use the template cut lines as a
guide. Place Template 2 inside the
cabinet. Cut around the door jam
and the corners, if necessary, to
make the template fit. (The front
edge of template must be even
with the front edge of the cabinet.)
Use tape to keep it in place.
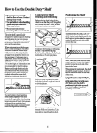
Note: For cabinets with a recessed
shelfyou must measure the thickness
of the front rail and cut that amount
off the front edge of Template 2
using the template cut lines as a
guide. This will allow Template 2
to lay flat on the shelf. (Fig. 9)
7
Front
rail
23
● If you have a partition in the
cabinet, you must do the following:
1. Cut Template 2 into two pieces
to fit each side of the partition.
2. Tape one piece of Template 2
inside the cabinet, making sure that
the front edge is even with the front
edge of cabinet.
3. TapeTemplate 1on the front
of the cabinet so that the arrow is
aligned with the hole center line
on Template 2. (Fig. 10)
Fig. 10
40 Position remaining piece of
Template 2 inside the cabinet and
align the hole center lines with the
arrowson Template1so thatdistance
from right hole center to left hole
center measures the distance
indicated on the template. (You
will have to cut excess paper
from the middle of Template 2
to make it lay flat.) (Fig. 11)
$
Fig. 11
of these holes
5. TapeTemplate 2 inside the
cabinet after cutting it to fit.
6. Check again to make sure that
the hole center lines on Template 2
are straight and that the distance
from the right to left drilling holes
measures the distance indicated on
the template.
7. Go to “Drilling the Mounting
Holes?