


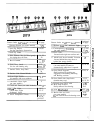
HOME CANNING TIPS
(continued)
Observe the Following Points in Canning
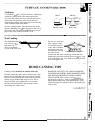
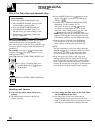
1. Be sure the canner fits over the center of the
surface unit. If your range or its location does not
allow the canner to be centered on the surface unit,
use smaller diameter pots for good canning results.
2. For best results, use canners with flat bottoms.
Canners with flanged or rippled bottoms (often
found in enamelware) don’t make good contact
with
the
surface unit and take a long time to
boil water.
3. When canning, use recipes and procedures from
reputable sources. Reliable recipes and procedures
are available from the manufacturer of your canner;
manufacturers of glass jars for canning, such as
Ball and
Kel”r;
and the United States Department of
Agriculture Extension Service.
4. Remember that canning is a process that generates
large amounts of steam. To avoid burns from steam
or heat, be careful when canning.
NOTE: If your house has low voltage, canning may
take longer than expected. even though directions
have been carefully followed.
Flat-bottomed canners are recommended.
The process time will be shortened by:
(1) using a pressure canner, and
(2) starting with HOT tap water for fastest heating
of large quantities of water.
1.
2.
3.
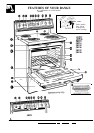
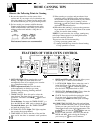
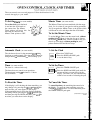
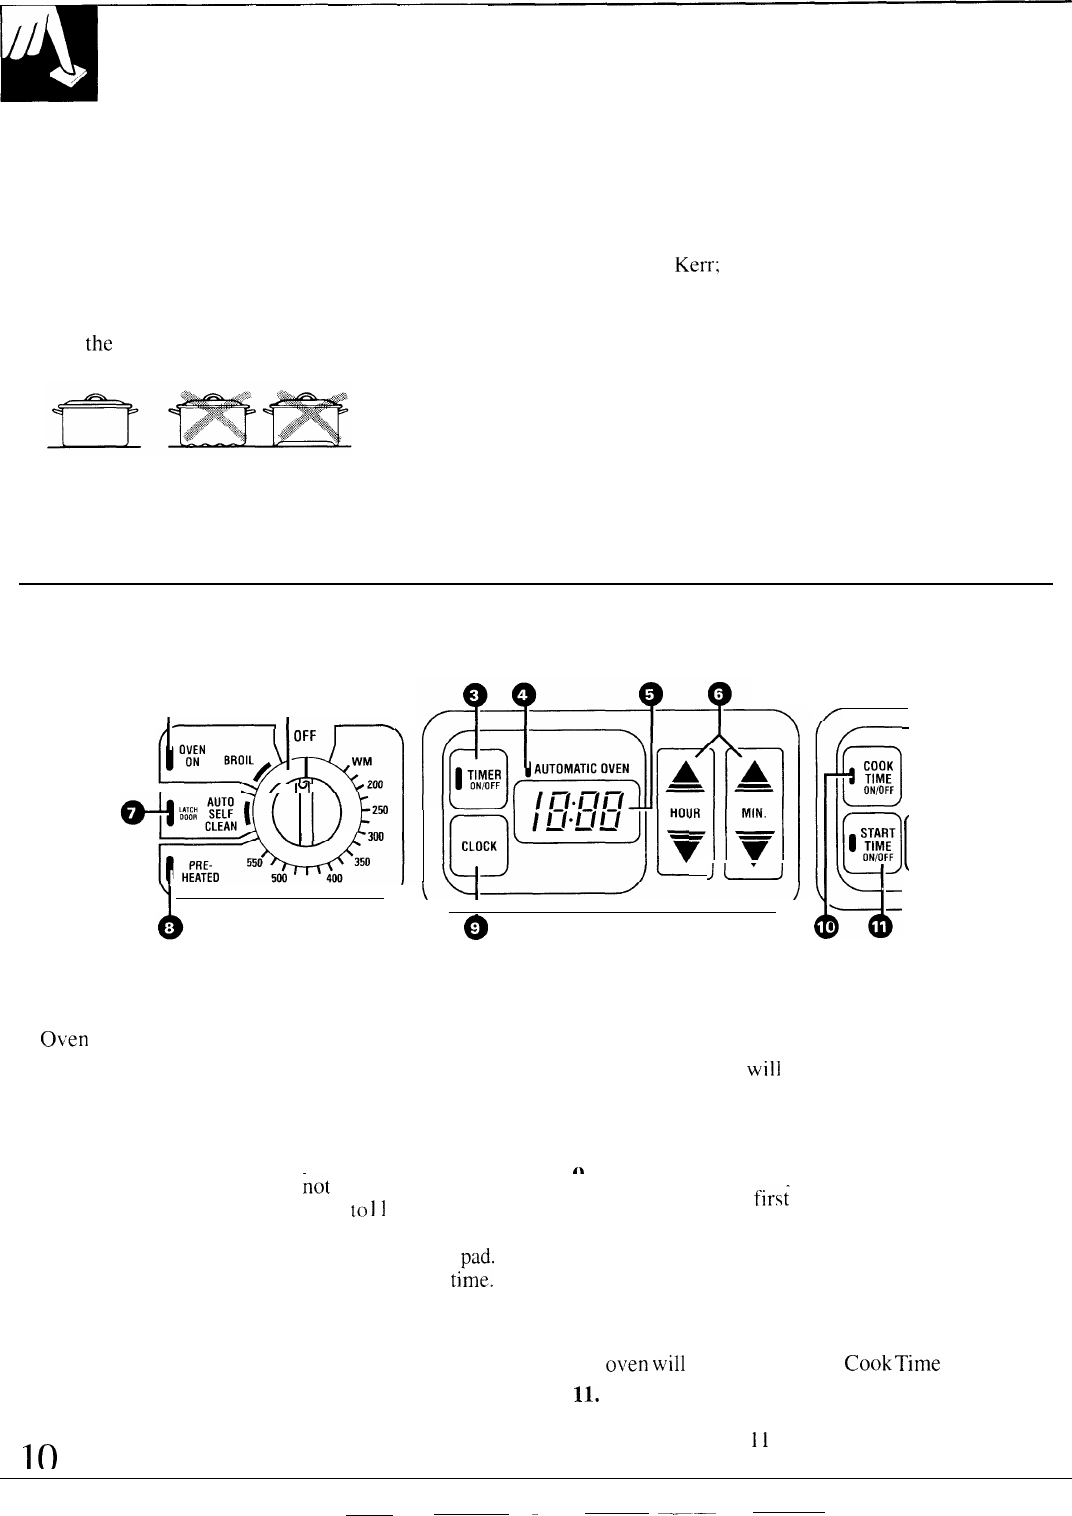
FEATURES OF YOUR OVEN CONTROL
Not all features are on all models. Appearance may vary.
Q
Q
l—
l—
Y
/
PI
\
,[;)pmqJ,TT
,,.,
o
.
OVEN ON Light. Glows anytime the oven is
6.
heating. The light will flash when the oven
automatically turns off to remind you to turn the
Okren
Temperature knob to OFF.
7.
Oven Temperature Knob. Turn this knob
to the temperature or function you want.
See the Baking, Roasting, Broiling and Self-
Cleaning sections.
8.
TIMER ON/OFF. Press this pad to select the
fh
timer feature. The timer does
not
control oven
Y.
operations. The timer can time up
to
11
hours and
59 minutes.
To set the timer.
first mess the TIMER ON/OFF
Pad.
/-
COOK
TIME
6
ONIOFF
[
1 ylYvJ{
[
—
—
I
HOUR and MIN. pads. These pads allow you to
set times up to 11 hours and 59 minutes.
LATCH DOOR Light. Glows when the oven is
in the Self-Clean cycle. After the Self-Clean
Cycle, the light
will
flash. Unlatch the door and
turn the Oven Temperature knob to OFF.
PREHEATED Indicator Light. Glows when the
oven reaches your selected temperature.
CLOCK. Press this pad before setting the clock.
To set the clock, firs; press the CLOC
-
K pad.
Then press the HOUR and MIN. pads to change
the time of day.
Press the HOUR and ‘MIN. pads to change the
t~me.
To cancel the timer, press the TIMER ON/OFF
pad until the display clears.
4. AUTOMATIC OVEN Light. This lights anytime
the oven has been programmed.
5. TIME DISPLAY. Shows the time of day and the
times set for the timer on automatic oven operations.
10
10. COOK TIME ON/OFF. Press this pad and then
press the HOUR and MIN. pads to set the amount
of time you want your food to cook. Turn the Oven
Temperature knob to the desired temperature. The
o~~en
~~i~l
shut off after the
Cook
Time
has run out.
11.
START TIME ON/OFF. Press this pad and the
HOUR and MIN. pads to delay the starting of
your oven up to
11
hours and 59 minutes.
—
———