Step 7
Apply aluminum tape to
the front of the heater
assembly. Starting back
under the Quick Chill
assembly and coming
up the front of the
heater assembly about
2.5” (Figure 6). Keep the
tape as close to the left
side fresh food
wall as possible.
Figure 6
Step 8
Cover aluminum tape with white vinyl tape.
Step 9
Route heater wire under evaporator cover as far as
possible for as little consumer exposure as possible.
Figure 7
Step 10
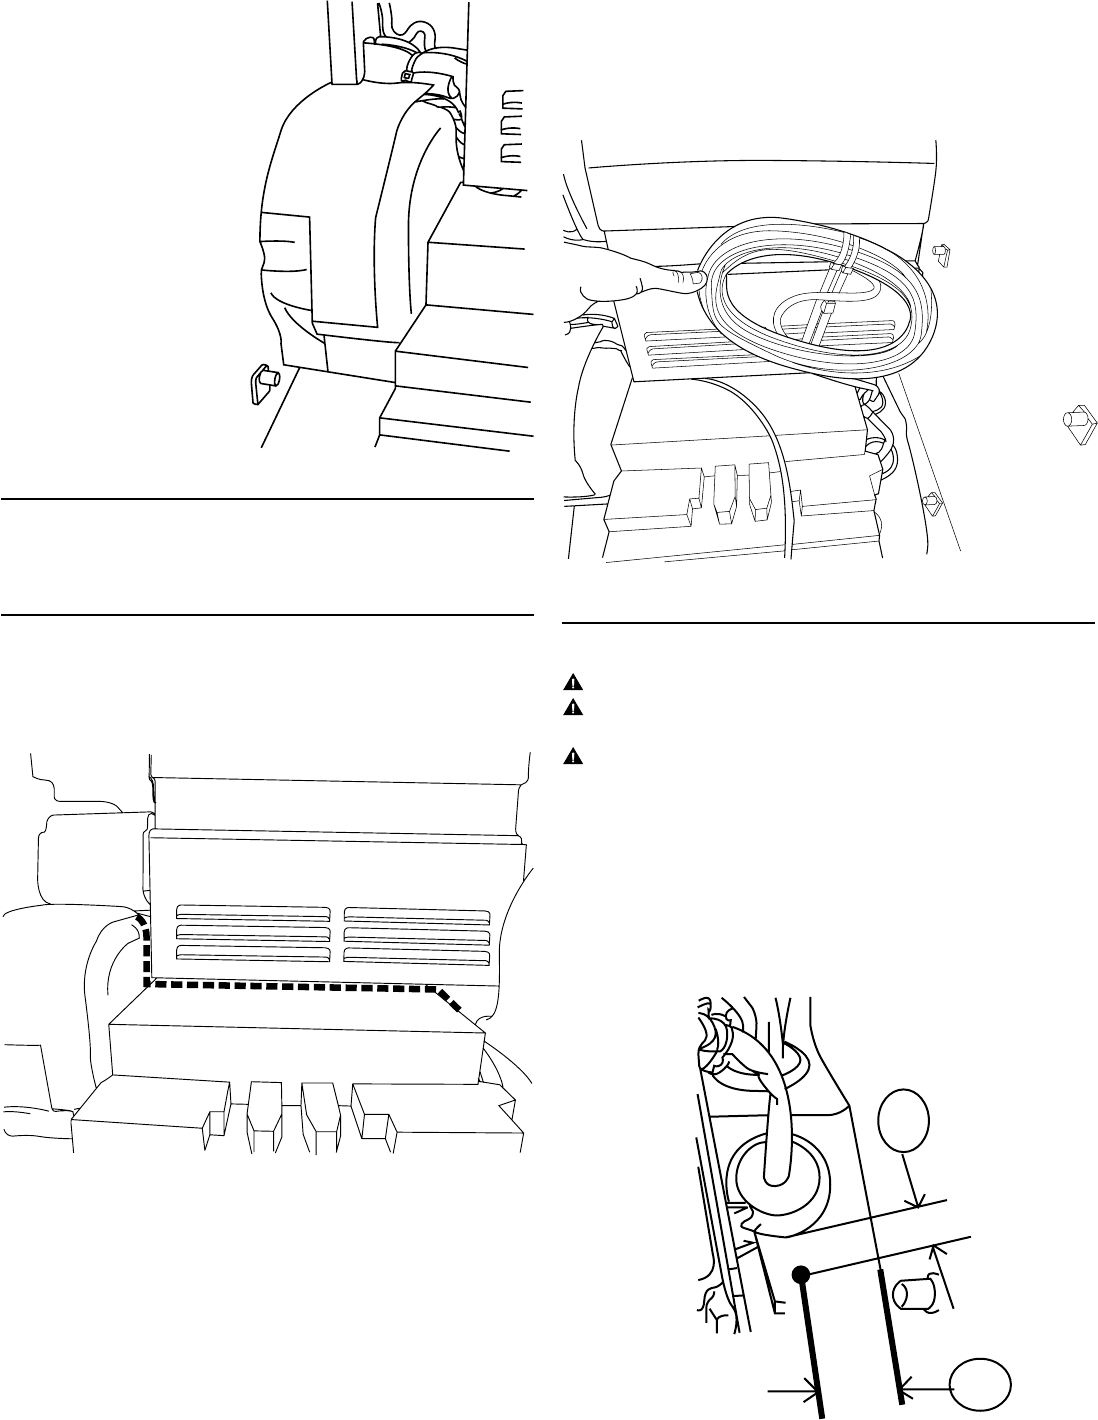
Replace evaporator tube cover. Move evaporator cover
back into position and replace screws. Remove the cold
water reservoir plastic cover. Position the reservoir coils
as clear of the right front DC grommet as possible
(Figure 8).
Figure 8
Step 11
Ensure power to unit is disconnected before drilling.
Check for Flow Meter wiring harness clearance in
doghouse before drilling.
If the unit has precise fill feature, check for wire harness
clearance in doghouse before drilling. If wires are in the
way, adjust hole location accordingly.
Drill a 1/2" hole straight down into the machine
compartment. Locate the hole in front of the right front
DC grommet. Hole should be 1” in front of DC grommet
edge and 2” from right liner wall (Figure 9).
Drill perpendicular to the surface.
Figure 9
3


