


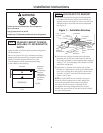


Installation Instructions
12
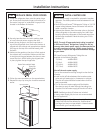
STEP 10A WATER LINE
INSTALLATION WITH
A REVERSE OSMOSIS
SYSTEM
Skip this step when not using RO System.
If the water supply to the refrigerator is from a Reverse
Osmosis Water System, use the refrigerator’s filter
bypass plug.
You must also use the filter bypass plug when
a replacement filter cartridge is not available.
The icemaker will not operate without the filter
or filter bypass plug.
Replacement Filters:
To order additional filter cartridges in the United
States, visit our Website, ge.com, or call GE Parts
and Accessories, 800.626.2002.
Filter Model GSWF
Customers in Canada should consult the yellow pages
for the nearest Mabe Service Center.
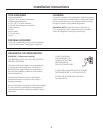
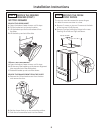
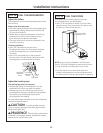
STEP 11 CONNECT WATER SUPPLY
Check to be sure that refrigerator power cord is not
plugged into the wall outlet.
If you are using copper tubing:
• Place compression nut and ferrule (sleeve) onto
the end of the tubing coming from the house water
supply.
• Insert the end of the copper tubing into
the refrigerator connection at the back
of the refrigerator, as far as possible.
Hold the tubing in place and tighten the fitting.
If you are using GE SmartConnect
™
tubing:
• Insert the molded end of the tubing into
the refrigerator connection, at the back of
the refrigerator, and tighten the compression
nut until it is hand tight.
• Then tighten one additional turn with a wrench.
Overtightening may cause leaks.
• Fasten the tubing into the clamp provided to hold it
in position. You may need to pry open the clamp.
• Turn on the water at the shut-off valve to check
for leaks.
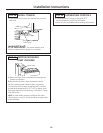
STEP 12 CONNECT POWER
• Connect r
efrigerator pow
er cord plug to a properly
gr
ounded r
eceptacle.
• Check to make sure power to refrigerator is on by
opening r
efrigerator door to see if interior lights
ar
e on.
1/4"Tubing
Tubing Clamp
1/4"
Compression Nut
F
errule
(
sleeve)
SmartConnect™ Tubing
Refrigerator Connection
716Dia2
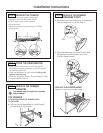
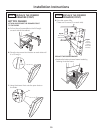
STEP 13 MOVE REFRIGERATOR
INTO POSITION
• Remove outside protective wrapping.
• Move the refrigerator into final installation position.
• Remove door spacer, if not removed earlier,
and all inside packaging.