


20
INSTALLATION INSTRUCTIONS
(continued)
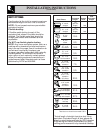
STEP 3
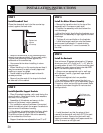
Install the Motor/Blower Assembly
• Secure the transition duct to the top of the
assembly with 2 screws on each side.
• Position the assembly with duct below the
vent discharge.
• Adjust the height by sliding the brackets up or
down until the assembly is tight against the vent
discharge.
• Tighten all nuts and bolts on the brackets.
• Install discharge transition onto the blower
and connect to ductwork. If round ducting
is used, transition to 6
″ round to connect to
the inlet.
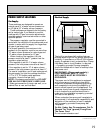
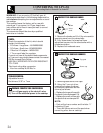
STEP 4
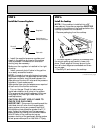
Install the Ductwork
Use minimum 26 gauge galvanized or 24 gauge
aluminum duct in 6″ round or 3
1
⁄
4
″ x 10″ size, or
a combination of both. PVC duct should be used
if installing under a poured concrete slab. DO
NOT use flexible plastic ducting.
• Always use an appropriate roof or wall cap
with damper. Laundry type wall caps should
never be used.
• Use the straightest duct run possible.
• For satisfactory performance the duct run
should not exceed 150 ft. or its equivalent length
if bends or other various fittings are used. Refer
to table of equivalent lengths for various duct
configurations.
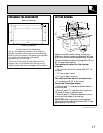
• Install ductwork so that the piece of duct
nearest the downdraft unit slots INTO the next
piece of the duct. Secure the joints with self-
tapping screws and apply duct tape around the
joints to ensure an airtight seal.
Air
Flow
Duct Tape
Over Seam and Screw
Screw
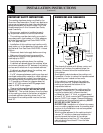
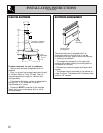
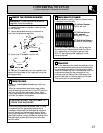
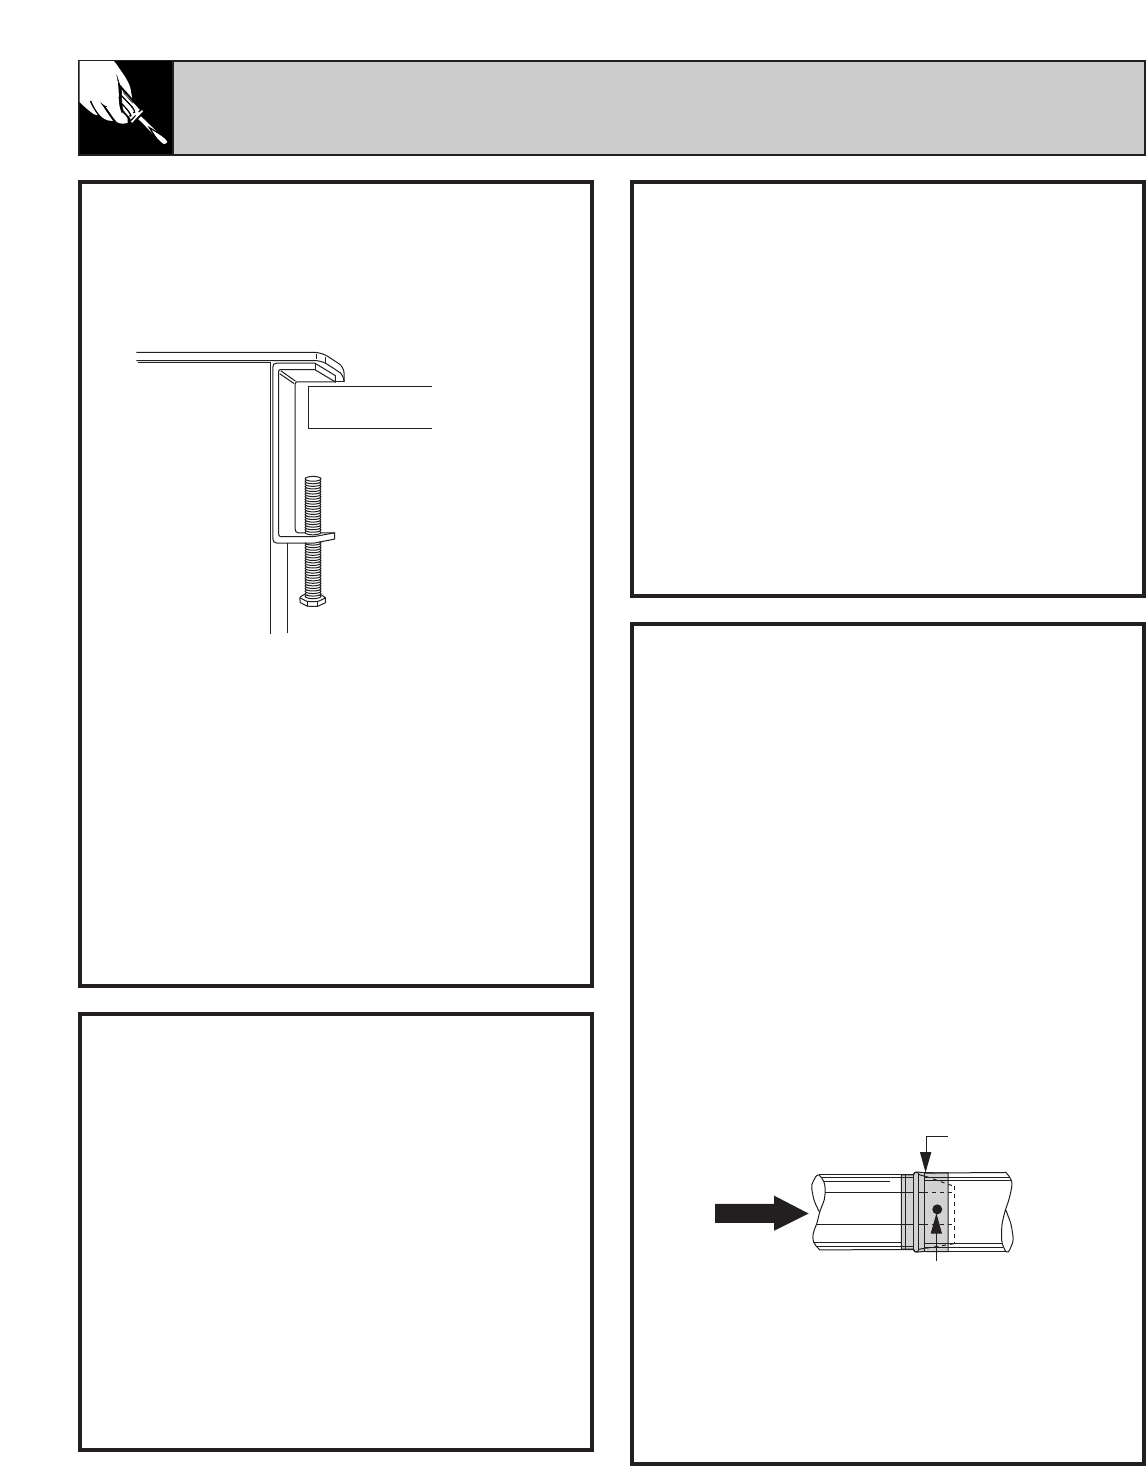
STEP 1
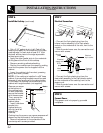
Install Downdraft Vent
Place the downdraft vent into the countertop
cutout, against the back side.
• Secure the downdraft to the countertop with
mounting screws provided. (One on each side.)
Tighten the mounting screws against the
underside of the countertop.
• Use a wood shim when installing in stone
countertops.
• When installing in a tile countertop surface, it
may be necessary to apply a locally approved
caulking to cover any gaps.
• Fasten stabilizing straps to each side with
screws provided.
• Secure the other end of the strap to the back
or side wall of the cabinet.
Countertop
Tighten
Bolt
Against
Countertop
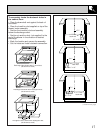
STEP 2
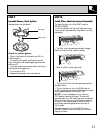
Install Adjustable Support Brackets
• Place 2 brackets together, with ends facing the
same direction. Secure with bolts, lock washers
and nuts. Do not tighten.
• Assemble all 4 brackets and secure to the
bottom of the blower/motor assembly.
• For installation where the blower is mounted
inside the cabinet, attach the support brackets to
the corners of the blower housing.
• If the blower is installed under the floor, attach
the support brackets to the top of the blower.
Provide a surface to attach the entire assembly
to the underside of the floor.
• Support brackets are adjustable from 5″ to 8″.
Countertop
Tighten bolt
against
countertop
Duct tape over
seam and screw
Screw
Air flow