Installation
Component Cooking Surfaces
7
Installation
Step
(continued)
Jo~nW
cooktq ~“
Note: To prevent knobs being
downdrafi
scratched, knobs must be
vent
removed from component before
it is turned
upside down.
D/agram521
.
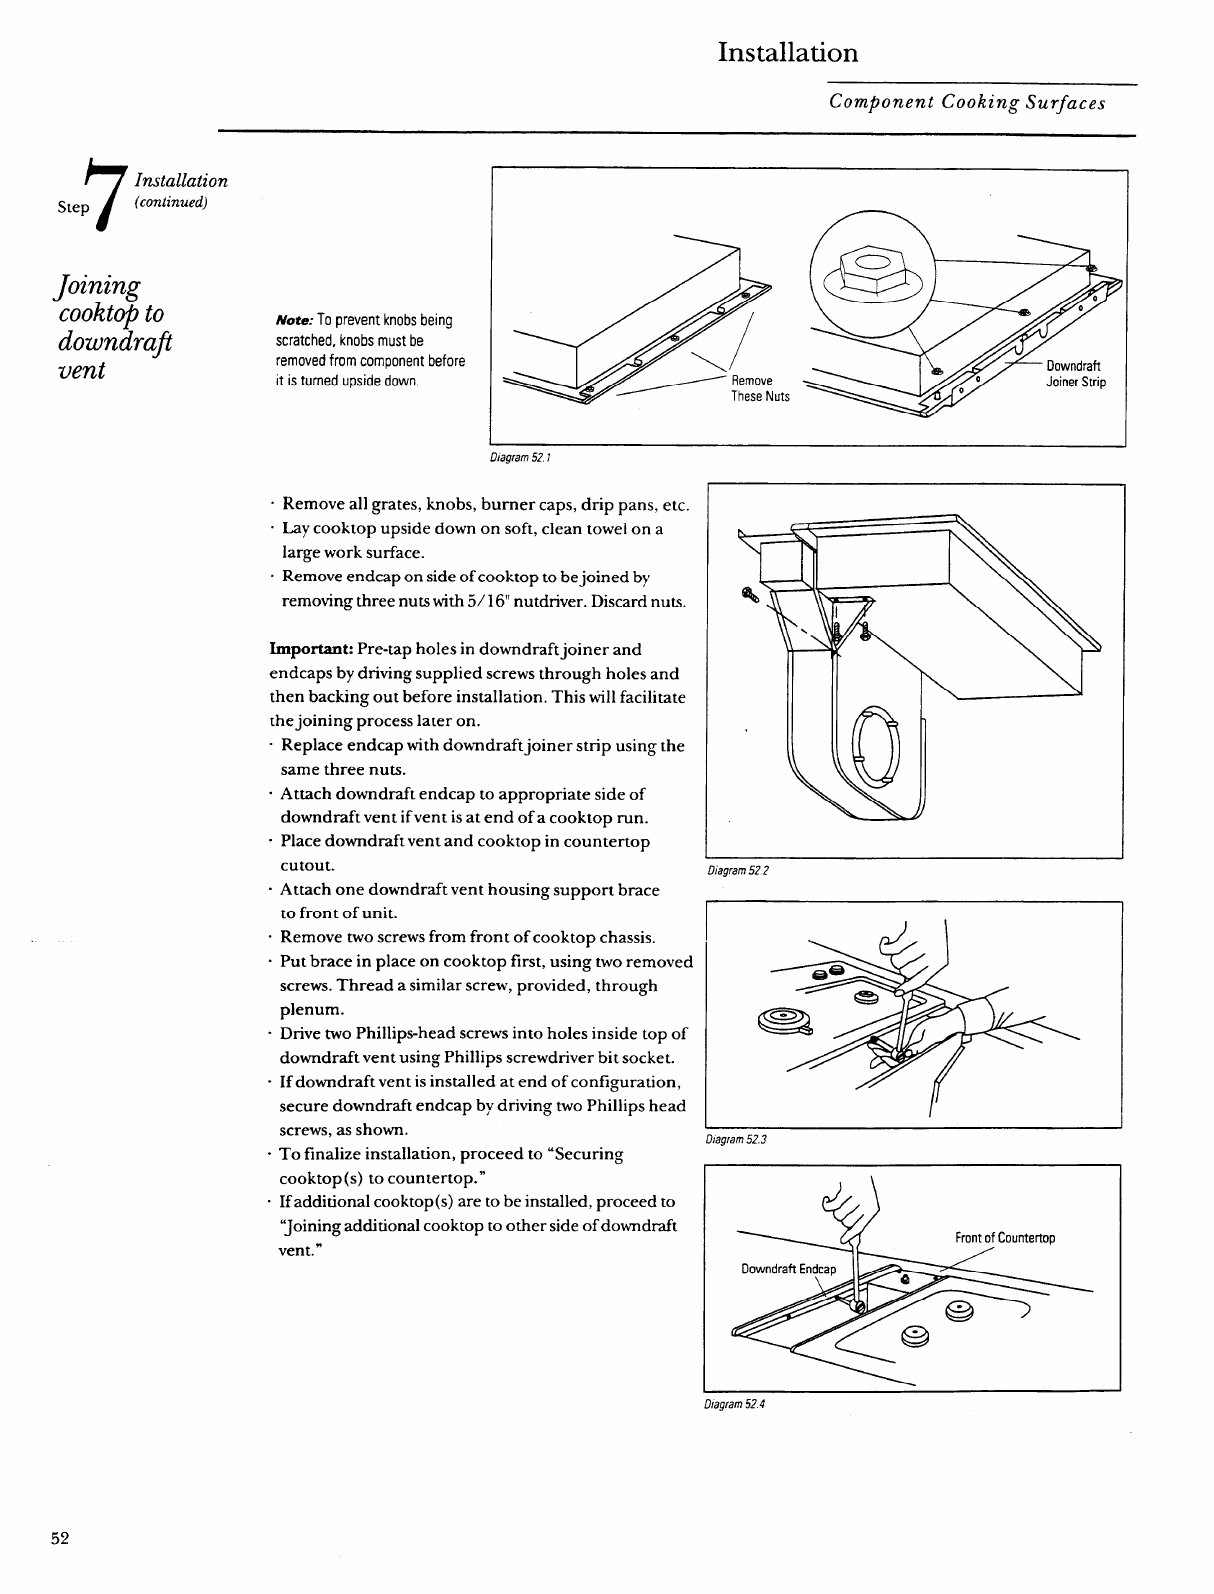
Remove all grates, knobs, burner caps, drip pans, etc.
“ Lay cooktop upside down on soft, clean towel on a
large work surface.
s Remove endcap on side ofcooktop to bejoined by
removing three nuts with 5/ 16“ nutdnver. Discard nuts.
Important: Pre-tap holes in downdraft joiner and
endcaps by driving supplied screws through holes and
then backing out before installation. This will facilitate
the joining process later on.
- Replace endcap with downdraftjoiner strip using the
same three nuts.
“ Attach downdraft endcap to appropriate side of
downdraft vent if vent is at end of a cooktop run.
- Place downdraft vent and cooktop in countertop
%)
i
cutout.
D/agram522
“
Attach one downdraft vent housing support brace
to front of unit.
. Remove two screws from front of cooktop chassis.
. Put brace in place on cooktop first, using two removed
screws. Thread a similar screw, provided, through
plenum.
Q
-
. Drive two Phillips-head screws into holes inside top of
downdraft vent using Phillips screwdriver bit socket.
. If downdraft vent is installed at end of configuration,
secure downdraft endcap by driving two Phillips head
screws, as shown.
Diagram 523
.
To finalize installation, proceed to “Securing
cooktop(s) to countertop. ”
- If additional cooktop(s) are to be installed, proceed to
“Joining additional cooktop to other side of downdraft
Front of Countertop
vent. ”
Downdraft Endcap
D:agram524
52
