


Page 2
P200/RAPS200 Brewers
Installation (con't.)
Electric hook-up
1) The electric ratings for your brewer are printed on its nameplate. Typical electric ratings
are: 120V, 1.65 kW, 15 Amp, 1 phase.
2) The brewer should be connected to its own circuit with a fused disconnect switch or a
circuit breaker near the brewer.
3) Electrical connection is made with power cord with NEMA 5-15P grounded plug (supplied) to
120V, 15 Amp wall socket. Certain models may be equipped with a NEMA 5-20P cordset and
plug.
WARNING
ELECTROCUTION HAZARD
NEVER USE THE GROUND CONDUCTOR AS A NEUTRAL. DO NOT USE GROUND
ELIMINATING ADAPTORS. UNIT MUST BE PROPERLY GROUNDED.
Start-up
Connect water line and turn water valve on. Check for leaks. Plug in power cord (supplied) to 120,
15 Amp (20 Amp for some models, see rating plate on unit) wall outlet.
Once the brewer is full of water, it will take 15 to 35 minutes to heat. The “READY” LAMP will light when
water has reached the set temperature.
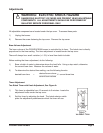
After “READY” LAMP is lit, portion volume may now be checked. Insert the brew basket and place
Shuttle/Airpot under the brew basket. Brew at least one batch at half and full volume to check for
proper volumes. Remember that when brewing coffee, the level will be lower. The water must be hot
to check for proper levels.
If adjustments are needed, see the Adjustments section of this manual.
WARNING: HOT LIQUID HAZARD
DO NOT TRANSPORT BREWER WITHOUT DRAINING WATER TANK FIRST.
!
!
WARNING
ELECTROCUTION HAZARD